Carpet Gripper Rod Length Calculator
Estimate carpet gripper rod length around room walls, doorway breaks, hearth or wardrobe skip zones, standard rod counts, offcut allowance, fixing pin count, and likely joins for bedroom, hall, stair-landing, and open-plan carpet layouts.
Each preset loads a real room outline, opening allowance, non-gripper skip length, rod stock size, and subfloor profile. Adjust any field before calculating.
Gripper rod estimate
| Layout | Base formula | Extra return rule | Best used for |
|---|---|---|---|
| Rectangle or square | 2 × (length + width) | No added return | Bedrooms, studies, box rooms |
| Shallow bay | 2 × (length + width) | Add bay side and face gripper | Bay-front bedrooms and lounges |
| Alcove returns | 2 × (length + width) | Add both return sides | Chimney breasts, closet recesses |
| L-shaped room | Outer rectangle perimeter | Add internal L returns | Dressing rooms and open closets |
| Hall or landing | 2 × (length + width) | Add return legs, subtract openings | Door-heavy corridors and landings |
| Rod stock length | Metric equivalent | Rods per 50 ft net run at 10% | Planning note |
|---|---|---|---|
| 4 ft | 1.22 m | 14 rods | Good for tight turns and many door breaks |
| 4.9 ft | 1.49 m | 12 rods | Common pack length in many UK-style listings |
| 5 ft | 1.52 m | 11 rods | Convenient for larger rooms with long walls |
| 1 m | 3.28 ft | 17 rods | Metric stock; expect more joins on big rooms |
| Break type | Typical deducted length | Why it is skipped | Calculator field |
|---|---|---|---|
| Single internal doorway | 30 to 32 in | Threshold bar or carpet-to-carpet join | Doorway openings |
| Wide doorway pair | 48 to 60 in | Double doors, cased opening, or archway | Doorway openings |
| Wardrobe rail front | 48 to 96 in | Built-in cabinets often need no tack strip | Built-in skip |
| Fireplace hearth | 36 to 72 in | Carpet finishes to a hard edge trim | Built-in skip |
| Floor vent or pipe cluster | 6 to 18 in | Avoid fixing where rods cannot sit flat | Built-in skip |
| Room layout | Approx dimensions | Net gripper run | Likely rods with waste |
|---|---|---|---|
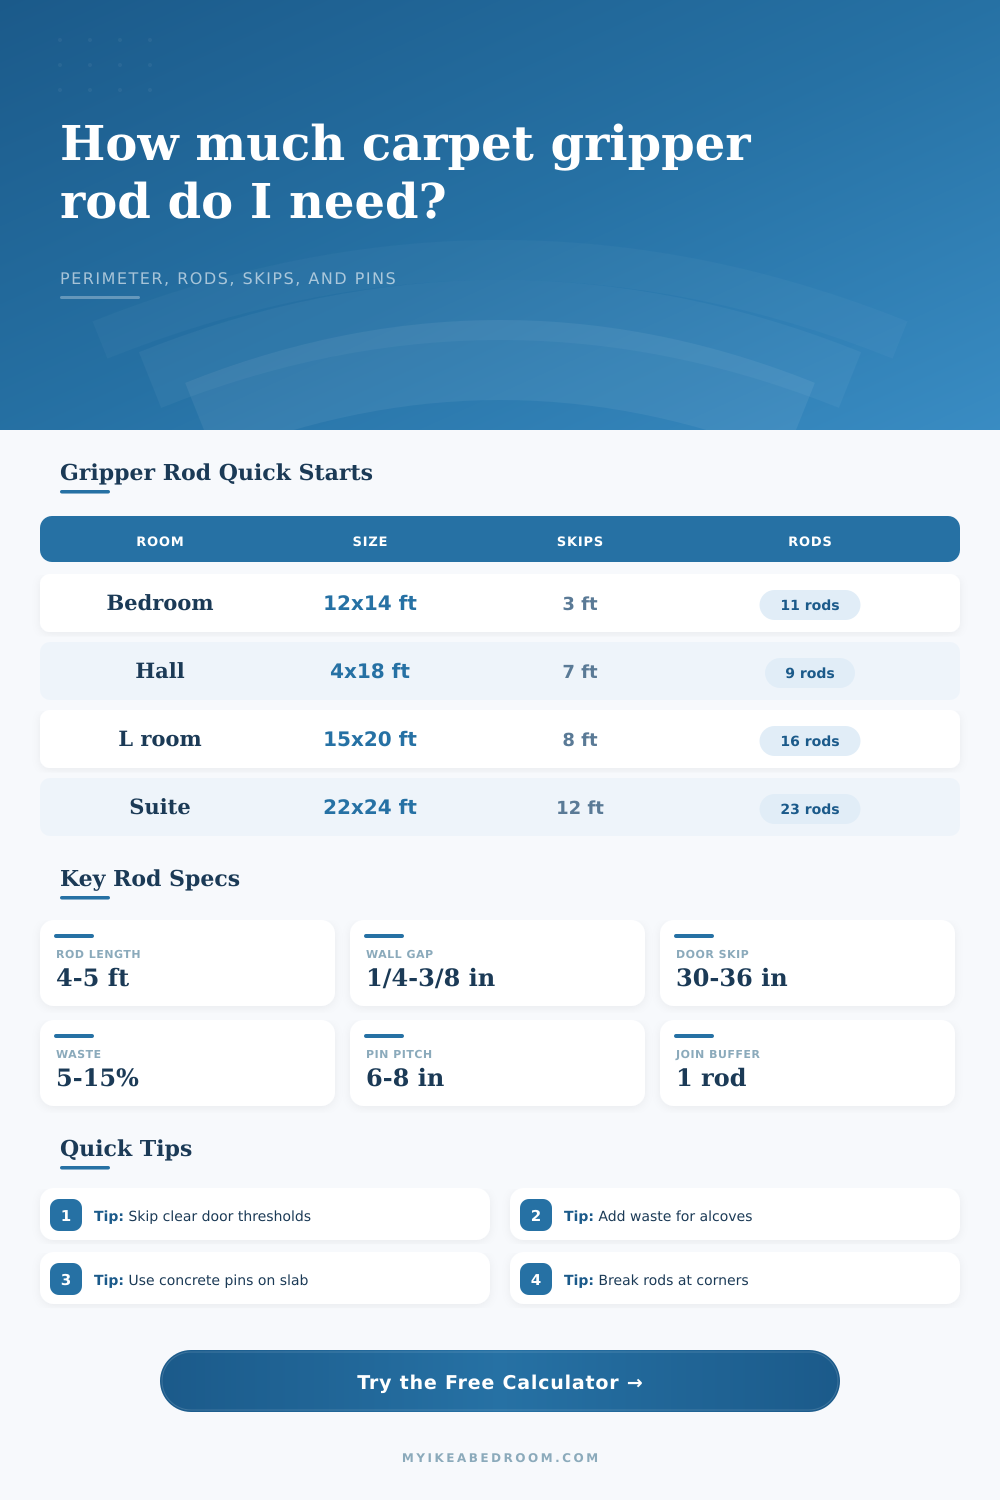
| Small box bedroom | 9 ft × 10 ft | 35.3 ft after one doorway | 8 rods at 8% |
| Standard bedroom | 12 ft × 14 ft | 49.3 ft after one doorway | 11 rods at 8% |
| Hallway with four doors | 4 ft × 18 ft | 36.0 ft after openings | 9 rods at 10% |
| L-shaped dressing room | 15 ft × 16 ft | 65.0 ft with returns | 15 rods at 12% |
| Large open-plan zone | 22 ft × 24 ft | 80.0 ft after skips | 18 rods at 10% |
Measure the interruptions separately. A carpet gripper run normally stops at threshold bars, hearth trims, fitted wardrobes, and other hard edges, so summing those skips prevents over-ordering while still leaving room for offcuts.
Round up by whole rods, not by feet. The usable purchase quantity is full stock lengths. Small offcuts are normal because gripper should break cleanly at corners, door frames, and changes in wall direction.
Carpet installation can seem daunting when measuring. What’s your perimeter? It’s never rectangular so it’s never as simple as that. There is alcoves. There are hearths. There are doorways. You’re standing in a bare bedroom armed with a tape measure, but you have no idea how many tack strips you need. Most people round up just in case. This mean they end up purchasing too much and wasting both time and valuable storage space.
If you enter your exact dimensions (and bypass areas you don’t want covered), the calculator will do all the math for you which saves you from having to picture each join and cut on your own. Why? This is how it works: First, find total perimeter length, and then subtract all areas where no griper can be applied (door thresholds, fireplace hearths, etc). Your skips. Input the lengths and the tool do the math for you. However, knowing why those subtractions apply will help ensure your final numbers is accurate.
How to Measure Your Carpet Perimeter
For example, if you include a doorway in the equation, the system think you’ll require gripers on both sides. You won’t. That piece of flooring must remain unobstructed by door swing plus whatever transition bar you want to use. It is a little thing but it makes all the difference between guessing right or wrong. You might end up ordering more gripers than necessary or making another run to the hardware store mid-job.
The biggest place people fall short of their estimate is the waste allowance. Based off the room complexity and the subfloor, you can pick from a waste profile on the calculator. If you have a simple rectangular bedroom, the waste may be as low as eight percent (for corner breaks and other cutting errors). For an L shaped dressing room with many corners and alcoves, it’s higher, typically between 12 and 15 percent. That number is based on offcuts from breaking your rods at right angles. If you don’t make a perfect break, you won’t be able to use that partial rod on the next wall. In a large room those bits accumulate very rapid. This is why the reference table on the page shows that shape impact waste more then square footage. See how various layouts impact final rod count.
Another variable to consider: how far apart should pins be? This will depend on what floor you’re fitting the carpet over. Six- or eight-inch gaps between the pins tend to be enough for a standard wooden subfloor. If you have a concrete slab, you’ll need harder, masonry pins (or something like glue to hold them in place), which change pattern of your fixings. Choose a rod from the available options. The tool will then calculates an approximate number of fixings to order and the length of the rods. It keeps carpet attached and tight without creating any ripples later on. Heavier carpets creates a greater pull. Therefore, you should of space your fixing points closer together to distribute the stress across the whole floor.
And don’t neglect that wall setback. Never let your gripper rods hit the skirting board (baseboard). Ideally leave about 2/3rds of the depth of your carpet which is around a quarter inch. This allows the carpet to fit nicely between the gripper rod and wall without buckling or bunching up. That is how it is done in the industry. You have some wiggle room to stretch the carpet nice and snug then cut the ends off. If you jam them up hard against the wall, you lose out on that and run the risk of messing up your trim work.
The net run length is measured in whole rods, so it will naturaly round up to the next full rod. Most places won’t sell you 1/2 a stick of tack strip so it rounds. Knowing how many joints you have to estimate lets you know how much effort this job should take. The more joints there is, the more time you spend trying to get them flush and snapped into place. I know it is not fun but it is worth it if you get the perimeter correct first. Then you can spend your time installing the carpet instead of looking around for stray hardware.
Take your time measuring twice and subtracting carefuly, then let the tool do the math for you so you can concentrate on the real thing: the install. When the numbers adds up then the dread subsides.