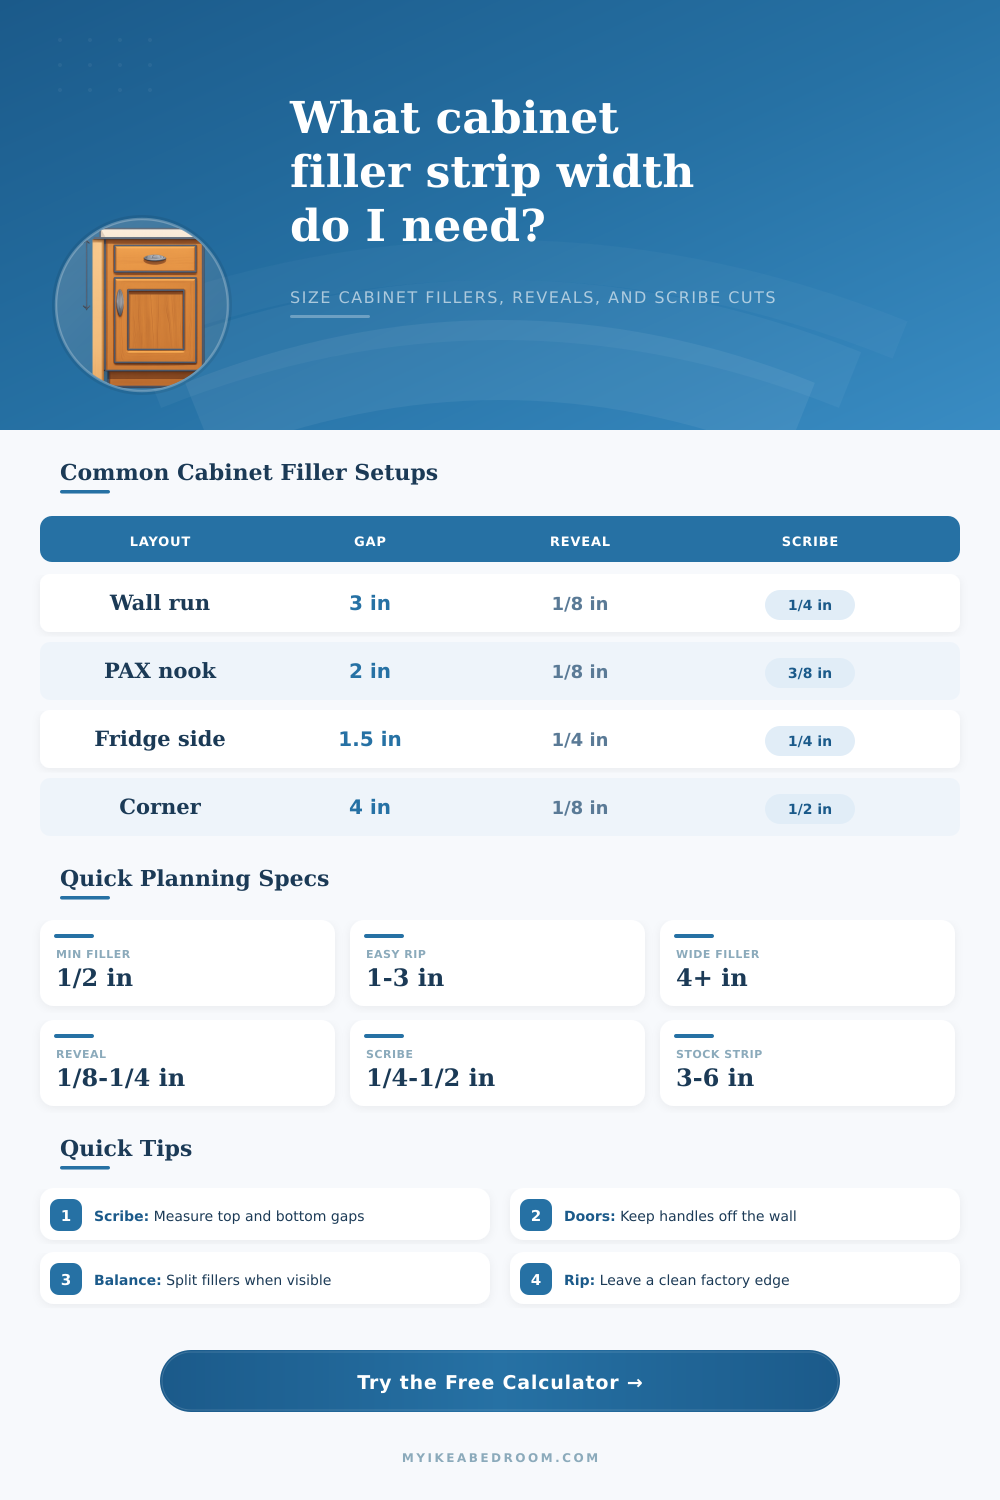
Cabinet gap, reveal, and scribe planner
Cabinet Filler Strip Width Calculator
Calculate total filler width, balanced side fillers, scribe margin, rip-cut width, stock strip count, and door-clearance risk for built-ins, wardrobes, pantry runs, vanities, laundry cabinets, and kitchen base cabinets.
Full Filler Strip Breakdown
| Cabinet situation | Typical filler | Reveal to keep | Use this when |
|---|---|---|---|
| Wall-to-wall base or upper run | 1 to 3 in each side | 1/8 in to 1/4 in | The cabinet bank must look centered in a fixed opening. |
| Single wall side filler | 3/4 to 3 in | 1/8 in to 1/4 in | Only one side touches a wall, pantry panel, or tall return. |
| Inside corner filler | 3 to 6 in | 1/8 in minimum | Drawers, knobs, or pulls need room to miss the return wall. |
| Appliance side filler | 1 to 2 in | 1/4 in typical | Dishwasher, fridge panel, range, or washer edge needs a straight stop. |
| Built-in bookcase face filler | 1 to 4 in | 1/8 in | Face trim hides wall waves around shelves or wardrobes. |
| Stock piece | Usable width | Common length | Best use |
|---|---|---|---|
| Narrow finished filler | 3 in | 30 to 96 in | Small base fillers, uppers, and short vanity sides. |
| Standard finished filler | 4 in | 30 to 96 in | Most side fillers with room for scribing. |
| Wide finished filler | 6 in | 30 to 96 in | Corners, tall cabinets, and rough old walls. |
| Side panel ripped down | Up to 15 in | 80 to 96 in | Full-height pantry, wardrobe, and custom wide strips. |
| Face-frame stile filler | 1.5 to 3 in | Cabinet height | Overlay doors and framed cabinets. |
| Wall condition | Scribe allowance | Out-of-plumb clue | Cut approach |
|---|---|---|---|
| New straight wall | 1/8 to 1/4 in | Under 1/8 in difference | Rip close to final width, then sand or plane lightly. |
| Typical drywall corner | 1/4 to 3/8 in | 1/8 to 3/8 in difference | Rip oversize and scribe one edge to the wall. |
| Old plaster or bowed wall | 3/8 to 5/8 in | 3/8 to 3/4 in difference | Use a wider strip and mark top, middle, and bottom. |
| Stone, tile, or brick return | 1/2 to 1 in | Irregular surface | Template the edge before cutting the finished face. |
| Common project | Opening and boxes | Typical result | Secondary check |
|---|---|---|---|
| Bedroom wardrobe alcove | 99 in opening, 96 in boxes | About 1.25 in visible each side | Use tall strips and split the filler evenly. |
| Kitchen base run | 108 in opening, 105 in boxes | About 1.375 in visible each side | Leave 1/4 in total reveal before scribing. |
| Vanity to side wall | 49 in opening, 48 in cabinet | About 0.75 in one side filler | Check drawer pull clearance near the wall. |
| Fridge panel gap | 37.5 in opening, 36 in cabinet | About 1.25 in side filler | Allow door swing and handle projection. |
| Blind corner base | 42 in planned space, 36 in cabinet | Wide 5 to 6 in corner filler | Prioritize drawer and handle swing over symmetry. |
The first clue that your cabinet install has gone awry is often the ragged edge between side panel and wall. It’s hardly ever a bent drawer front or a broken hinge that tips you off. Weeks of planned layouts for hardware placement and door overlays goes down the drain when you overlook scribe strips on the end.
No matter how perfectly square most walls may be, there isn’t one straight corner in any piece of drywall. The only thing an eye level tap on tape measure reveals to you is what the gap looks like at eye level. How does it change around floor? Plan to do something with that waste prior to making the cut.
How to Measure for Cabinet Fillers
Now the trick with sizing is its not as simple as “wall width minus cabinet width.” You must consider reveal gaps. These are the little breaths between the door and other trim items, like crown, so your doors don’t rub when opened and closed. Typicaly there is an eighth of an inch of space here to breathe. Sounds like nothing on paper but if you multiply that by multiple cabinet, it will eat up your filler budget fast!
Once you put in your opening size, the calculator do all the math and removes the guesswork, letting you focus on which stock widths can be ripped down. When the space is small you might be tempted to make narrow fillers, but they’re delicate: Half an inch or narrower is hard to screw in without splitting, especially if you have milled your wood dry. With the wider, normal three to four inches filler you get some real material to work with which lets you cut a decent kerf in it with your table saw blade and leave room to shave off more if the wall push out near baseboards. You can always cut it down if too wide but not glue another inch on top of a split.
What traditional measurements fail to account for is how old houses adds extra complexities. Plaster walls often bow so they touch in middle but leave a gap above and below. Your filler might bind on the cabinet box or dangle loose if you only measure one spot. The best way to get a clear idea of the worst-case-scenario is to take multiple readings, one at the ceiling, middle, and floor. Don’t size your filler to the average; you need it wide enough to fill out the gap’s widest point. It forces you to scribe carefuly instead of trying to force a square piece into an organic shape.
When it comes to stock width, there’s a trade off between working it out onsite and in the shop. Four inches work for most standard runs with wiggle room if needed. For really funky walls, stepping up to a six inch board gives you even more room for error when it comes time to make the final fit.
And no, this isn’t all about looking good. The wider cabinet will also cover uneven shims used to keep cabinets level before you nail them into place for good. Until you close your dishwasher door and hear the hollow thunk against side trim, appliance clearance doesn’t get much thought. The handles stick out into room. Corner pull mechanisms also take up extra side space when they are turned open all the way, so they need to rotate freely without hitting nearby surfaces.
Fillers keep the visual weight evenly distributed by being placed on either side of a wall run. That way any imperfection is less visible to the naked eye. Symmetrical is forgiving. Asymmetrical never is.
What comes next: After all other pieces are in place, scribe. First, shim and secure cabinets so they’re level. Once the end panels or face frames have been attached, use real wall shape to mark the filler, then cut it to final size. The beauty part is this, it’s no longer an abstract measurement; it becomes a physical template to work from. You go from battling geometry to working with what’s actualy there in the room. That makes the difference between a filler that appears intentional and one that looks as if it would of been an accident.