Bunting Length Calculator
Estimate total cord length, flags per run, fabric area, sag allowance, end tails, and multiple runs for wall, mantel, rail, stair, table, window, and party bunting.
Load a common setup, then adjust the span, flag size, gap, sag, tails, run count, seam allowance, and flag shape to match the space.
Cotton triangles
Area factor: 0.50x cut rectangle.
Efficient for party bunting and easy to press before stringing.
Linen rectangles
Area factor: 1.00x cut rectangle.
Uses more fabric but gives strong text or applique space.
Felt swallowtails
Area factor: 0.82x cut rectangle.
Good for no-fray edges where sewing allowance can stay small.
Scalloped flags
Area factor: 0.78x cut rectangle.
Soft look for nursery walls, windows, and bedroom garlands.
Single-sided fabric
Best for: walls, mantels, tables.
Back side is not prominent, so area stays close to the estimate.
Double-sided flags
Best for: patio rails and stairs.
Double the fabric area when both faces need a finished print.
Bias tape cord
Best for: sewn indoor bunting.
Use the cord result as the tape length before final trimming.
Twine or rope
Best for: rustic and outdoor runs.
Add extra tail length if knots are bulky or anchors are wide.
| Sag setting | Extra cord on 10 ft | Visual effect | Best use |
|---|---|---|---|
| 0% to 3% | 0 to 3.6 in | Nearly straight | Table fronts and tight window valances. |
| 4% to 6% | 4.8 to 7.2 in | Soft shallow curve | Mantels, shelves, headboards, and small rooms. |
| 7% to 10% | 8.4 to 12 in | Classic party swag | Nursery walls, party backdrops, and railings. |
| 11% to 15% | 13.2 to 18 in | Deep decorative dip | Fireplace displays, stair rails, and photo areas. |
| Flag size | Typical gap | Flags on 8 ft | Good placement |
|---|---|---|---|
| 4 x 5 in / 10 x 13 cm | 1 to 1.5 in | 17 to 19 | Mini shelves, dollhouses, and small windows. |
| 5 x 7 in / 13 x 18 cm | 1.5 to 2 in | 13 to 15 | Nursery walls, headboards, and party tables. |
| 6 x 8 in / 15 x 20 cm | 2 to 3 in | 10 to 12 | Mantels, bedroom walls, and photo backdrops. |
| 8 x 10 in / 20 x 25 cm | 3 to 4 in | 8 to 9 | Patio rails, stair garlands, and market fronts. |
| Seam allowance | Added to width | Added to drop | Use when |
|---|---|---|---|
| 0 in / 0 cm | 0 in | 0 in | Felt, paper, vinyl, or no-fray materials. |
| 0.25 in / 0.6 cm | 0.5 in | 0.5 in | Most small cotton and linen bunting flags. |
| 0.375 in / 1 cm | 0.75 in | 0.75 in | Larger flags, thicker fabric, or turned edges. |
| 0.5 in / 1.3 cm | 1 in | 1 in | Double-sided flags or fabric that shifts while sewing. |
| Project | Span | Run count | Planning note |
|---|---|---|---|
| Mantel bunting | 4 to 6 ft / 1.2 to 1.8 m | 1 | Use longer tails if the cord ties behind decor. |
| Party table front | 5 to 8 ft / 1.5 to 2.4 m | 1 | Lower sag keeps flags above knees and chair backs. |
| Nursery wall | 6 to 10 ft / 1.8 to 3 m | 1 | Small flags keep the garland visually light. |
| Stair rail | 8 to 14 ft / 2.4 to 4.3 m | 2 | Measure along the actual angled rail path. |
| Patio or market rail | 10 to 18 ft / 3 to 5.5 m | 2 to 3 | Double-sided flags are easier to read outdoors. |
Hanging bunting looks easy … until you try it. Then you discover it’s more math and geometry than art. You want something gently swaying up and down a stair rail or across mantel. You do not want something sagging in a droopy way that risks toppling your centerpiece. The difference between professional and amateur bunting usually comes down to math.
You might guess at the length of the string, cut off the flags until there is no more fabric left, and hope for the best. Doesn’t work very often, not when two unseen forces is ignored: tail waste and sag allowance. So rather than try to figure out complicated geometry with a protractor, the calculator does it for you (above). Just enter the span, the pitch of the flag, and the type of curve you want, and it breaks that down into exactly how much cord you’ll need.
How to Hang Bunting Without Mistakes
Before plugging numbers into this thing, take a moment to think about what they mean. Span is straight-line distance from one anchor point to another. How long is the run? Measure along actual path of whatever you’re draping, including turns or bends. A ten-foot wall might be twelve feet if the route isn’t perfectly straight. Screw up the base length and everything else downstream are ruined.
Next is the pitch. The pitch is the total width of all flags added to the space between them. It’s what allows you to figure out how many pennant will fit in the given space. The closer together you put them, the tighter the look, and more cord and fabric you’ll need. The wider the gap, the airier the look, and less flags you’ll have to make.
You can also play with the shape of your flag within the tool. Because triangles cut about half area of a rectangle, they’re an efficient choice. Scallop shapes or swallowtails falls somewhere in the middle. If you’re making your flags from felt, you may not even bother with seam allowance (they don’t fray). For cotton or linen, though, you want those quarter-inch bits on either side for when you wash it, so the edge doesn’t start unraveling. When you multiply by two-dozen flags, that little bit goes a long way.
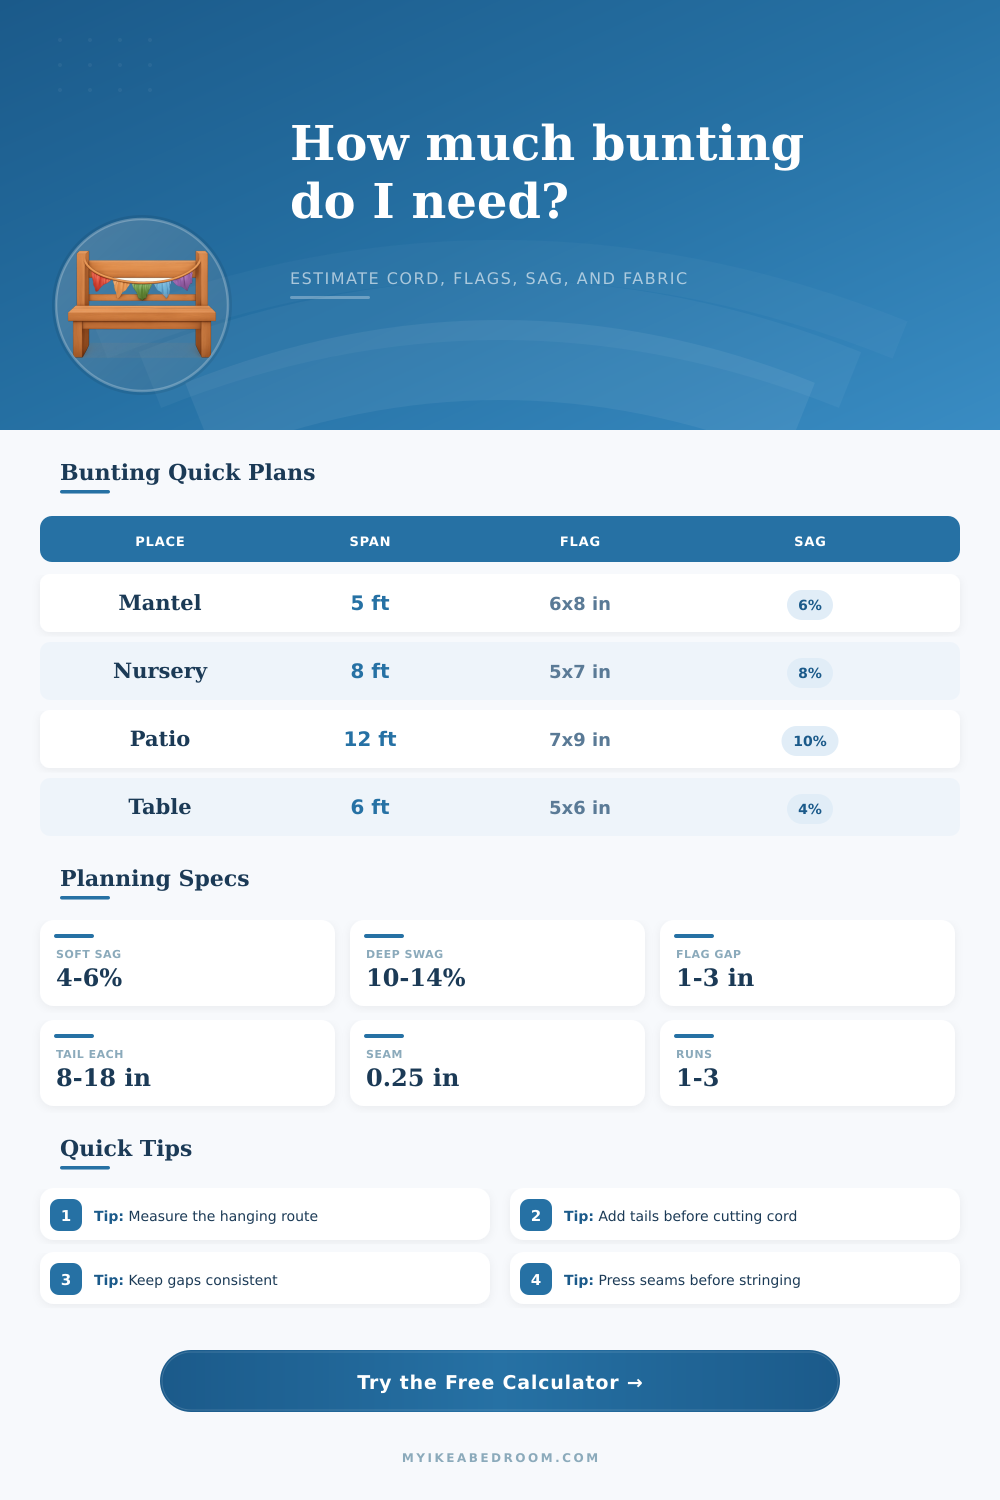
The main weakness of any project is sag. Anything that doesn’t sag will look stiff and artificial; you want some sort of curve to lend the bunting some life. The table that came with the tool explains it all. If you make a four to six percent sag, you get a soft and shallow curve perfect for use on shelves and mantels. Ten to fourteen percent yields a more dramatic, deeper dip great for backdrops in photos or hanging from fireplaces.
This number corresponds exactly to how much longer your cord should be. Otherwise, your flags won’t have enough cord at the top to relax. You’ll have ugly tension points that can pull the knot apart or change the shape of the fabric. And don’t forget those tails. Make sure to leave enough extra length on both ends so that you can tie a secure knot, then tuck it under a hook or tape it up.
For most indoor jobs, 12 inches each end will do just fine. If you’re making large loops with bulkier knots or thicker rope, go a little longer. The calculator takes care of it. That way you won’t run out of string to tie off your flags once they reach the wall, which is very frustrating!
It also includes extra for multiple runs; say you want to decorate a bunch of windows or a really long stretch of patio railings. Double the number of runs and double the amount of cord and fabric needed. This throws people for a loop when they are trying to plan something big for a party.
The size of your material is only part of the equation; it’s also important to use the right fabric. For example, I love cotton for my holiday decorating; it holds its form (triangle!) and presses beautifully. Linen has more weight and texture, so even without lots of stitching, the flag stays nice and flat. Felt is super forgiving if this is your first time, as it doesn’t have to be hemmed at all.
Consider how you plan on displaying the bunting. If outside, double-sided flags are best, so that either side looks finished depending on what angle it’s viewed from. Indoor wall decor can work with one-sided fabric, since you won’t see the backside.
Now that you’ve got those numbers, trim the first test flag. Pin it down, stitch together the seams (if applicable), tie it to some scrap string. Hang it in your room. Does the drop look too short? Is there too much empty space above? A quick tweak to one proto spares you from picking apart an entire batch.
You know how bunting seems so easy? It is just fabric plus string. Well, when you want to get the rhythm right, think about what goes between the pieces as much as on them. Measure twice, cut once. Then let the sag do the rest.