Bow Window Radius Calculator
Calculate a bow window curve from straight width, projection depth, panel count, and hardware spacing, then turn the geometry into radius, arc length, segment marks, bend angles, and bracket positions.
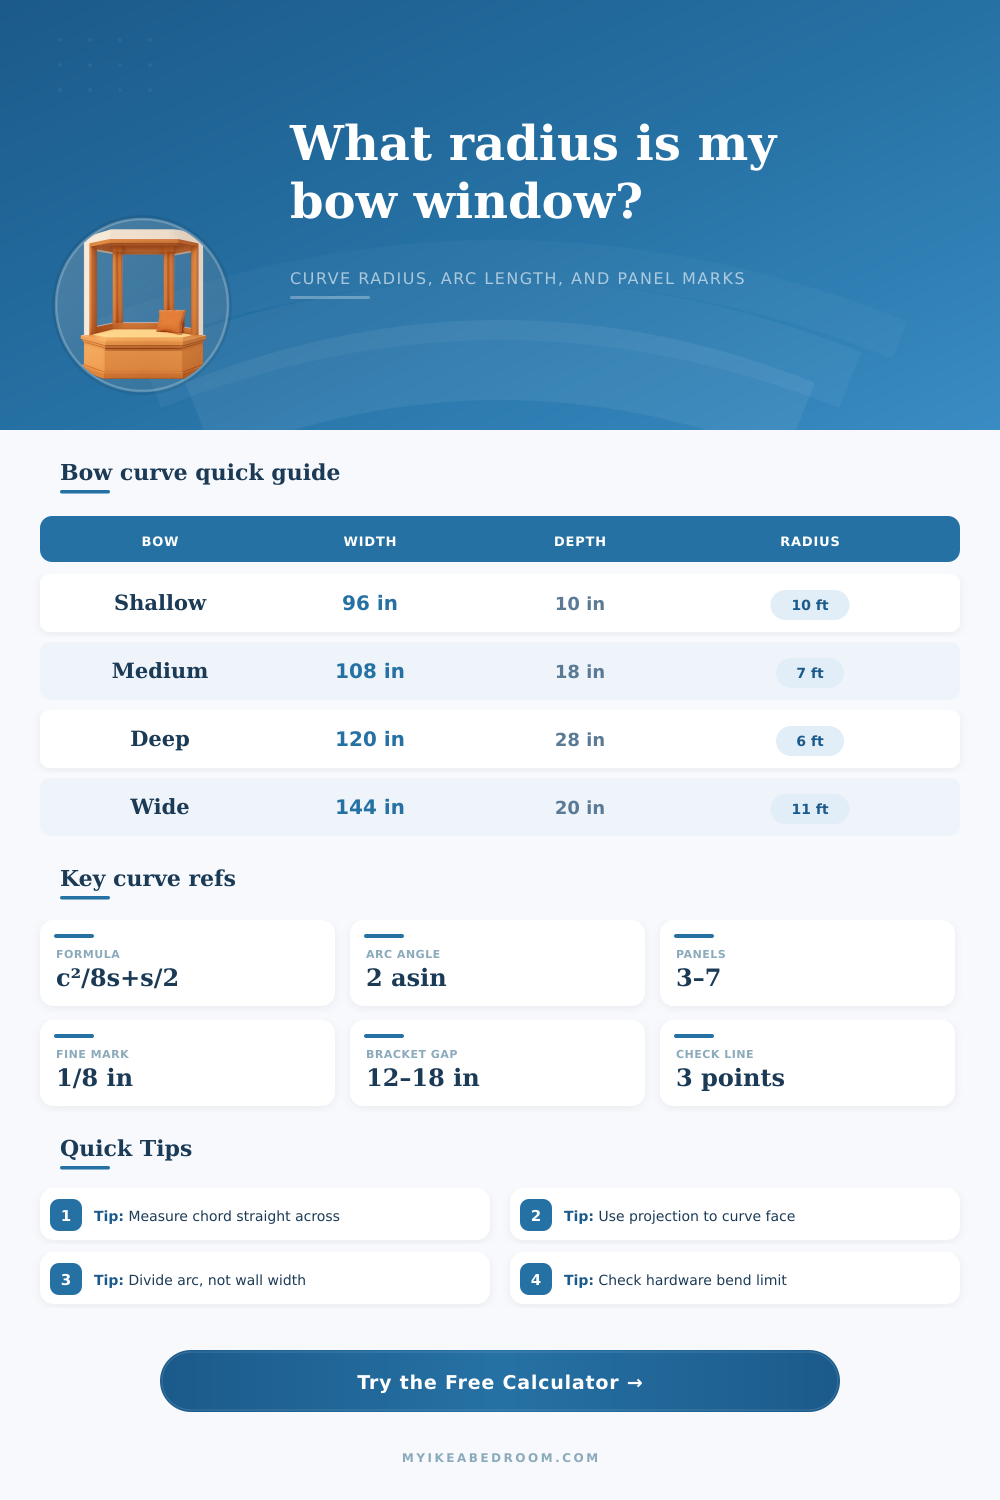
Pick a similar bow layout, then adjust the straight chord width, projection, panel count, hardware line offset, and bracket spacing for your measured opening.
| Straight width | Projection | Approx radius | Curve type |
|---|---|---|---|
| 72 in | 8 in | 6 ft 11 in | Shallow bedroom bow |
| 96 in | 12 in | 8 ft 6 in | Gentle curtain track bow |
| 108 in | 18 in | 7 ft 6 in | Classic 4-panel bow |
| 120 in | 28 in | 6 ft 5 in | Deep bow seat curve |
| Panels | Best for | Segment math | Layout note |
|---|---|---|---|
| 3 panels | Small bows and shallow alcoves | Arc divided by 3 | Check center panel width first |
| 4 panels | Common bedroom and living bows | Arc divided by 4 | Two middle joints frame the center |
| 5 panels | Balanced wide bow windows | Arc divided by 5 | One panel centers on the crown |
| 7 panels | Sunroom or long gentle curves | Arc divided by 7 | Small joint turns look smoother |
| Target | Formula | Inputs needed | Use case |
|---|---|---|---|
| Radius from rise | c squared over 8s, plus s over 2 | Chord width and projection | Field-measured bow windows |
| Central angle | 2 times arcsine of chord over diameter | Chord width and radius | Template sweep or track bend |
| Arc length | Radius times angle in radians | Radius and central angle | Track, valance, and blind route |
| Segment chord | 2 times radius times sine of half segment angle | Radius, angle, panel count | Faceted templates and panel marks |
| Measurement | How to take it | Used for | Common mistake |
|---|---|---|---|
| Chord width | Straight endpoint to endpoint across the rear line | Circle chord in radius formula | Following the curved trim instead |
| Projection | Square out from chord line to deepest curve point | Sagitta or rise of the arc | Measuring diagonal from one end |
| Arc length | Flexible tape along intended hardware route | Route length and support spacing | Mixing glass line and track line |
| Offset | Distance between glass curve and hardware curve | Adjusted radius and arc length | Ignoring brackets or fabric clearance |
Signal: projection is under about 12% of straight width.
Expect a large radius, small joint angles, and long arc marks that are close to straight width marks.
Signal: projection is roughly 14% to 22% of straight width.
This usually works well for four or five equal panels with moderate curtain track bends.
Signal: projection is above about 23% of straight width.
Check minimum bend radius carefully, because hardware may need segmented elbows instead of one smooth bend.
Signal: track, blind, or valance line is not exactly on the glass curve.
Apply offset before reading arc length, because even a small radius shift changes support spacing.
Snap the chord line first. The width must be a straight baseline between endpoints. If the rear wall is uneven, mark a temporary line and measure projection square from that line.
Keep track and glass lines separate. A curtain track set 2 inches into the room has a different radius and arc length than the glass or sill curve.
Where do I want this curve to go? With a tape measure in one hand and drill in the other, you’re standing on a ladder trying to figure it out. Two points on wall are marked, but now just how far does it peak outward? What angle will my trim turns at the center?
On the street, bow windows appear effortless, a gentle smile on the house’s face. From inside, they’re a geometry problem that waits to be solved. And get the math wrong, and the frame will be crooked, or the hardware won’t bend enough.
How to Measure Your Bow Window Curve
So what’s it all about? Well, most times it’s not the straight width of the opening between the walls. You can use your trusty tape for that one. It’s when you attempt to convert that flat distance into a three-dimensional curve that things becomes tricky.
Enter the projection and the chord. Imagine your wall opening as a tightrope stretched across it. Now imagine a person standing directly in the middle of that rope. The vertical rise from that line are the projection. From here we know everything else about how this thing will shape up. If the rise is not too great, the cord becomes a big, gentle radius with hardly any curvature. With a steep rise, however, it pulls the curve tight and the angles between each segment of the panels becomes small.
The good news is the calculator (above) does all of the trigonometry for you. You do not need to thumb through your high school geometry textbook at 2 PM on a Saturday.
The tricky part is that most folks takes their measurements in the wrong spot. They lay them out for seat cushions, valences, or curtain tracks. Those thing don’t sit flush against window. So if your hardware is set back another 2″ into the room, then the “glass” line that they’re measuring has a longer arc length, because it’s drawing a circle at a greater radius. Sounds like no big deal right? But it adds up realy fast over a span of twelve feet. When you draw out your fabric or trim based off the glass measurement and your hardware is 3″ further back, you’re going to have gaping holes at the joint or saggy lines.
This tool takes the offset into account so that you know what line the material needs to be drawn out for (the real one, not the theoretical middle of window).
Oh, and another thing: what’s the number of panels you’re dividing that arch into? Seven looks nice and traditional, but there are lots more joints, with more opportunities for misalignment. Three is wide-open-feeling, but means stronger frames and wider glass. Every panel makes an angle where it connects to the next one. And blinds or curtain rods (or anything else) that must wrap around that curve has real-world limitations. You don’t want the metal track to bend too sharply, or it will kink.
The calculator tests your selected curve against its minimum bend radius and warns you if you’re about to order something that’ll break under the strain.
You should also consider how to apply these marks to the material or wall. Some techniques applies equally spaced markings along the straight chord. These are simple to use, but they is not very accurate on the curved portion. Then there are techniques where the arc is divided up equally by arc length. This provides all panels with the same visual weight even though the angle change a little bit. Dividing the arc makes for the cleanest appearance in most residential applications since it accounts for the actual distance that your eye moves across the face of the window.
But at the end of the day, it’s simply a circle sliced and inserted into your wall. And the math doesn’t care whether there’s a pretty view, or if you’ve shelled out big bucks for luxurius curtains. Math only cares about angle, radius, and length.
Once you understand that the chord anchors everything to the wall and the projection dictates the amount of bend tightness), the rest is simply a matter of marking precisely. Following the natural arc back to its center point, you’re not fighting against the curve. It may take you out to sea, or somewhere in the backyard. Measuring that tiny center point makes a guess a plan. You should of known it would be easier than this.