Backsplash Tile Calculator
Estimate backsplash tiles or mosaic sheets, net coverage area, grout line length, exposed edge trim, outlet cutouts, openings, pattern waste, and material quantities for kitchen, vanity, laundry, and range walls.
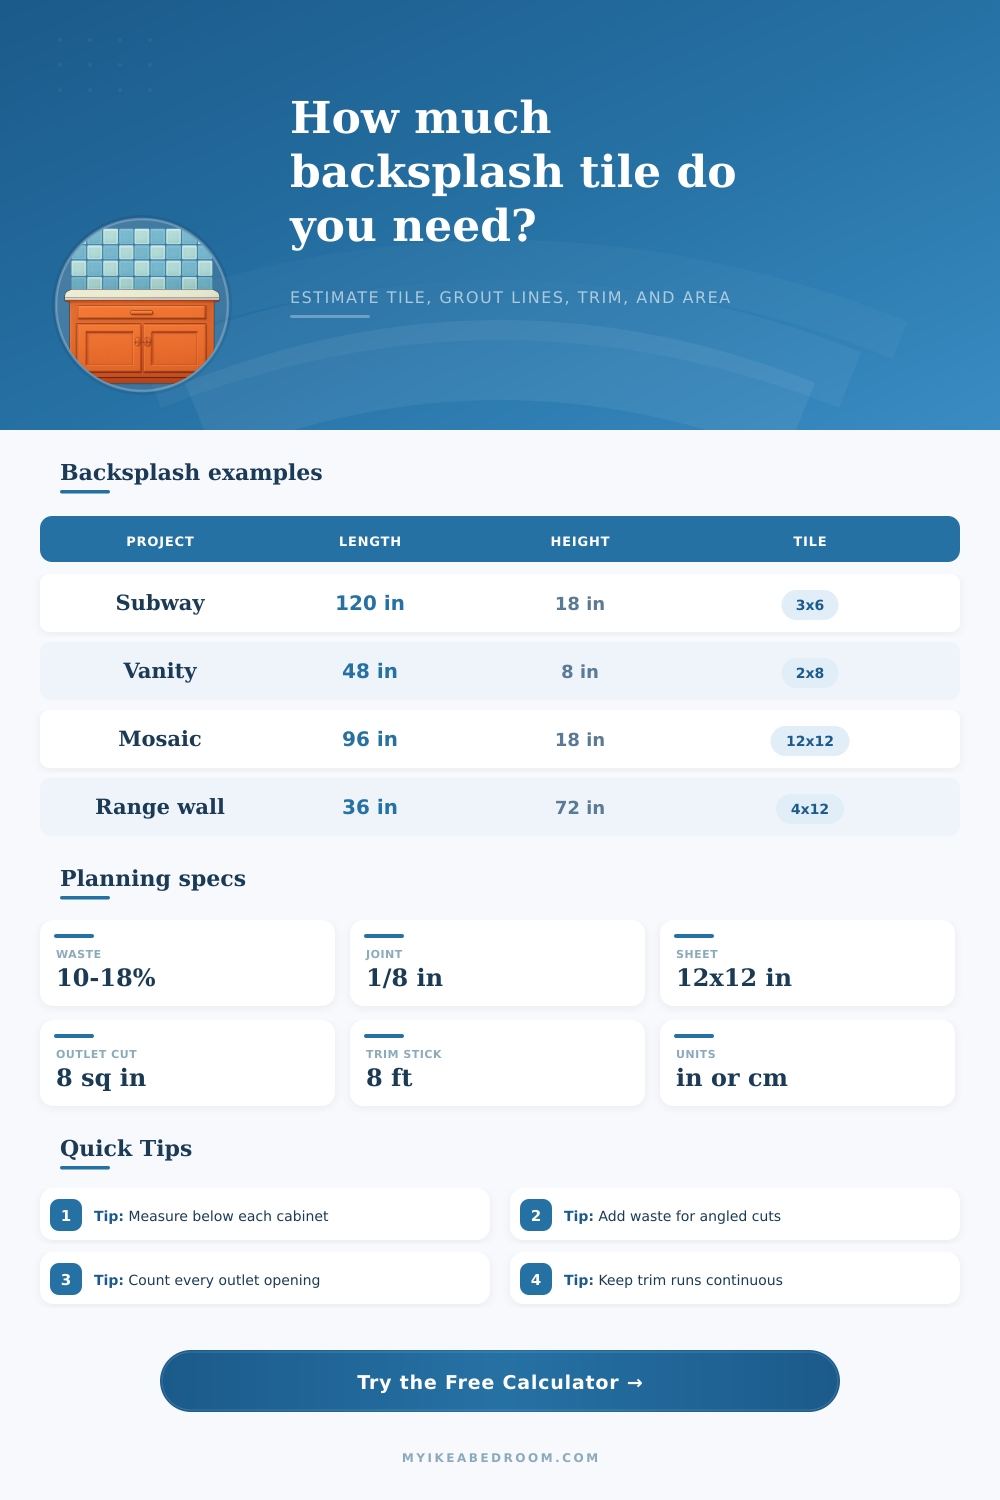
Load a common backsplash shape, then replace the dimensions with your wall, tile, opening, and trim measurements.
Low waste
Straight rows reduce cuts and simplify outlet alignment.
Medium waste
Offset joints add end cuts on every other row.
Medium waste
Tall orientation can increase top and bottom trimming.
High waste
Angled pieces and outlets need the largest buffer.
| Tile or sheet | Nominal size | Area each | Typical use |
|---|---|---|---|
| Small subway | 2 in × 4 in | 0.056 sq ft | Vanity strips and tight backsplashes |
| Classic subway | 3 in × 6 in | 0.125 sq ft | Kitchen walls below cabinets |
| Large subway | 4 in × 12 in | 0.333 sq ft | Range walls and modern vertical layouts |
| Mosaic sheet | 12 in × 12 in | 1.000 sq ft | Penny, hex, basketweave, and small mosaics |
| Long rectangle | 2.5 in × 10 in | 0.174 sq ft | Stacked or offset backsplash bands |
| Layout | Suggested waste | Cut difficulty | Best input choice |
|---|---|---|---|
| Stacked rectangle | 5% to 10% | Low | Use 5% only for open, straight walls |
| Running bond | 10% to 12% | Medium | Use 10% for typical kitchens |
| Diagonal field | 15% to 18% | High | Use 15% or more near cabinets |
| Herringbone | 18% to 20% | High | Use 18% when outlets interrupt the pattern |
| Joint size | Decimal input | Look | Use with |
|---|---|---|---|
| 1/16 in | 0.0625 | Narrow | Rectified tile and tight mosaics |
| 1/8 in | 0.125 | Standard | Most ceramic subway tile |
| 3/16 in | 0.1875 | Visible | Handmade or irregular tile |
| 1/4 in | 0.25 | Wide | Rustic tile with larger variation |
| Feature | What to measure | Calculator input | Result impact |
|---|---|---|---|
| Open side edge | Left, right, and top exposed runs | Edge trim length | Increases trim piece count |
| Window inside field | Opening width and height | Opening count and average size | Reduces net tile area, adds grout perimeter |
| Range hood gap | Untiled appliance or hood rectangle | Opening count and average size | Reduces coverage area |
| Outlet or switch | Each box cut through tile | Outlet count | Adds cuts and small area deduction |
Measure in sections: For L-shaped counters, measure each straight wall run and use the total length only after subtracting windows, range gaps, or cabinet breaks.
Keep trim separate: Enter only exposed edges that need finished trim. Edges hidden by cabinets, counters, or side walls usually do not need trim pieces.
To ensure that a backsplash project remain within a budget, the person starting the backsplash project must determine the exact amount of tile material that the backsplash require. Although it is tempting for someone to make rough guesses about the amount of tile that will be required, the alternative to making rough guesses is that a person will find themself either short on tile or will purchase too much of the trim tile for the backsplash. The length and height of the wall are the primary measurements that must be obtained for a backsplash project, but these two measurement are not the only measurements that will be needed.
Most kitchens contain windows, range hoods, and kitchen cabinets that will need to be accounted for in the calculations for the backsplash tile. The backsplash calculator must account for the area that these openings remove from the backsplash. The area of the outlets that are located on the backsplash will also remove area from the backsplash that must also be accounted for in the calculations of the backsplash tile.
How to Measure a Backsplash and Calculate Tile Needed
The size of the tiles to be used in the backsplash will also impact the calculations of how many individual piece of tile are required to cover the area. For instance, a three-by-six inch subway tile will cover less area than a four-by-twelve inch tile, so more three-by-six inch subway tiles will be required to cover the same area as four-by-twelve inch tiles. The same is true for mosaic tiles; a mosaic sheet will cover more area than individual mosaic tiles, but fewer sheet will be required than individual mosaic tiles to cover the same area.
A backsplash calculator can handle both types of tiles so that a person can compare the cost of each type of tile. The width of the grout joint that will be used for the backsplash tiles will also impact the calculations. A wider joint will increase the module size for each tile and will reduce the number of individual tiles that is required to cover the area.
However, there will be more grout required for the backsplash. Narrow joints will perform the opposite of wide joints. The width of the joint can be accounted for in the backsplash calculator to determine how much grout will be required for the backsplash project.
The pattern in which the tiles will be laid down can also impact how much waste is to be expected from the backsplash project. For example, a simple stacked pattern will require less waste than a herringbone or diagonal backsplash pattern. The different backsplash patterns create different amounts of waste, so a backsplash calculator that takes into account the type of backsplash pattern accounts for the amount of waste.
Because trim is such a critical component of backsplash tile projects, it is essential to measure the trim careful. If the edges of the backsplash project are to be exposed, the trim will be required to cover those edges. However, if the backsplash project will be tucked under a countertop, the trim will not be required for those edges of the backsplash.
The length of the visible trim only should be measured for the backsplash project. A backsplash trim calculator will ask for the total length of the trim and the length of each stick of trim to be used, and then it will return the number of trim sticks that will be required for the backsplash project. To simplify the backsplash tiling project, a number of reference tables are provided that contain information about the size of the available tiles and the width of the joints for the tiles.
For instance, a two-by-four inch subway tile may appear to be a small size for backsplash tiling, but there may be alot of two-by-four inch subway tiles that will be required to cover an eighteen-inch high backsplash area. A twelve-by-twelve inch mosaic sheet will cover one square foot of area with the mosaic tiles on the sheet. However, only a portion of the sheet may be usable for the backsplash project, just like a backsplash of individual mosaic tiles.
The actual kitchens that are to be tiled will have some irregularities to the measurements of the backsplashes. Because of the irregularities, the backsplash tiler will have to make adjustments to the placement of the tiles on the backsplashes. Calculators are available that ask for the length of each straight run of the backsplash.
Each of these measurements can have the areas for the outlets and openings in the backsplash tiles deduct from them. Then, these numbers can be added together to determine the total length of the backsplash that will be tiled, and the calculator will account for the irregularities of the backsplash in its calculations. The percentage of waste that will occur during the backsplash tiling project is also an important number to enter into the calculator.
For a long backsplash with no outlets and with a simple backsplash pattern of tiles, five percent of waste will be sufficient to allow for mistakes in tiling. For a backsplash with outlets, diagonal tiles, and short returns around a kitchen window, fifteen or eighteen percent of waste is more realistic. Choosing the correct percentage of waste will ensure that the individual is not in a situation where they discover that the tile needed to complete the last two feet of backsplash is no longer in stock.
The number of electrical outlets that will be included in the backsplash will also impact both the area of the backsplash and the labor required to complete the backsplash. Each electrical outlet will remove approximately eight square inches of area from the backsplash. These eight square inches of area will add up over the length of the backsplash.
Furthermore, each of these electrical outlets will require the tiler to make cuts to the backsplash tiles so that the edges of the tiles do not land on the electrical plate. The area of the outlets will be deducted from the total area that must be tiled, and the length of the perimeter of the outlets will be added to the length of the grout that will be used for the backsplash project. Finally, the backsplash that will be completed will depend upon the planning that is performed before beginning the backsplash tiling project.
By carefully measuring the backsplash, calculating the waste for the project, and determining the different patterns for the backsplash tiles, the tiler can ensure that there will be enough of each type of tile for the project. The calculator will obtain all of the numbers for the backsplash tiling project, but the advantage of using the calculator comes from the care with which the measurements is taken.