Backsplash Height Calculator
Plan the visible backsplash height between a countertop and upper cabinets, range hood, shelf, or open wall, then check tile rows, cut size, grout lines, focal area, and outlet alignment.
Choose a common kitchen, vanity, laundry, or open-wall starting point, then adjust the actual heights and tile module before ordering or setting tile.
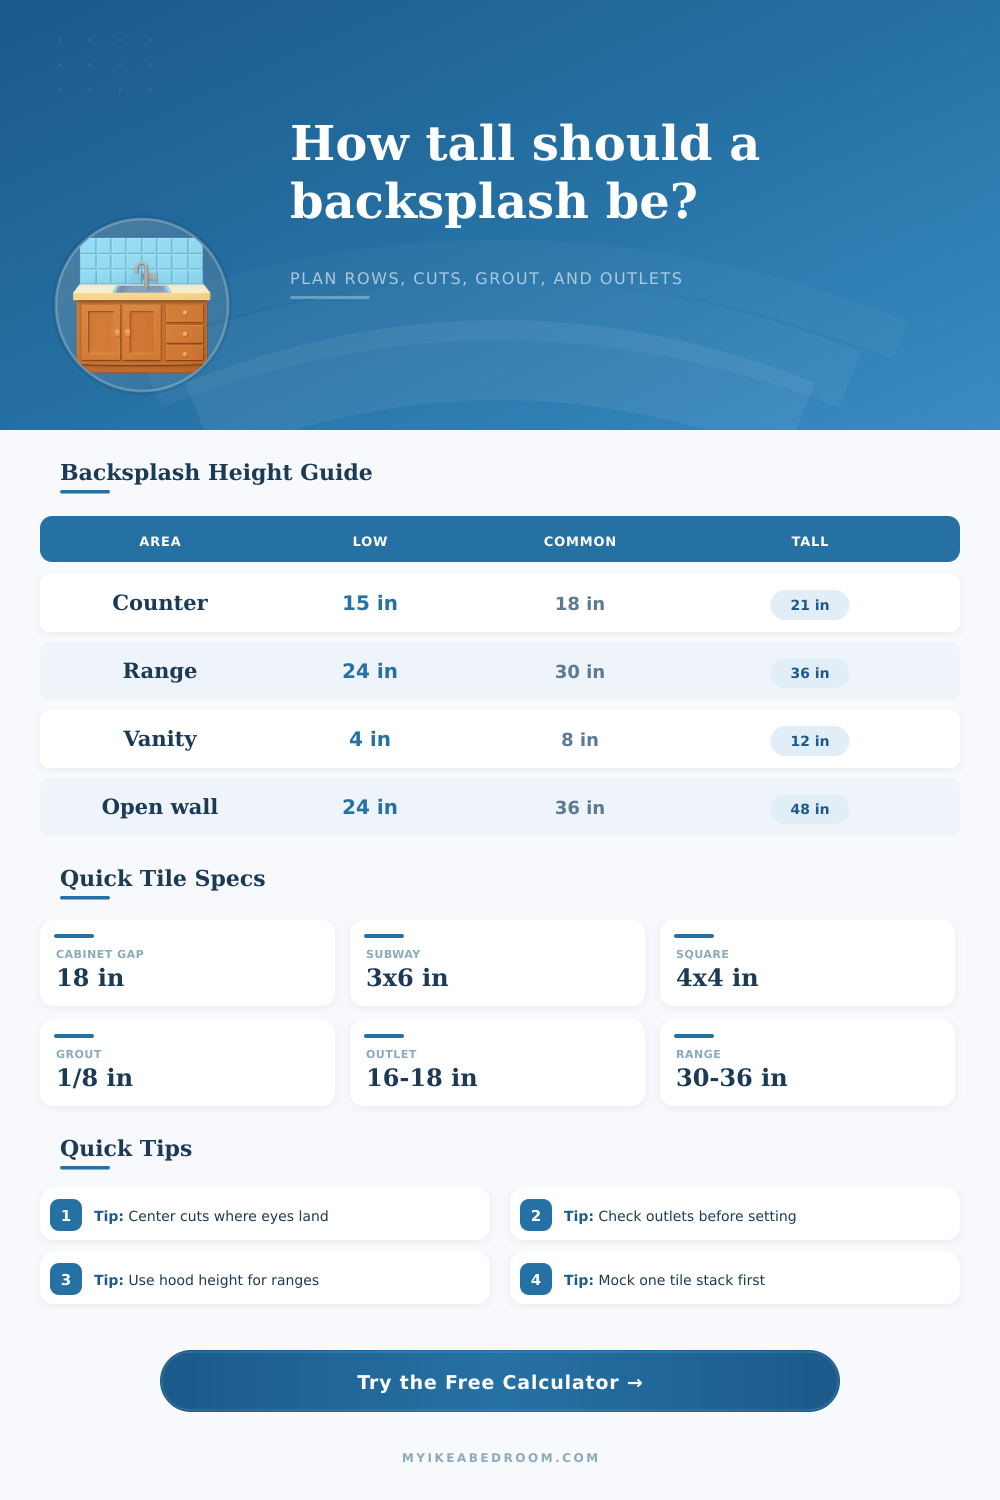
| Location | Typical height | Top reference | Tile planning note | Outlet watch point |
|---|---|---|---|---|
| Kitchen counter to wall cabinet | 15 to 21 in | Upper cabinet underside | Often works with 3, 4, or 6 inch tile modules. | Outlet centers often land 6 to 10 inches above the counter. |
| Range wall below hood | 24 to 36 in | Hood bottom or feature panel top | Use focal width for the area behind the range. | Keep grout lines away from boxes and cover plate edges. |
| Bathroom vanity | 4 to 12 in | Mirror, shelf, or planned top edge | Small fields can look better with a full or half tile. | Side outlets can force narrow cuts. |
| Laundry counter | 12 to 24 in | Cabinet, shelf, or utility rail | Durable tile and simple rows are easier to clean. | Check switches and GFCI covers before setting. |
| Open shelf or coffee bar | 18 to 36 in | Shelf underside or visual stop | Center the prettiest row at eye level when possible. | Small appliances may hide lower outlets. |
| Tile size | With 1/16 in grout | With 1/8 in grout | Rows in 18 in | Common use |
|---|---|---|---|---|
| 2 inch mosaic | 2.06 in module | 2.13 in module | 9 rows | Vanities, tight areas, curved walls |
| 3 x 6 subway | 3.06 in module | 3.13 in module | 6 rows | Kitchen counters and laundry rooms |
| 4 x 4 square | 4.06 in module | 4.13 in module | 5 rows | Traditional kitchens and utility backsplashes |
| 5 inch handmade | 5.06 in module | 5.13 in module | 4 rows | Coffee bars and feature walls |
| 6 inch field tile | 6.06 in module | 6.13 in module | 3 rows | Clean modern walls with fewer grout lines |
| Outlet condition | Conflict score | What it means | Layout response | Best check |
|---|---|---|---|---|
| Grout line clears cover plate | 0 to 25 | Low visual and cutting conflict. | Keep row stack as planned. | Dry-lay one column beside the outlet. |
| Line near outlet center | 26 to 55 | Moderate alignment pressure. | Shift start line, change grout, or use a balanced cut. | Compare plate height with row joints. |
| Line crosses plate edge | 56 to 80 | Visible joint may run into the cover. | Move row start or choose a different tile height. | Mock up the exact tile plus spacers. |
| Outlet partly outside tile field | 81 to 100 | Height or top line likely needs correction. | Raise the backsplash, relocate device, or use a trim plan. | Confirm electrical box position before tile. |
| Scenario | Counter height | Top line | Backsplash height | Planning note |
|---|---|---|---|---|
| SEKTION kitchen wall | 36 in | 54 in cabinet bottom | 18 in | Classic cabinet gap for subway tile rows. |
| Bathroom vanity | 34 in | 42 in visual stop | 8 in | Short backsplash often benefits from larger tile pieces. |
| Range focal wall | 36 in | 72 in hood bottom | 36 in | Use focal width to estimate feature area. |
| Laundry counter | 36 in | 58 in cabinet bottom | 22 in | Taller protection helps around sinks and folding areas. |
| Open shelf wall | 36 in | 66 in shelf underside | 30 in | Use a clean stopping line below shelf brackets. |
Ceramic subway
Predictable rows. A 3 inch vertical tile often stacks cleanly in an 18 inch kitchen gap.
Small grout changes can still alter the top cut.
Handmade tile
More variation. Zellige and handmade pieces need extra tolerance around outlets and edges.
Dry-lay more rows before committing.
Mosaic sheet
Flexible cuts. Small units help around outlets, short vanity splashes, and narrow returns.
More grout lines need careful alignment.
Slab or panel
Few joints. Area matters more than row count, but outlet cutouts must be exact.
Confirm finished top and cabinet heights first.
Mock the tile stack at the outlet wall. Even a good row count can look awkward if a grout line lands through a switch plate, GFCI cover, or the most visible range focal point.
Choose the top line before choosing the cut. Cabinet rails, under-cabinet lighting, hood trim, and shelf brackets can reduce the visible height by more than the tile calculation suggests.
In kitchen planning, area between your countertop and upper cabinets is frequently an afterthought. Pick some tile you like. Pick a grout color. Hope for the best when it comes to installer’s handiwork. But that space are where most budget overruns occur. It is not because of tile. It happens because of how tile plays off cabinet height, electrical boxes, and so on.
Those variables play out as they want to and suddenly you’re left with cut awkward slivers of tile. Looks like it was rushed. Once you plug in your own dimensions, the calculator does the math for you (above). No more guessing how many row will fit into an eighteen-inch standard gap. Most folks think they only has to know whether their tile will fit; forgetting that there’s a grout joint between each row.
How to Plan Your Kitchen Backsplash Tile Layout
So three inch subways with an eighth inch grout line = 3 and one-eighth inch vertical module. That little number make all the difference when it comes to avoiding having to cut a row in half at the top/bottom of the wall. That’s why the tool also calculate the stack height for you. It’ll tell you exactly where that cut will fall, so you can choose whether it looks like it was meant to be or not.
It’s more complicated than just height. What does it stop? In a typical kitchen, the bottom of cabinets above is the top of your backsplash area. But in a range area, maybe a decorative panel or a hood stops higher. Maybe in a bathroom vanity, a few inches back are open wall or mirror. These are all scenarios that makes a huge difference visually, which is why the calculator allow you to toggle them.
Large format tile running tall looks clean and moddern. Small mosaic stacked short can look busy if you don’t lay it out well. Before ordering material, you want to see what entire field will look like. Next comes the electrical battle, which is something nobody thinks about until mortar has dried.
Typically, standard outlets has their centers eight inches above countertop. And if your tile layout doesn’t work out nicely, you could end up with a grout line running directly down center of faceplate. Ugh. To give you an idea how much of a problem this might be, the tool computes a “conflict score” for each outlet depending on both the grout width and tile height. The higher the number, the more likely it will require changing either the grout dimension (to shift the joint out of center of the box) or your starting point. There’s no covering up a sloppy fit with a cover plate.
The other complicating factor is material selection. Zellige (handmade) tiles are a bit bigger than their machine-made cousins, and has a little more variability in tile size. This means row counts will be less accurate, which require more wiggle room for your top and bottom cuts. On the flip side, slab stone have no joint horizontally… But requires absolute level prior to installation since it won’t be covered up with any grout lines. Those material traits, along with typical height ranges, is outlined in the reference tables on the page, which will help you consider those trade-offs.
If you want to know how it will go together before committing to a plan, stand back from one vertical column at eye level and mock up the cut row at the top. Does it look like a conscious design decision, or a leftover piece of something else? Will that grout line be all over your most prominent outlet? You can fix both with half an inch of adjustment in where layout starts. Your eyes are the final judge (the calculator has the numbers)…Plan the stack; the rest of the install will fall into place. Weeks of frustration could of been avoided with just a bit of forethought.