Area Rug Border Exposure Calculator
Measure how much visible floor border remains around an area rug, whether the rug is centered, how much of the room is covered, and whether the chosen size fits the furniture zone.
Choose a real layout, then adjust the rug, wall borders, target exposure, and furniture footprint for your room.
Placement readout
Your rug exposure summary will appear after calculation.
Centering cue: Compare opposite borders.
Coverage cue: Check the rug area against the full room area.
Furniture cue: The furniture footprint should sit comfortably on or around the rug.
These cards compare common rug sizes in your current room using centered placement and your ideal border target.
| Layout type | Useful exposed border | Watch point | Best calculation cue |
|---|---|---|---|
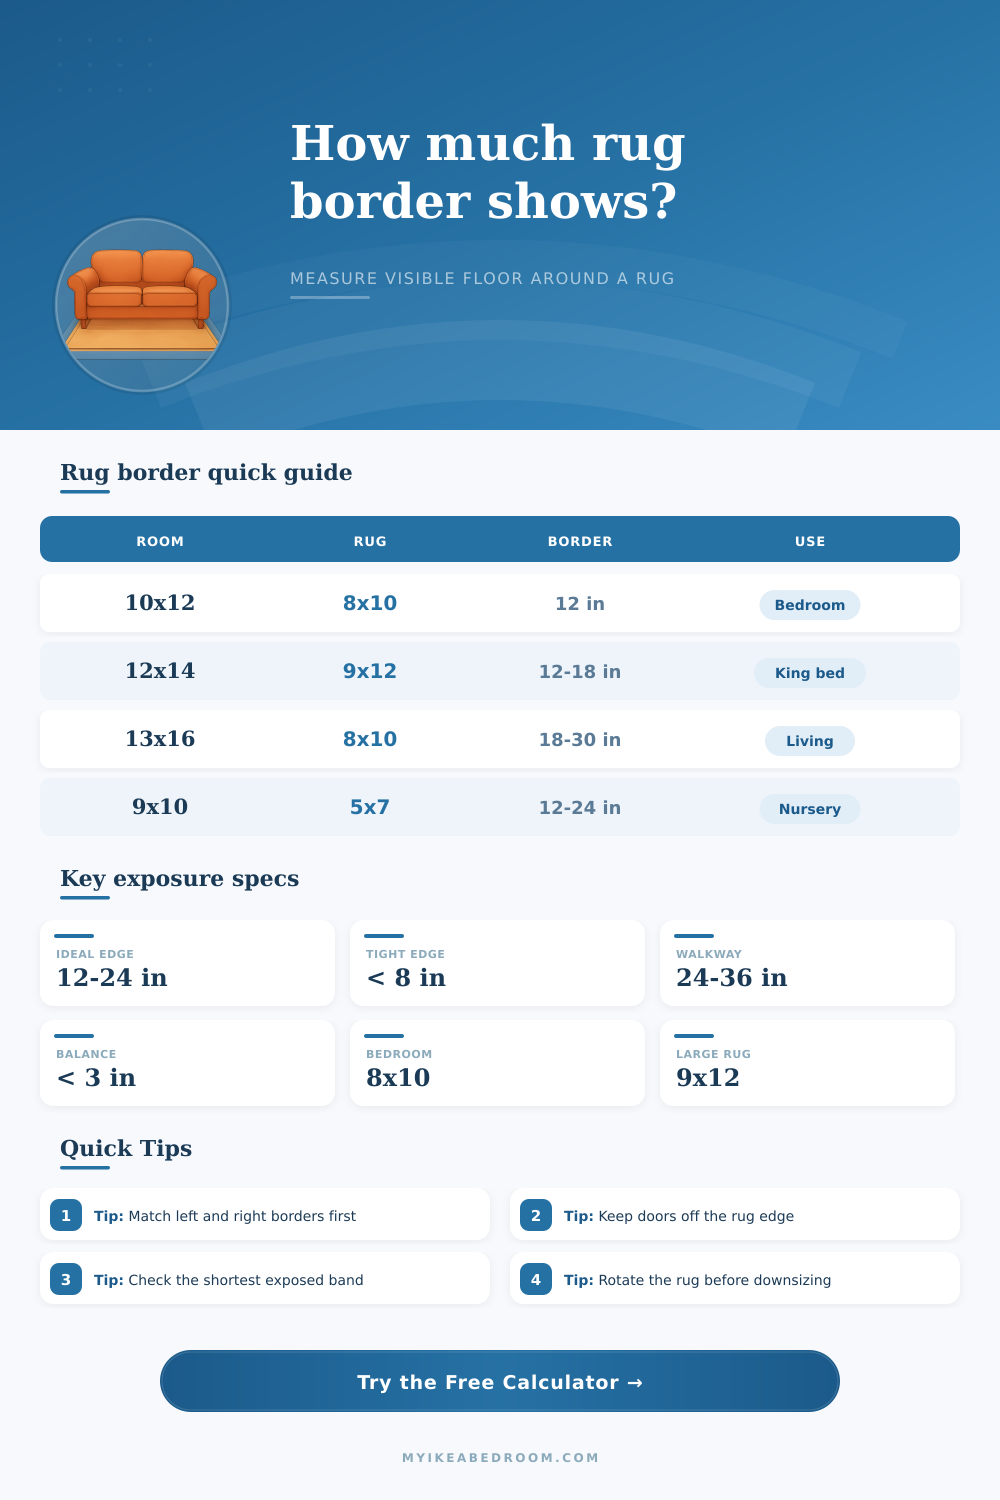
| Centered bedroom rug | 12 to 24 in on open sides | Uneven left and right bands | Keep horizontal imbalance under tolerance |
| Rug under bed | 8 to 18 in near walls, more at foot | Rug hidden too far under bed | Check bottom edge exposure and furniture buffer |
| Living room seating | 18 to 30 in around seating zone | Front legs falling off the rug | Compare rug size to furniture footprint |
| Dining room rug | 24 to 36 in beyond table | Chair legs catching rug edge | Use walkway target as chair pullout buffer |
| Entry or small zone | 6 to 18 in depending on door swing | Door rubbing the pile | Check pile thickness and clearance target |
| Room size | Rug size | Centered side border | Centered end border |
|---|---|---|---|
| 8 x 10 ft | 5 x 7 ft | 18 in each side | 18 in each end |
| 10 x 12 ft | 8 x 10 ft | 12 in each side | 12 in each end |
| 11 x 13 ft | 8 x 10 ft | 18 in each side | 18 in each end |
| 12 x 14 ft | 9 x 12 ft | 18 in each side | 12 in each end |
| 14 x 18 ft | 10 x 14 ft | 24 in each side | 24 in each end |
| Metric | Strong result | Needs attention | What to change |
|---|---|---|---|
| Tightest border | At or above your minimum | Below minimum or negative | Move the rug, rotate it, or choose smaller |
| Average border | Near your ideal target | Far below or above target | Adjust rug size before centering |
| Border range | Small spread across all sides | One side much wider than another | Shift rug toward the wider band |
| Furniture buffer | Positive edge space on rug | Furniture footprint exceeds rug | Use a larger rug or reduce footprint |
| Door clearance | Pile stays below door gap | High pile near swing path | Move rug edge away from door arc |
| Scenario | Room | Rug | Primary exposure goal |
|---|---|---|---|
| Queen bedroom | 10 x 12 ft | 8 x 10 ft | Even 12 in side and end borders |
| King bedroom | 12 x 14 ft | 9 x 12 ft | Balanced sides with bed footprint covered |
| Living room | 13 x 16 ft | 8 x 10 ft | Moderate exposed floor around seating |
| Dining room | 11 x 13 ft | 8 x 10 ft | Enough border for chair pullout |
| Open plan | 14 x 18 ft | 10 x 14 ft | Large anchor rug with clear perimeter |
Centering tip: If the room is rectangular, balance left and right first. Then decide whether the top or bottom border should be intentionally larger for a bed, sofa, or doorway.
Fit tip: A rug can have a beautiful average border and still fail if one edge is tight. The shortest exposed band and the furniture buffer are the two numbers to check before ordering.
That’s why your new rug might seem like it just doesn’t look right when you first bring it home. It either sits awkwardly in the middle of the room, meaning it is too small for the space, or it push up against the baseboard because it is too big.
A lot hinges on how much exposed floor shows around the rug. That little bit of wood or tile that frames its edges. While most folks leave this to chance, interior designers know that it can make the difference between looking like a pro or a dud.
How to Choose the Right Rug Size for Your Room
You can enter size of rug and room in the calculator up top and it does all the math for you. This way, you don’t have to guess at centering. In real life, things is rarely even. You have to consider whether a door swings open into that area, where your bed is placed, and how much space your dining chair need when pulled out.
The calculator will break it down and show you exactly what the exposure are on either side. It also shows you the tightest point (not just the average), which is what you really want to know, since human eyes is drawn to asymmetry. Even if you get the math to check out on paper, your room will feel lopsided if one side has a 2 foot border while the other has only 6 inches.
Another myth: The larger the rug, the better! Oversized rugs overwhelms a room. The trick with an oversized rug (like any other) is that when all four walls touch the rug, it start to create a tunneling effect. It takes away from defined spaces and visual breathing room that an open plan space needs.
The goal is typically to have some exposed floor on the open sides, between 12-24″. That’s enough to frame the furniture without letting it float. (That’s why you’ll see the term “framing” used.)
On the other end, there’s a bit of wiggle room on the bedroom side. Usually, you’d like the width of the front (foot of the bed) to be wider than the side borders. This give you a step-off zone that feels intentional.
Beyond just raw measurements, there’s the matter of furniture layout. That’s why we built in a field for a furniture footprint into the calculator. When laying out a sofa grouping, typically the front legs should of be sitting on the rug to really ground the seating zone. Too-small a rug means only the back legs sits on it, which can feel disconnected. A rug that is too-large compared to the seating loses its impact as its edges fade into nothingness.
Furniture buffer help you make sure your chairs don’t snag on the rug edge when you get up from them. This is always a mistake, no matter how pretty the print may be. Beyond focusing on aesthetics, there are also walkways and doors to consider. If you have high-pile rugs beside your doors, they can creates too much friction… Enough to prevent doors from shutting all the way, or enough to wear down over time.
It will flag this by comparing your clearance target with height of your pile. This is another little physical thing to trip up homeowners who only think about the visual border line. You might have a great symmetrical design, but now you block a doorway or catch the door hinge.
One easy trick for solving many layout issues (particularly in narrow spaces) is rotate the rug. You’ll see it right away on the tool, just click the button and it will flip between directions to show how it works best with your traffic flow. Sideways can open up your visual field; lengthwise can feel constraining. It’s more about quick testing than lugging around heavy textiles on sticky floors.
When you buy a rug, it should feel finished from the very start. Getting the borders right is part of making sure the whole investment feels resolved and intentional. If you get those right, then the entire room will feel planned and grounded. You don’t need to hunt around the room looking for mistakes in the spacing, the eye wants to rest comfortabley with how it’s all arranged.
The balanced border doesn’t just fill up space; it communicates care. Step back and look at even strips of floor that frame your furniture, and the chaos quiets itself. Suddenly the rug isn’t just an object, but the foundation it’s supposed to be. That quiet confidence in the proportions of the room is worth the few extra minutes spent measuring before you lift a finger to put it down.