Architrave Length Calculator
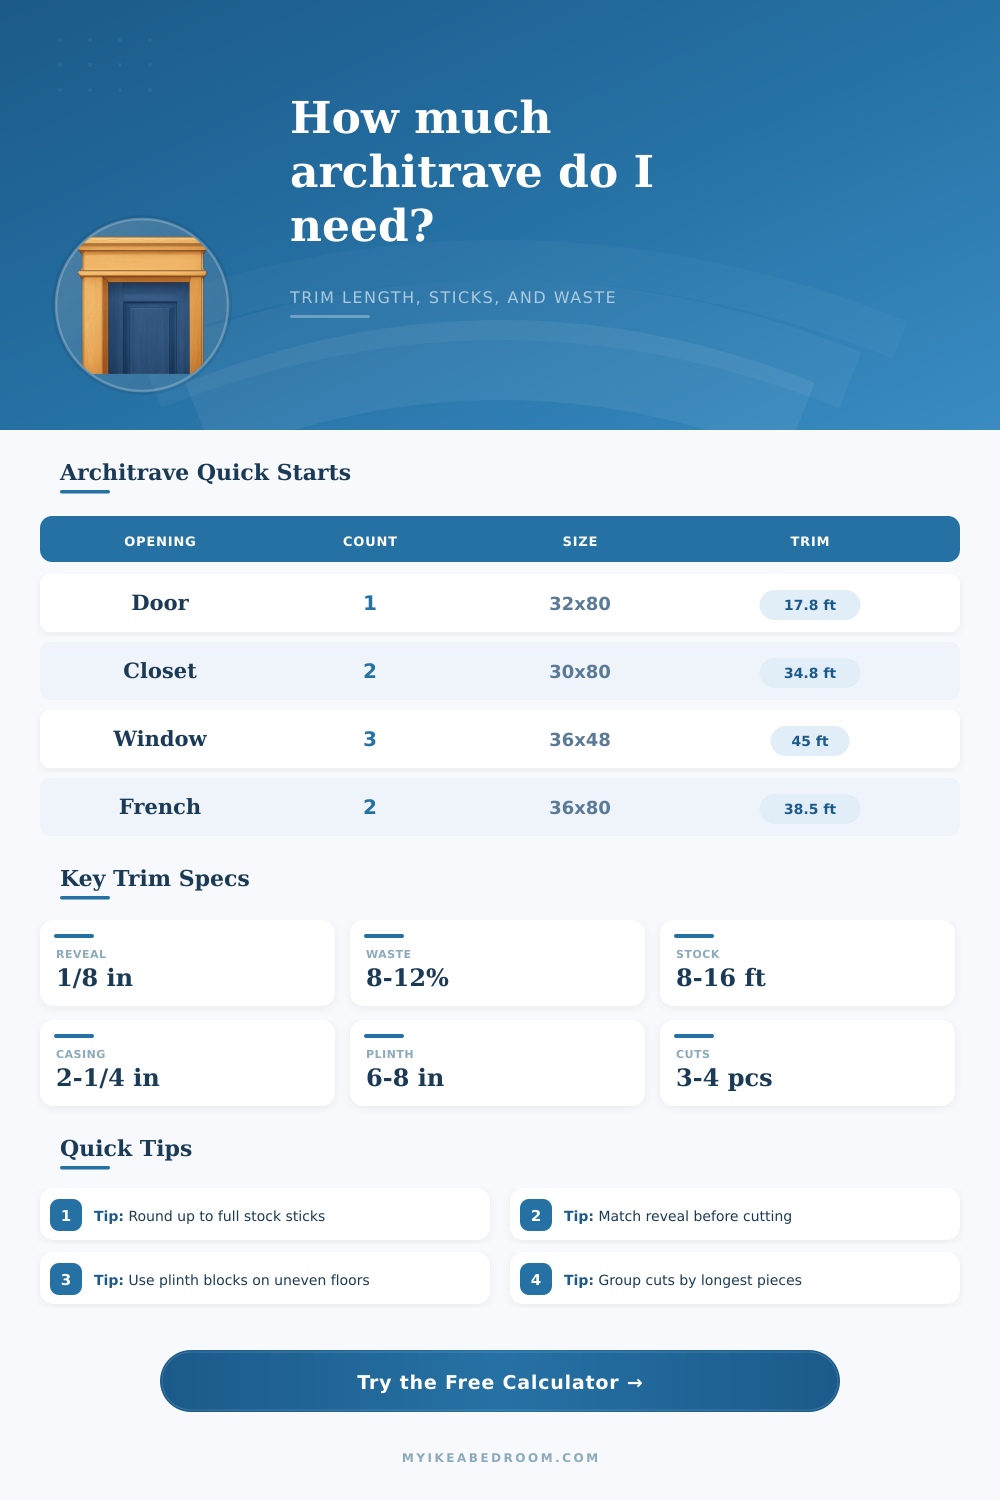
Estimate casing length for doors, windows, closets, and built-ins from opening count, width, height, reveal, casing width, plinth blocks, stock length, and miter waste.
Presets load common door, window, closet, and wardrobe casing scenarios. Fine-tune the dimensions before ordering or cutting stock.
Primed MDF casing
Best for: painted bedrooms, closets, and straight walls.
Calculator note: add normal miter waste, but protect long sticks from dents.
Finger-jointed pine
Best for: painted trim where light sanding and nailing are expected.
Calculator note: use a bit more waste when sorting out visible joints.
Solid hardwood
Best for: stained architrave, feature openings, and durable edges.
Calculator note: increase waste for grain direction and color matching.
Flexible or PVC trim
Best for: damp rooms, curved surfaces, or low-maintenance edges.
Calculator note: verify stock length because flexible trim often ships differently.
| Formula item | How it is estimated | Why it matters | Planning note |
|---|---|---|---|
| Side casing | Opening height + casing width + reveal - plinth height | Sets each vertical leg cut | Two side pieces per opening |
| Head casing | Opening width + 2 x casing width + 2 x reveal | Sets top miter long point | One head piece per opening |
| Total before waste | Opening count x per-opening casing length | Base linear trim required | Plinth savings are already removed |
| Stock sticks | Total with waste divided by stock length, rounded up | Converts linear length to full pieces | Always buy complete stock lengths |
| Opening type | Inside size | Typical pieces | Approx trim before waste |
|---|---|---|---|
| Single interior door | 32 in x 80 in | 2 legs + 1 head | About 16.2 to 17.0 ft |
| Wide closet opening | 60 in x 80 in | 2 legs + 1 head | About 18.5 to 19.5 ft |
| Window picture frame | 36 in x 48 in | 4 sides if no sill | About 15.0 to 16.0 ft |
| French door pair | 72 in x 80 in | Two cased leaves or one wide casing | About 20.0 to 22.5 ft |
| Stock length | Good use | Watch point | Offcut pattern |
|---|---|---|---|
| 7 ft or 84 in | Standard side legs for many doors | May be tight for tall openings | Small head-piece offcuts |
| 8 ft or 96 in | Most door legs and small heads | Check long closet head pieces | Flexible for mixed cuts |
| 10 ft or 120 in | Tall doors and wide windows | More storage and transport length | Better for long continuous heads |
| 12 ft or longer | Room bundles and feature openings | Plan cut order carefully | Lowest joint count when handled well |
| Detail | Typical value | Effect on length | Use when |
|---|---|---|---|
| Zero reveal | 0 in | Shortest top head miter | Flush modern trim layouts |
| Standard reveal | 1/8 in | Adds a small amount per side | Most door and window casing |
| Wide reveal | 1/4 to 3/8 in | Adds slightly more linear length | Thick jambs or shadow-line trim |
| Plinth blocks | 6 to 8 in | Saves casing length at each leg | Uneven floors or thicker baseboards |
Cut order: Mark the longest legs and heads first, then fit shorter window or closet pieces into the remaining stock lengths.
Reveal check: Scribe a reveal line on the jamb before measuring. Consistent reveal usually matters more than tiny length differences.
So you go to the hardware store with a vague notion of what your door frame should be and buy enough stick in hopes that it will cover up errors. Most times, you come home with a bunch of leftover scraps of wood (which you’ll put in the garage) and maybe another trip back to the store for some additional trim. You’re not bad at the width part. What trips you up are the stock lengths available on the shelf, the width of the saw blade cuts, and miter angles. If you can get that all figured out beforehand then you’ve got yourself a seamless install instead of a patchwork job.
For example, architrave seem like a straightforward concept until you consider wrapping around a corner. It’s not just the length of your door opening, it includes both the length past the edge of the jambs as well as the miter or return at the top. Add in a typical reveal and each side gets a small fraction of an inch added on. This is insignificant for one door, but it adds up across four sides and ten doors. The calculator above handles the geometry for you by converting raw opening measurements to total linear footage plus some cushion for miter tweaking.
How to Buy the Right Amount of Trim
The extra few-percent waste allowance accounts for reality. Saw blade have thickness, wood splits, and you might cut an angle slightly wrong the first time and need to trim it down. Without any wiggle room, your project becomes a scavenger hunt for stray scraps; eight to twelve percent waste allows for all of these real-world scenarios without making the whole thing a scavenger hunt for leftover scraps.
The kicker in most cases is stock length. Eight foot sticks are the norm for most casing. So if your door is eighty inches wide, you may look at the picture and figure one stick is enough for both legs…but it’s not. An eighty inch opening need two side pieces longer than thirty-eight inches each, even before you account for reveal and head piece overlap. For a standard door height, one stick of casing yields only one leg. The tool takes this into consideration and will calculate what number of full stocks you’ll have to order, rather than linear feet. Why? Because half a stick doesn’t exist. It’s either all or nothing, which means you grab the whole eight footer and make do with the cut-off.
For doors where thick baseboard or uneven flooring throw off your door swing, consider using plinth blocks. These are just solid blocks that replaces part of the casing leg on the bottom, drastically reducing amount of trim needed. No more dealing with tricky miters at floor…just some simple straight cuts. To see how much lineal footage this might actualy save, you can toggle it on or off in calculator. For smaller openings, sometimes it’s all the difference between buying one stick versus two. This saves money on materials and also saves labor time which pays for itself even faster.
Material choice also affects how much waste you should of plan for. Primed MDF is forgiving but dents easly during transport. But solid hardwood needs to be grain matched carefully, often resulting in tossing those pieces that has odd patterns at their ends or unsightly knots. PVC trim wants to flex differently and sometimes need to run in long stretches for the curve of headers. The chart on the page summarizes all this stuff so you can tweak your waste factor according to whatever’s in your hands when you go to build. Knotty pine? Tilt up to high side of the waste allowance. Smooth MDF? Lean back down.
Finally: Lay out your cuts from longest to shortest. Why? This little trick ensures you have plenty of offcuts available for repair pieces or even smaller projects such as window casings and similar things. Don’t be tempted to cut the short bits first. You’ll end up with unusable fragments that aren’t long enough for anything, not good! Think of every stock stick as a puzzle piece, not a piece of raw resource. Use the math to set the boundaries; then use your cutting order to decide if those boundaries will result in usable scraps or trash.
If you get that initial calculation correct, precision planning can transform a messy pile of lumber into a tidy set of ready-to-install frames. The final result will look intentional instead of accidental.