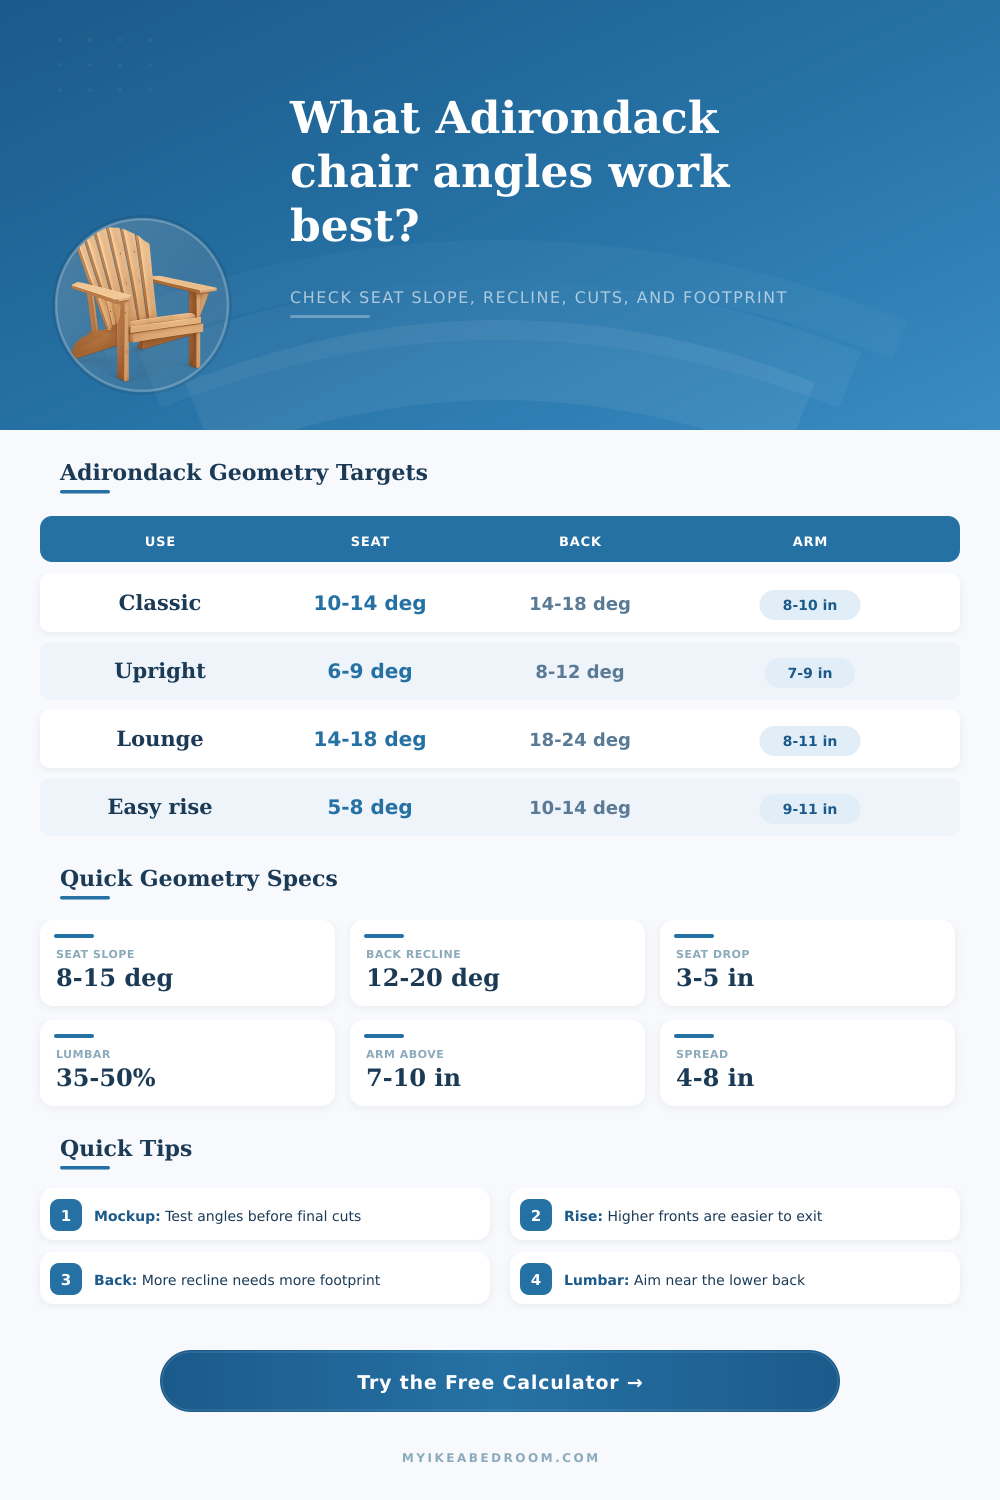
Chair slope, recline, footprint, and cut planner
Adirondack Chair Angle Calculator
Calculate seat slope, back angle, rear leg rise, projected footprint, cut angles, lumbar placement, arm position, and comfort category before cutting an Adirondack chair frame.
Angles are planning values for layout, mockups, and cut-list checks. Always verify with a full-size side profile before cutting finished stock.
| Chair feel | Seat slope | Back recline | Best use |
|---|---|---|---|
| Upright porch chair | 5 to 9° | 8 to 13° | Conversation, eating, small patios, and easier exit. |
| Classic Adirondack | 9 to 15° | 13 to 19° | General lounging with a recognizable rear-settled posture. |
| Deep lounge | 15 to 19° | 19 to 25° | Fire pit seating, lake chairs, and long relaxed sits. |
| Over-reclined | 20° or more | 25° or more | Mock up carefully; getting out can become awkward. |
| Calculated value | Formula used | What it controls | Cut-list note |
|---|---|---|---|
| Seat slope angle | atan(seat drop / depth) | How far the sitter settles toward the back. | Use as the side rail or seat support bevel reference. |
| Back angle above floor | 90° - back recline | Visual lean of back slats from horizontal floor. | Square-cut complement for back support layout. |
| Rear leg rise | rear height + back rise | Vertical reach of rear support toward the back top. | Check against stock length and top rail location. |
| Projected footprint | seat run + back projection + leg spread | Front-to-back space the chair occupies. | Compare with deck, balcony, and fire-pit clearance. |
| Cut location | Typical angle | Set saw from square | Layout reminder |
|---|---|---|---|
| Seat side rail bevel | 8 to 15° | Seat slope angle | Match both rails so slats sit in one plane. |
| Back support lean | 12 to 20° | Back recline value | Measure from vertical, then confirm with a side template. |
| Rear leg foot cut | 8 to 18° | Calculated leg cut | Use the floor contact angle after stance is finalized. |
| Arm support notch | 0 to 6° | Usually minor | Keep the arm level or slightly rising toward the back. |
| Project size | Seat depth | Back height | Footprint planning |
|---|---|---|---|
| Compact balcony chair | 17 to 19 in | 27 to 31 in | Keep projection under about 32 in when possible. |
| Standard adult chair | 20 to 22 in | 31 to 35 in | Expect roughly 34 to 40 in front-to-back. |
| Tall lounge chair | 22 to 24 in | 35 to 39 in | More recline can push footprint past 42 in. |
| Easy-rise chair | 19 to 21 in | 30 to 34 in | Use a smaller drop and higher rear seat. |
The thrill of building a piece of outdoor furniture quickly turns to worry when plans is unclear about angles. Okay you’ve picked your lumber and maybe even stained it, only now do you notice that the geometry is sketch. There’s supposed to be a bevel on the side rails; those back supports should inclines backward. One wrong degree on one cut and the chair feels all wrong, it won’t balance level. When you sit in it, it slides back under you. Frustration shows that geometry is just as important than a sharp saw.
Before your first permanent cut, the calculator lets you sketch out the leg rise, back recline and seat drop. The seat has a slope and the back have an angle. In most folks’ minds, these are two independently adjustable parameters. But, in the mechanics of an Adirondack chair, they’re connected. As you drop the rear of the seat (to produce a more lounge-like feeling), the sitter sinks deeper into frame. And if you don’t also relax the back, it will seem as though the chair is tugging you forward. The result is an awkward posture where your spine and hips fight for position. You can use the tool to play with these variables simultaneously, allowing you to observe the effect of steeper seat slope on the need for more relaxed back angle to achieve ergonomic harmony.
Why Angles Matter in Chair Design
How exacting you can afford to get on those angles depends a lot off the materials you’re using. Softwoods such as pine respond different to compression than cedar and cypress, which are forgiving woods that will stand up well outdoors. If you construct it from pine (and paint it), you may discover that an inflexible mathematical cut is too severe after the joints relaxes. Conversely, hardwoods such as acacia or oak is closer to stone. They retain their crisp angles well without any give at all. Because of this rigidity, a bit of boldness in your calculated recline will result in an unforgiving feeling of firmness in the chair. The calculator does the geometry, but you still should of factor the personality of the material into your head.
Another variable often overlooked until it’s too late is footprint. A long-seat-depth, deeply reclined chair will take up far more real estate then you may think. Add in its back projection and you’ve added several inches to the length of the chair at its back. Those inches matter on a cramped deck or balcony. You may have designed the most beautiful lounge chair but now it doesn’t physically fit between table and the railing. Measure out your projected footprint early to save yourself from building a masterpiece that has nowhere to live.
The ultimate test of good design is getting out. In theory, every additional degree of seat drop are relaxing. But the harder you have to push to get up, the less inviting the seat becomes. A steep slope presents a trap for those with limited mobility (older adults, guests) or anyone who wants to sit back and relax in a chair. The easy rise design makes rising from the seat less of an effort by keeping angle gentle and the rear seat higher. It is much more inviting to a wider range of users. It is a small adjustment, it makes a dramatic change to the social dynamic of the piece.
The best insurance policy is to mockup the side profile. Clamp some scrap boards to match your figured out back lean, front height and rear height before committing to finished stock. Then sit in that mockup frame. Where does your lower back contact the support structure? Tweak the lumbar point until it’s naturaly. Ten minutes of clumping together some scraps of wood will save you hours of planing and sanding down the line. Use the mockup as a way to confirm your angles, then apply those measurements confidently to your finished product. Your body will tell you when it feels comfortabley. Let the math guide the structure, let yourself guide the fit. That’s the line between a chair that merely sits there and one people want to spend hours sinking into.