📐 Baseboard Angle Calculator
Find the exact miter & bevel angles for perfect baseboard cuts — inside corners, outside corners & sloped ceilings
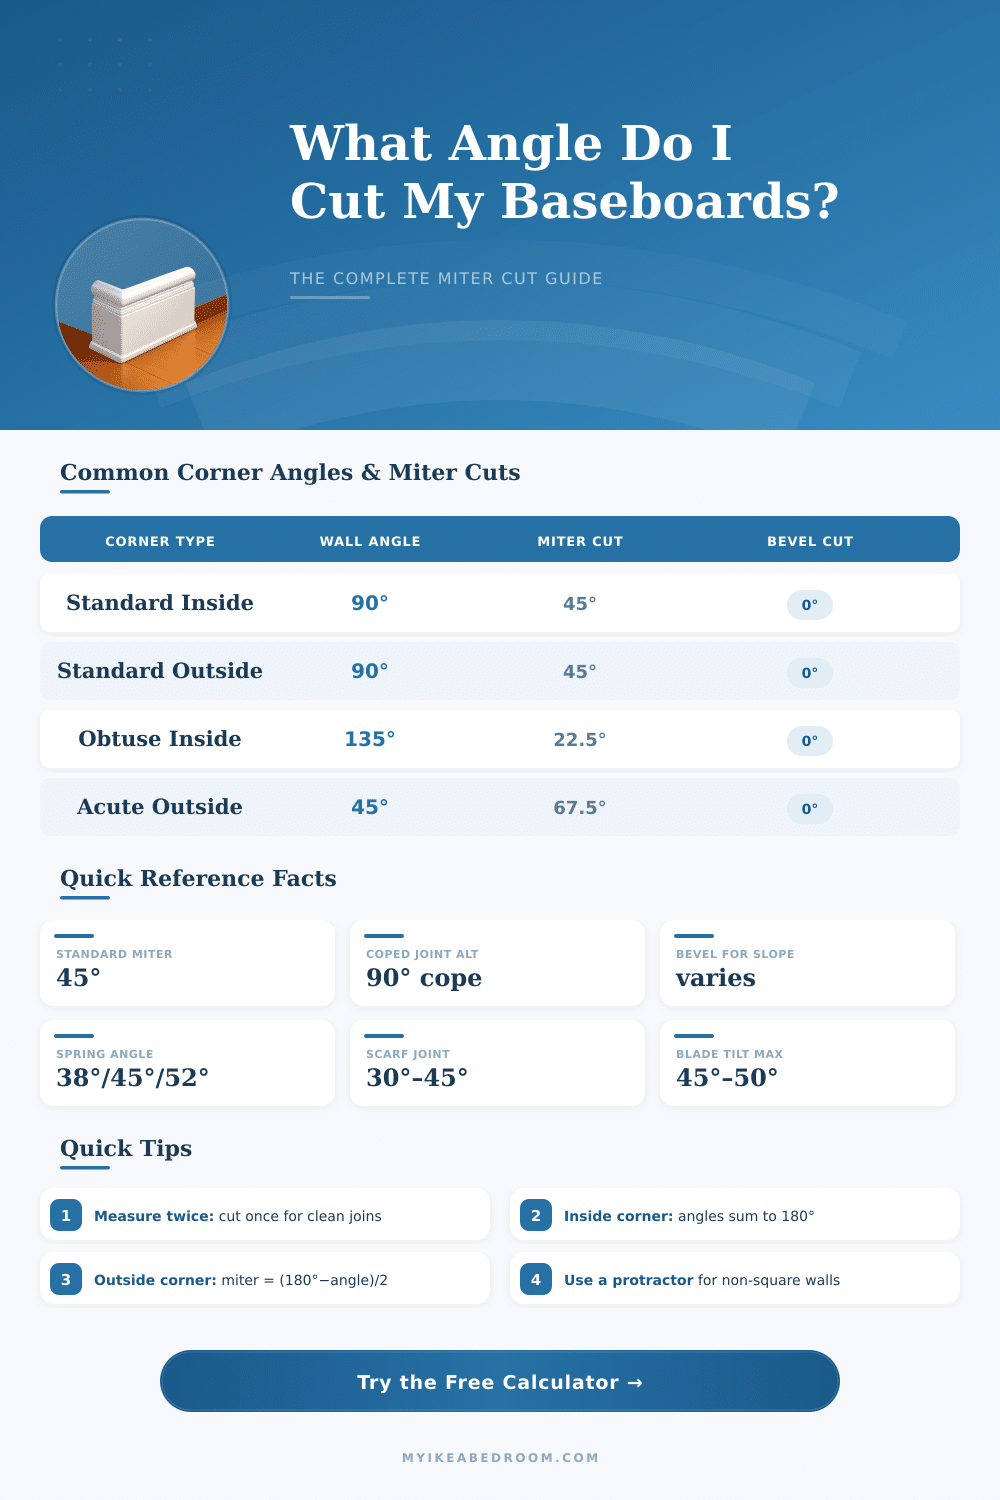
| Wall Corner Angle | Corner Type | Miter Angle (each piece) | Saw Setting | Notes |
|---|---|---|---|---|
| 90° | Inside | 45° | 45° left / 45° right | Most common |
| 90° | Outside | 45° | 45° left / 45° right | Mirror cuts |
| 135° | Inside | 22.5° | 22.5° each | Bay windows |
| 135° | Outside | 22.5° | 22.5° each | Bay windows |
| 120° | Inside | 30° | 30° each | Hexagonal rooms |
| 120° | Outside | 30° | 30° each | Hexagonal rooms |
| 60° | Inside | 60° | 60° each | Acute inside |
| 60° | Outside | 60° | 60° each | Acute outside |
| 45° | Inside | 67.5° | 67.5° each | Very acute |
| 150° | Inside | 15° | 15° each | Obtuse inside |
| Spring Angle | Corner Angle | Miter Setting | Bevel Setting | Position |
|---|---|---|---|---|
| 38° spring | 90° inside | 31.62° | 33.86° | Flat on table |
| 38° spring | 90° outside | 31.62° | 33.86° | Mirror cut |
| 45° spring | 90° inside | 35.26° | 30° | Flat on table |
| 45° spring | 90° outside | 35.26° | 30° | Mirror cut |
| 52° spring | 90° inside | 38.94° | 25.84° | Flat on table |
| 52° spring | 90° outside | 38.94° | 25.84° | Mirror cut |
| 38° spring | 135° inside | 15.16° | 17.21° | Bay window |
| 45° spring | 135° inside | 17.63° | 15° | Bay window |
| Run Length | Recommended Scarf Angle | Saw Setting | Notes |
|---|---|---|---|
| Under 8 ft (2.4 m) | Single piece | N/A | No scarf needed |
| 8–12 ft (2.4–3.7 m) | 30°–45° | 30°–45° | Joint over stud |
| 12–16 ft (3.7–4.9 m) | 45° | 45° | Stagger joints |
| Over 16 ft (4.9 m) | 45° | 45° | Use 2+ scarfs |
Whether you plan to install baseboard against walls, that is not entirely straight? Here is the moment when everything starts to get hard. Even those corners, that seem to be exactly at 90 degrees, often are 89 or 91.
Because angle slices require precise form, even little differences cause visible gaps that show under light.
How to Cut Baseboards for Uneven Corners
The natural reaction is cut at 45 degrees for a usual 90-degree corner. Even so I found something more efficient: cut only a bit under 45 degrees, at least 44, so that the pieces fit more flatly. A good method is prepare some samples at 44, 45 and 46 degrees, label them well and check, whether they match, before touch the main material.
Here is a simple formula, that helps for any corner, that you meet. Take 180, subtract the real measure of your corner, later divide the result by two. For an ideal 90 degrees it gives 45.
If the walls meet at a wierd corner, the same calculation always works well.
For internal corners you need an entirely other method. Copy-cutting gives better results than angle slices. The first bit is cut directly against the corner.
For the second one does a 45-degree angle cut, later cut the profile part by means of a back slice, so that it fits flatly to the first. That method allows more room for error, if the room shape is not perfect. One can use a coping saw, spiral saw or even a flap disc on an angle grinder…
Although that last does a whole dust cloud.
Exterior corners work otherwise. Around 46 degrees usually works best for outsides, while 44 degrees helps well four internal angle cuts. If little gaps appear, one can fill them with silicone or a wax stick before painting.
For odd corners a sliding bevel or digital angle measurer becomes your best friend. Fix the bevel in the corner, copy it on paper, later use a compass for halving it. It does not matter, if you do not know the degree…
The compass gives the right angle. Another way, that helps, is cut short samples in one-degree differences over and under 45, later check until something fits well. Attempts on cheap pieces before the main material saves a lot of stress and useless expense.
For long lines of ceiling trim or baseboard, that goes past your piece length, lap joints do the task easy. Cut matching 45-degree bevels, later stick and click where they overlap. When baseboard meets stairs, place two cheap bits on the stringer and the flat part, mark their crossing point and draw a line between those spots to know, where to cut.
Always leave pieces a bit longer, so that fixing is possible. Only think, that an angle cutter does notalways show the same as a scale, so check every case yourself.