Weight Plate Rack Capacity Calculator
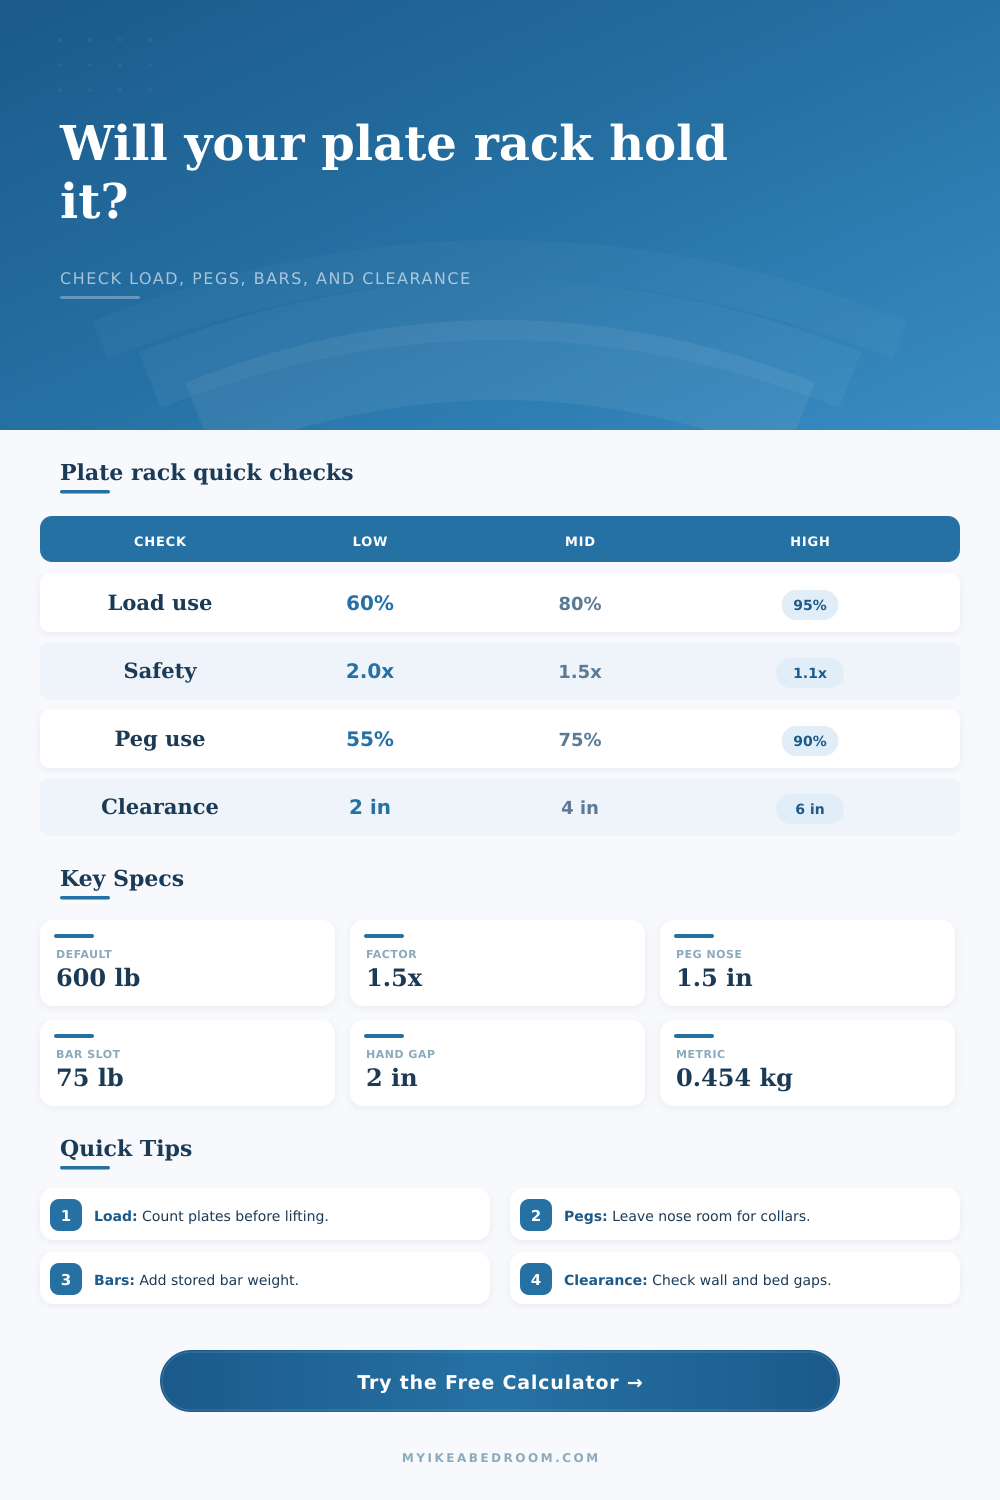
Check plate counts by size, plate thickness, usable peg length, rack rating, stored bars, side clearance, total load, and safety factor before loading a home gym rack.
1Rack presets
Start with a common home gym loading pattern, then adjust every count, thickness, rating, peg, and clearance value to match the rack in the room.
2Rack and room inputs
3Stored bar inputs
4Plate counts and thickness
Enter total plates on the rack. Thickness should be the real measured plate width, because bumper plates often run out of peg length before the rack reaches its load rating.
Rack capacity result
5Quick rack spec grid
6Plate size reference
| Plate size | Metric equivalent | Typical thickness | Typical diameter |
|---|---|---|---|
| 45 lb Olympic iron | 20.4 kg | 1.25 to 1.6 in | About 17.7 in |
| 35 lb iron | 15.9 kg | 1.1 to 1.4 in | About 14 in |
| 25 lb iron | 11.3 kg | 0.9 to 1.2 in | About 12 in |
| 10 lb change plate | 4.5 kg | 0.7 to 1 in | About 9 in |
| 5 lb change plate | 2.3 kg | 0.55 to 0.85 in | About 7.75 in |
| Bumper 45 lb plate | 20.4 kg | 2.25 to 3.5 in | About 17.7 in |
7Peg length capacity table
| Usable peg length | After 1.5 in nose | Approx iron 45s per peg | Approx bumper 45s per peg |
|---|---|---|---|
| 6 in | 4.5 in | 3 plates at 1.38 in | 1 plate at 3.25 in |
| 8 in | 6.5 in | 4 plates at 1.38 in | 2 plates at 3.25 in |
| 10 in | 8.5 in | 6 plates at 1.38 in | 2 plates at 3.25 in |
| 12 in | 10.5 in | 7 plates at 1.38 in | 3 plates at 3.25 in |
8Rack rating and load table
| Rack rating | Usable at 1.25x | Usable at 1.5x | Usable at 2.0x |
|---|---|---|---|
| 300 lb | 240 lb | 200 lb | 150 lb |
| 600 lb | 480 lb | 400 lb | 300 lb |
| 900 lb | 720 lb | 600 lb | 450 lb |
| 1200 lb | 960 lb | 800 lb | 600 lb |
9Clearance and storage table
| Setup | Main check | Useful clearance | Capacity note |
|---|---|---|---|
| One-sided wall rack | Largest plate radius plus hand gap | 11 to 12 in for 45s | Good when load is fastened and rated for wall use |
| Two-sided plate tree | Full plate diameter plus hand gaps | 22 to 24 in for 45s | Balance left and right pegs to reduce twisting |
| Bedroom corner rack | Bed edge, wardrobe door, and walkway gap | 24 in or more works better | Short pegs usually limit storage before rating |
| Bar-and-plate stand | Bar slots plus plate load together | Allow bar sleeve swing space | Stored bars count against the total rack load |
10Rack measuring tips
The plate rack arrives. It is nice and stout, keeping things tidy in the space. Instead of the iron jumbled on the garage floor, lets have it resting on something strong. And the box says it will hold six hundred pounds.
Sounds like plenty until you go to load up all those plates. Then you discover it’s about more than weight; there is length, clearance, and other shape factors as well. Maybe the thing can handle the weight, but maybe the bulk isnt handled by the pegs. If you don’t plan, you’ll end up with a forty-five pound plate on your toe (or worse yet bend a peg beyond repair).
More Than Just Weight
The thing is most folks think of just the overall weight rating. Six hundred pounds… cool. I can load it up. What they fail to realize is that bumper plates are thick. Those Olympic bumper plates can measure more than three inches thick.
If you use an eight inch peg as a typical example, you may only be able to get two plate on before bumping into the rack face. Enter in your peg length and plate thickness, and the calculator figures out the rest. It spares you having to guess whether or not your stack will fit before it hits the weight limit. Sure you could of had a rack rated for a thousand pounds. But short pegs will present a physical block well before the actual structural block.
There is also the addition of bars. Many times people put their barbells in the same rack as their plates. A standard Olympic bar weigh forty-five pounds. Specialty bars can be as much as thirty pounds or more. Two bars will add an additional ninety pounds of dead weight to the overall rating.
That also has an effect on balance. Putting heavy bars on one side and light change plates on another is a twisting issue. The rack doesn’t give a hoot about symmetry, it reacts to stress on the frame and the floor mounts. Consider the bar weight when calculating the total load. Dont just consider the plate weight.
Home gym clearance issues arise when you buy furnitures like beds with no idea how wide they are (or the swing of doors on wardrobes). Your racks goes into corners. Yet there’s never enough space between the rack and a big plate to get your hands under it while sliding it back on its peg. A two inch hand gap is a bare minimum for room when sliding plates.
Whenever you pull weight off the bar, you see how tight the clearances are. The plate scrapes down the wall. The bench blocks your route. Why cant I exercise where I want? Measure from the middle of the rack to the closest obstruction. That way you wont feel that constant friction.
There are safety factors for a good reason. For storage in the house, a common safety factor is 1.5x. That’s why they say you should use 2/3rds of what the rack can hold (i.e., if the rack holds 100 pounds, then don’t put more than 66 pounds on it). The other 33% is a safety factor.
This isn’t static weight; it’s dynamic weight when you drop a plate with some momentum. Impact weight isnt the same thing as static weight. Putting yourself at 95% of rated capacity doesnt allow any margin for error. You’re one dropped plate away from going over the edge. Staying under 80% of the rated capacity provide the frame with breathing room. It prolongs the life of the pegs and the metal.
This is shown in the reference table on that page and explains the usable length after taking away nose allowance. At minimum, I would use an inch and a half of free peg at the end. Why? So they dont hang down off the edge and get tipped over. Also, it’s easier to grab a hold of.
You’ll notice if you try sliding a plate on, you don’t want it to go all the way to the tip. Doing this will save your pegs from bending over time.
Your rack is a system, not just a shelf. Consider the weight of items on the floor. If you have a six hundred pound load on a narrow footprint, that’s going to put more stress on your floor joists. That might be a concern in an apartment where there are people living beneath you. Less so in a garage. But it will impact stability over time.
If you’re putting heavy iron on a second story, check the floor plan limits. You want to be able to get in the gym, and have your gear set up so it fits. So you can just reach over, pick up a bar, and load some plates. Everything has its place, so when you come home from work, you walk into the gym and you don’t break your back getting stuff out.
You plan for the right amount of weight and now you’re not thinking about what’s in the rack, you’re thinking about the lift. Now the rack doesn’t move from the floor and the iron doesn’t go anywhere but where you placed it. That’s the kind of rack that lasts.