Home Gym Equipment Footprint Calculator
Estimate the room area, active clearance, mat coverage, wall spacing, overlap, and ceiling height needed for one machine or a compact multi-station home gym.
Pick a starting layout, then adjust the machine dimensions, clearance, mats, ceiling, and room size to match your space.
Switch between feet and inches or metric labels. Presets convert automatically and all geometry is calculated internally in inches.
Footprint results
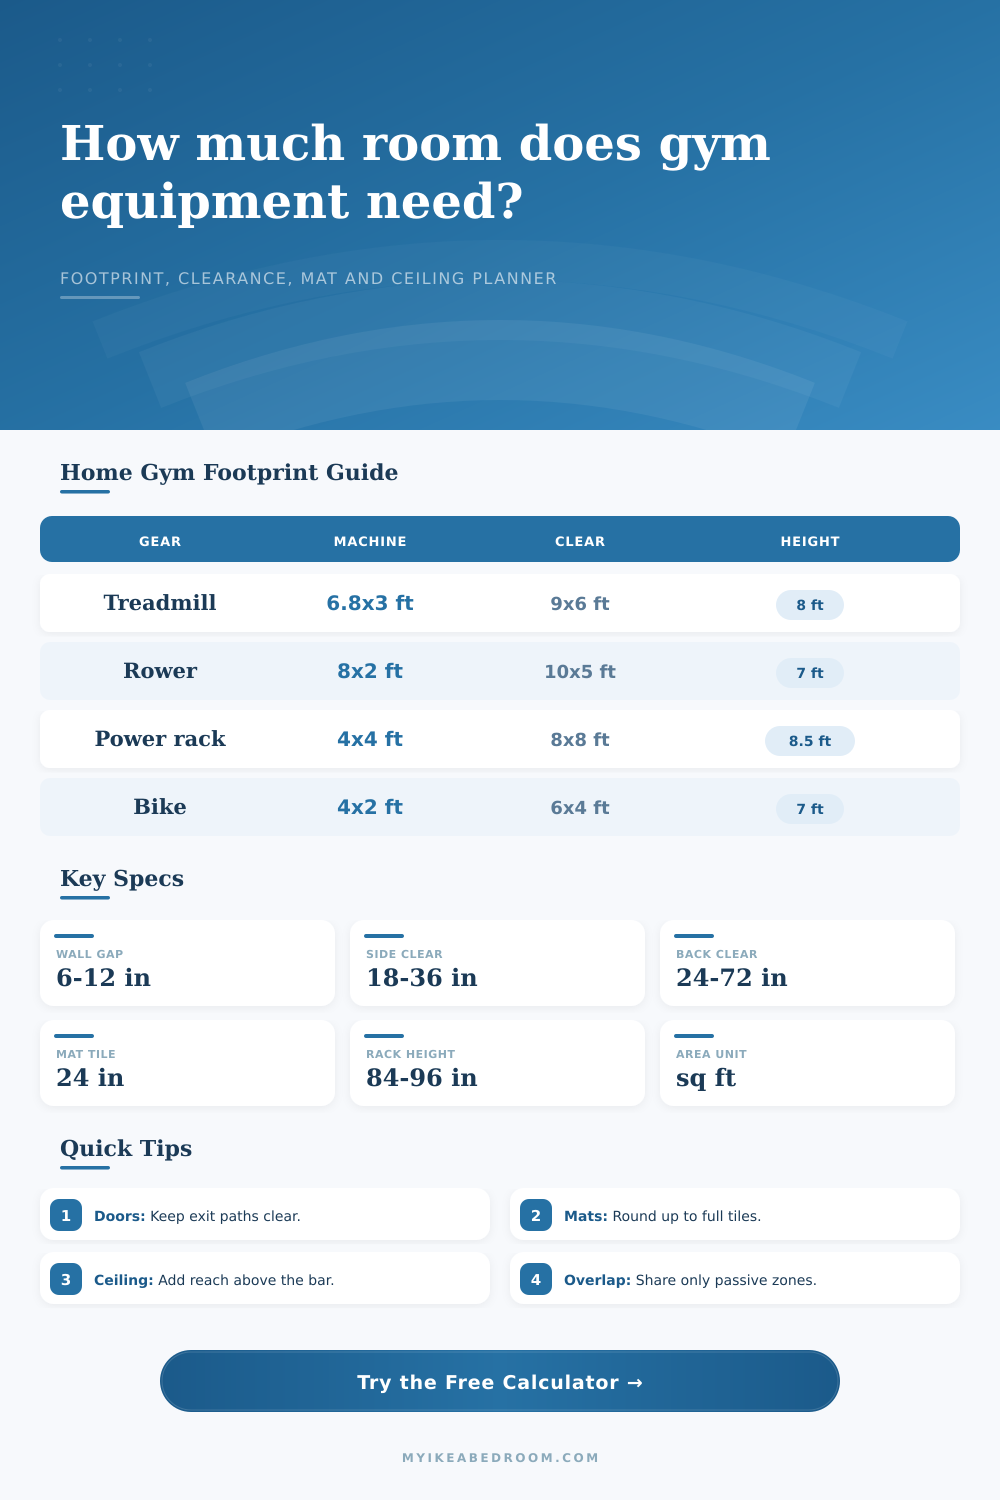
| Equipment type | Machine size | Common clearance | Ceiling note |
|---|---|---|---|
| Treadmill | 78 to 84 in long, 32 to 36 in wide | 24 in front, 72 in rear, 24 in sides | Deck height plus head bounce; 8 ft is comfortable for many users. |
| Elliptical | 70 to 84 in long, 26 to 34 in wide | 20 in front and rear, 24 in sides | Check pedal height plus user height; low ceilings can be tight. |
| Rower | 84 to 96 in long, 20 to 24 in wide | 18 in sides, 24 in rear, 18 in front | Usually low ceiling demand, but needs a long unobstructed rail path. |
| Power rack | 48 to 60 in deep, 48 to 72 in wide | 36 in front, 36 in rear, bar width to each side | Rack height, pull-ups, and overhead presses may need 8.5 ft or more. |
| Bench and dumbbells | 52 to 60 in long, 18 to 24 in wide | 30 in sides, 36 in front and rear | Flat bench is low; standing presses need user reach allowance. |
| Mat approach | Best use | How to size | Planning note |
|---|---|---|---|
| Machine mat | Bike, treadmill, elliptical | Machine length and width plus 3 to 6 in each side | Keeps sweat and vibration under the equipment footprint. |
| Tile grid | Rack, dumbbells, mixed station | Round length and width up to full tile counts | The calculator rounds up based on the tile size field. |
| Open training zone | Yoga, mobility, kettlebells | Use body span plus movement clearance | Keep swinging, stepping, and floor work clear of furniture. |
| Shared platform | Rack plus bench or cable trainer | Use the largest active station, then add aisle reserve | Overlap only the standing aisle, not the lift path. |
| Room size | Area | Usually fits | Watch item |
|---|---|---|---|
| 8 by 8 ft | 64 sq ft | Bike, bench, rower stored flat, open mat | Door swing and side clearance can consume the room quickly. |
| 10 by 10 ft | 100 sq ft | Treadmill, elliptical, bike plus mat work | Keep rear treadmill clearance and walk path separate. |
| 12 by 12 ft | 144 sq ft | Rack or functional trainer plus bench zone | Ceiling and barbell side clearance matter more than area. |
| 12 by 20 ft | 240 sq ft | Two to three stations with shared aisle | Plan overlap by movement direction, not just square footage. |
| Clearance | Low | Comfort | Use when |
|---|---|---|---|
| Side movement | 18 in | 24 to 36 in | Mounting machines, dumbbell reach, rowing handles, or spotting. |
| Rear movement | 24 in | 36 to 72 in | Running decks, bench walk-around, rack spotting, or rower exit. |
| Wall spacing | 3 in | 6 to 12 in | Protecting walls, handles, cords, plugs, and moving arms. |
| Shared aisle | 21 in | 30 to 36 in | Moving around two or more stations in a small room. |
A new treadmill is exciting, until you realize that it will barely fit through the door and squeeze into your space. And then there’s the space for running on the thing. Spatial panic! Planning where a treadmill fits are more important than checking its motor horsepower. Most people will measure their treadmill. But they will fail to measure the person moving around it. A dozen inches can make the difference between having a usable gym or a cluttered storage closet. And I’ll bet you didn’t draw out that space when you first sketched it.
Rather than leaving this to your (potentially inaccurate) guesswork, the calculator handles geometry so you don’t have to guess which zone overlaps with which. Instead of just using the static dimensions of the frame, it encourage you to think about active movement paths. For instance, when you choose a power rack, the calculator doesn’t simply view the four feet of steel resting on the ground. It takes into account weight-loading safety, overhead press height, and barbell travel. Why? Because while a given rack may fit within the corner, you may not be able to step back far enough to catch a barbell, rendering the entire rack useless.
How to Measure Your Home Gym Space
The thing people forget most when designing a gym at home: ceiling height. Eight-foot residential ceilings sound like plenty. However, there is an eighty-five-inch-tall power rack. You will also need some headroom for yourself and a buffer zone in case you throw things up. An eight-foot ceiling becomes a functional limitation if you’re six-feet tall and intend to perform military presses and/or pull-ups. The tool will automatically check your vertical clearances. It will warn you if the combined height of the equipment and your overhead reach exceed the actual room height. No more awkward crouches on deadlift.
Then there’s flooring. Mats are also sold in set sizes which add another layer of difficulty. If you want one half of a mat tile, you can’t buy that. The calculator will round the mat area you need up to the next highest number of whole tiles. Why does this matter? Budget-wise, if you overestimate the mat footprint, you end up with excess rubber you’ll never be able to use. Underestimate the footprint and you’ll have bare spots where the machine weight might poke holes in your floor. A major error is putting down a mat underneath the machine then calling it good. We recommend adding a buffer all the way around to protect from vibration, sweat, and the occasional misfire when stepping off.
Equipment clearance will differ greatly based off what piece of gym equipment is being used. For example, a rowing machine need a long, narrow slide path, while a spin bike requires a wider, shorter footprint. The chart below provides an idea of typical clearance dimensions as a starting point. Adjust accordingly if you have a custom-built frame or a smaller size than average. But be aware that going outside the norm puts you at risk. Sure, reducing side clearance may save some square footage when setting up a bench press station. This, however, leaves no room for you or the spotter to stand during a lift. It further prevents you from comfortabley racking the weight once done.
Overlap is something that multi-station layouts bring in. You may be able to share aisles and still save space while maintaining safety. For example, you might have a bench with a rack behind it. That’s overlap. Just use the tool to add an overlap percentage to your passive zone (in this case, the aisle). But when you overlap active zones (like where someone swings their kettlebell or sits down on a treadmill), it makes sense for it to tell you not to do that. Why combine two dangerous spots into one tight area?
Ultimately, you want everything to be intentional. Buying less saves more than just money; it also keeps you from finding out your new equipment takes over the room after you measure twice and calculate once. Your workout shouldn’t feel like an obstacle course. Identify the constraints. Let the math draw the lines for you. Then put the gear into place in that space.
The greatest home gym isn’t the one with the most equipment. The greatest home gym is the one where you have enough space to walk freely among the things you purchased.