Clamp Quantity for Glue Up Calculator
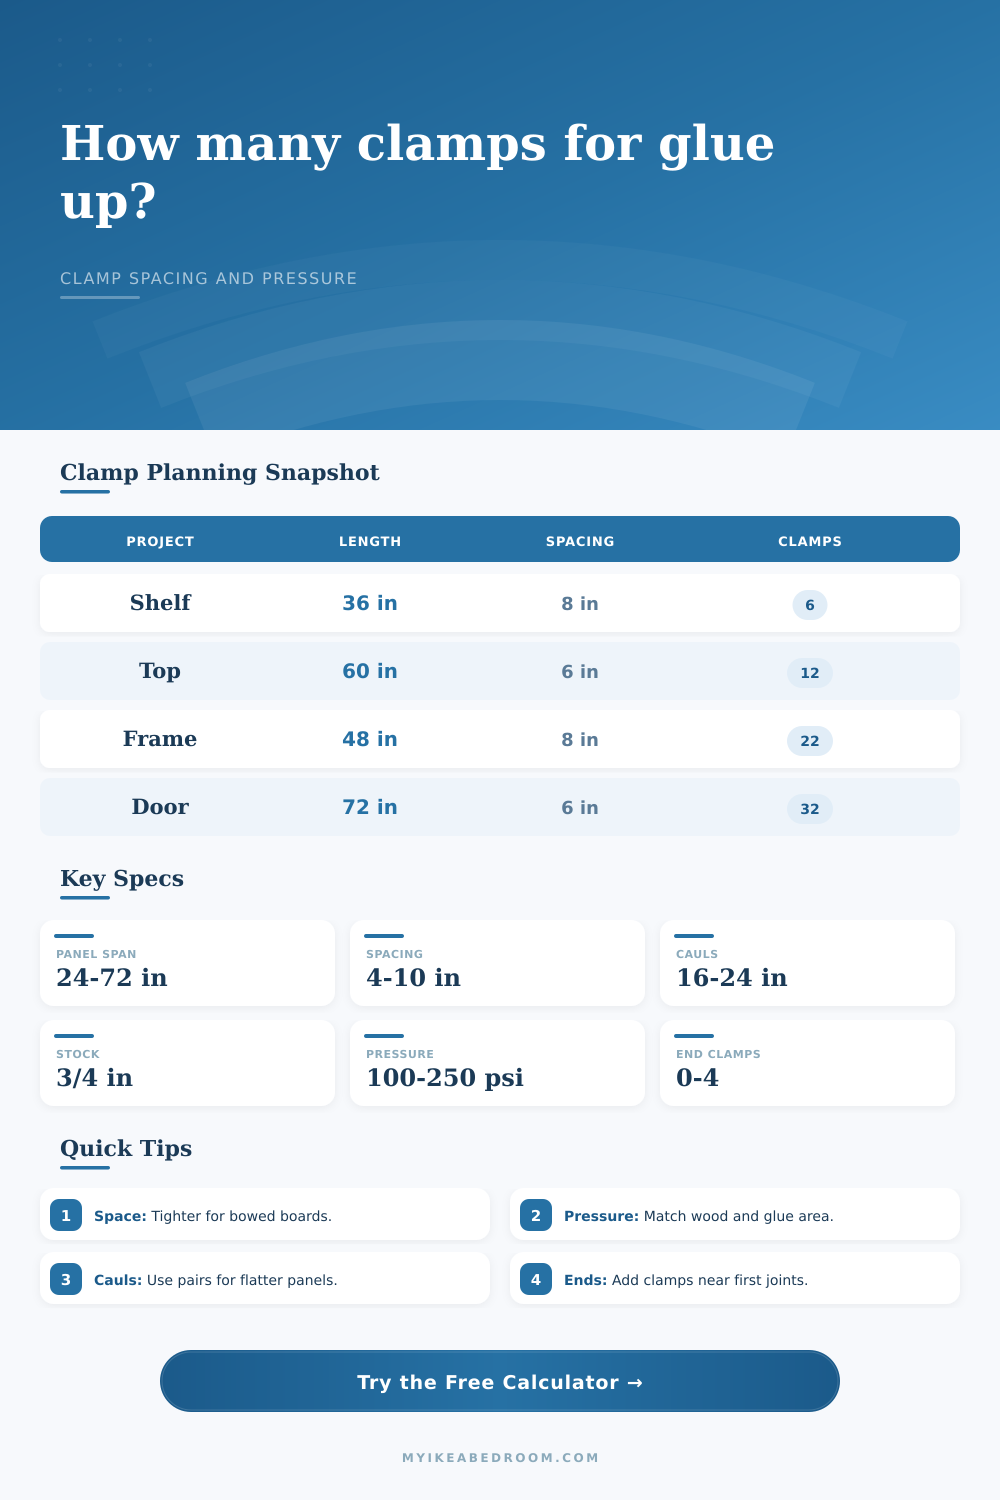
Estimate clamp count for edge-glued panels or rectangular frames using panel size, stock thickness, clamp spacing, caul spacing, pressure class, alternating sides, and extra end clamps.
🔧Glue-up presets
📏Glue-up inputs
Core formula: spacing count is compared with pressure count, then extra end clamps, caul pairs, frame corners, and alternating-side distribution are added to the final plan.
Glue-up clamp plan
📊Clamp pressure quick cards
📐Clamp spacing reference
| Spacing choice | Metric equivalent | Best use | Planning note |
|---|---|---|---|
| 4 in | 10.2 cm | Thin strips, bowed boards, high pressure | Use when alignment is fussy or when narrow clamps provide modest force. |
| 5 to 6 in | 12.7 to 15.2 cm | Most cabinet and furniture glue-ups | A dependable starting point for panels, shelves, tops, and small laminations. |
| 8 in | 20.3 cm | Straight stock with good edges | Often enough when joints close evenly during a dry clamp test. |
| 10 to 12 in | 25.4 to 30.5 cm | Light-duty work and stable boards | Check squeeze-out and joint closure carefully before committing to glue. |
📏Caul spacing and quantity guide
| Caul spacing | Metric equivalent | Typical panel | Quantity logic |
|---|---|---|---|
| No cauls | 0 cm | Short, thick, very flat assemblies | Calculator returns zero caul pieces when this option is selected. |
| 12 to 16 in | 30.5 to 40.6 cm | Thin boards or alignment-sensitive tops | Use paired top and bottom cauls at each station across the length. |
| 18 to 24 in | 45.7 to 61.0 cm | Common shelf, tabletop, and dresser glue-ups | The calculator counts one pair at each caul station plus both ends. |
| 30 in | 76.2 cm | Heavy stock or light flattening help | Use only when boards are straight and clamps can pull joints closed evenly. |
💪Pressure class reference
| Pressure class | Target psi | Useful for | Calculator effect |
|---|---|---|---|
| Light | 100 psi | Softwood, thin panels, delicate parts | Lower total force demand, but spacing still sets a practical minimum. |
| Standard | 150 psi | Furniture panels, shelves, dresser tops | Balanced default for many bedroom and cabinet projects. |
| High | 200 psi | Hardwood edge joints and wider glue lines | May increase clamp count when the glue-line area is large. |
| Dense | 250 psi | Hard maple, dense lamination, stubborn joints | Uses the strongest pressure target and benefits from tighter spacing. |
🛠Edge glue vs frame logic
| Mode | Clamp direction | Glue area estimate | Special additions |
|---|---|---|---|
| Edge-glued panel | Clamps span the panel width and repeat along length | Length x stock thickness x estimated joint count | Extra end clamps and optional top/bottom caul pairs. |
| Rectangular frame | Clamps pull rails and stiles from all four sides | Four corner joints x member width x stock thickness | Corner pressure is included, then end clamps add reserve. |
| Alternating panel | Every other clamp flips above and below | Same glue area as panel mode | Calculator splits count into top and bottom clamps. |
| One-side layout | All clamps placed from one face | Same glue area, less flattening balance | Calculator keeps all primary clamps on one side. |
💡Glue-up planning tips
When gluing a table top you plan the hardware before you even mix the adhesive. While glue is sitting out you discover that all of a sudden you only have 3 clamps and want them spaced out over a span of sixty inches. Panic sets in as you now know the laws of physics are not going to bend to your will.
Time, alignment and pressure are factors in a glue up. Take an uninformed stab at it and you will have a wavy mess. What you want is strong joints that is flat. How much force does each joint need? How many joints do you need to close? Most people figures out how many clamps they have and go from there. That’s backwards.
How to Plan Your Glue-Up
Plug in your size panels and how much space you want between them (your desired spacing), and the calculator does the rest. No more “six inches seems like enough” guesstimates…or so we hope!
Spacing matters. If you have some warped boards or your pieces don’t line up exactly straight, then go for closer together so there’s no chance of any gaps. Usually cabinets is spaced at six inches, which is fine. But if you’re working with very thin pieces or picky woods, tighten things up by going down to four or five inches. That can make all the difference when you pull out the sander for finishing step. A little tweak now to save an hour later, something we all deserve to get for ourselves!
Another overlooked variable is pressure. Too little, and you fail to squeeze glue all along the joint. Too much, and you crush the wood fibers. You starve the joint of adhesive. You might also blow out end grain. Selecting a pressure class with the tool helps you determine how much pressure to apply.
Laminations can range from light softwoods to dense hardwoods. That’s not “turn-knob-harder” but rather realizing a thick piece of hard maple will require greater total force than a thin pine shelf. If you under clamp, your joint fail. Over clamp, and you risk making a dry joint or even blowing out the end grain. The calculator takes into account glue-line area and desired psi (target) to estimate how many clamps are needed. This is no longer a wild guess at what is realistic.
Flat glue ups have their unsung hero called cauls. Cauls are nothing more than strips of scrap wood applied to both top and bottom of the panel. In other words, they run across the panel perpendicular to the boards. As you clamp down the pieces, this helps hold the edges in line. If you don’t use them, even a good tight clamp job will cause the panel to cup or move from side to side.
What does the calculator want with respect to cauls? It wants information about the spacing between cauls. Why? It tells you how much you’ll need to cut from your scrap to make pieces that align things. Usually on a typical dresser top, eighteen inches apart is plenty. On a thin, delicate panel you may need to space them closer to achieve proper alignment.
And that’s where the clamps come into play. They bring the brute force and the cauls bring the guidance. It is a clever mechanical solution to a complex alignment issue.
Veterans know how to alternate the clamps by placing them on opposite sides of the panel. You don’t want all of your clamps on the same side (top or bottom) because that creates uneven pressure which will cup the panel. Splitting them top/bottom balances the forces. The calculator has an option that does just that. It includes an option to split the total count into top and bottom distributions. Every time there’s a clamp pulling down, there’s probably one pulling up. That way, it keeps the panel flat while drying.
The last safety net is dry clamping. Run the entire setup without any glue. Is it aligned? Are there gaps? If so, move your clamps. Use the numbers that the tool provided as a good place to start. But your eyes will be the final judges.
When you have a good plan for the glue-up, it’s not a race to the finish line. It becomes more of a planned assembly process. You’re walking away with a flat panel. And you’ve got a reputation for doing quality work. So now you don’t have a warping mess on your hands. And you also wouldn’t of run out of clamps; and have a story to tell about it.