Overhead Garage Rack Clearance Calculator
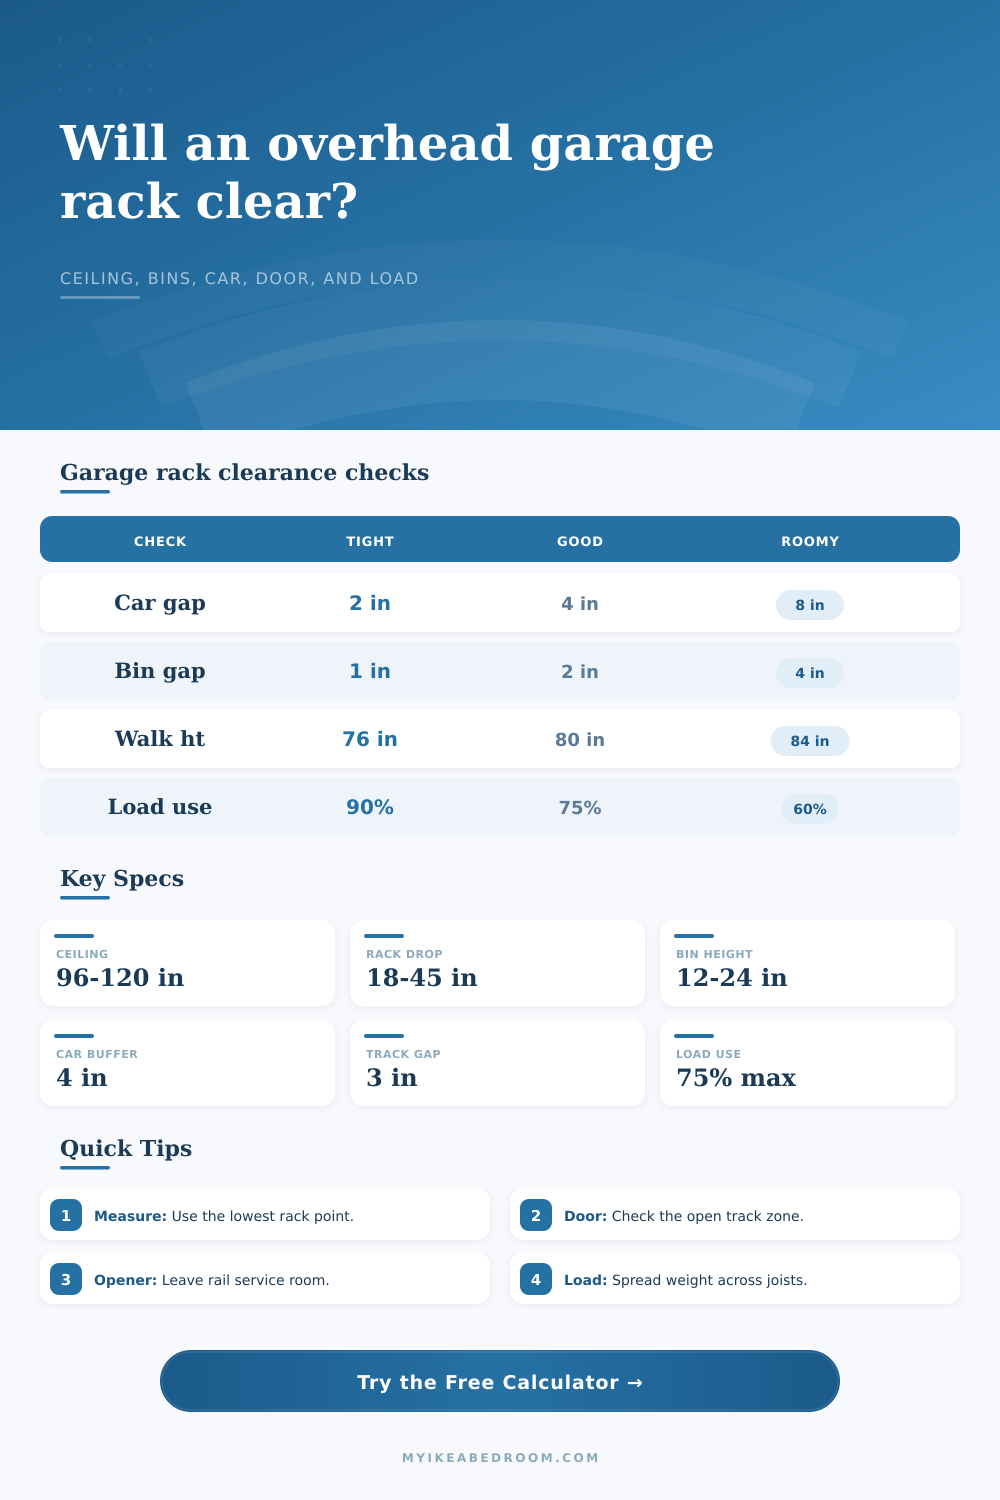
Check overhead rack drop, bin height, vehicle height, door track zones, opener rails, walking clearance, rack size, load rating, and joist spacing before choosing a mounting height.
1Garage rack presets
Start with a close scenario, then replace each value with the lowest real measurement in your garage bay.
2Measured clearance inputs
Garage rack clearance result
3Clearance spec grid
4Rack drop and bin height table
| Rack deck drop | Max bin with 2 in gap | Lowest point on 108 in ceiling | Typical fit note |
|---|---|---|---|
| 18 in | 16 in bin | 88 in with 2 in rail | Best for cars and shallow totes |
| 24 in | 22 in bin | 82 in with 2 in rail | Good for many SUVs if buffers are modest |
| 30 in | 28 in bin | 76 in with 2 in rail | Often tight above tall vehicles |
| 36 in | 34 in bin | 70 in with 2 in rail | Better for side or rear storage zones |
5Vehicle and walking clearance table
| Clearance target | Planning value | Use when | Margin flag |
|---|---|---|---|
| Vehicle roof gap | At least 4 in | Rack is above a parking bay | Under 2 in is a hard caution |
| Walking aisle height | 78 to 84 in | Rack is beside a wall or workbench | Use the tallest regular user |
| Open hatch or liftgate | Measure actual arc | Vehicle opens under the rack | Enter the highest accessory height |
| Sloped driveway | Add 2 to 4 in | Vehicle approaches on an angle | Buffer should be increased |
6Door track and opener rail table
| Obstruction | Where to measure | Common allowance | Calculator check |
|---|---|---|---|
| Horizontal door track | Floor to lowest roller or track edge | 3 in movement gap | Applies in front zone |
| Open door panel | Highest moving panel path | 3 to 4 in gap | Enter as track height if lower |
| Opener rail | Floor to rail, chain, belt, or trolley | 3 in service gap | Applies in opener zone |
| Emergency release | Handle and pull path below rail | Keep reachable | Review before final mounting |
7Load and joist spacing table
| Joist spacing | 48 in crossing dimension | 96 in crossing dimension | Planning note |
|---|---|---|---|
| 12 in on center | About 5 joists | About 9 joists | Many load paths if brackets are aligned |
| 16 in on center | About 4 joists | About 7 joists | Very common garage framing layout |
| 19.2 in on center | About 3 joists | About 6 joists | Verify exact layout before drilling |
| 24 in on center | About 3 joists | About 5 joists | Use broader spread and lower load target |
8Practical measurement tips
The problem with most garage makeovers isn’t that they use crappy hardware; it’s that they use incorrect geometry. Sure, you can install a stylish overhead storage system and fill it to the brim with camping equipment. However, you might discover that every time you back into your driveway, the roof of your SUV clips the lower bar. Sound familiar? It should, because too often we calculate our ceiling height and forget about all the things that live below.
Once you input your exact measurements, the calculator above will do the rest for you, saving you from wasting time guessing on how these unseen conflicts play out in three dimensional space. But the problem lies mostly with the vehicle buffer. Manuals typically recommend several inches of wiggle room. That’s fine if your floor was completely level, and your car sat stationary. Unfortunatly, that’s not how cars work. When your car reaches the threshold ramp, the front end sink down. And when your brakes go on, the car bounces again. For trucks and large SUVs, the taller all-terrain tires only add to the buffer. A four inch gap can quickly become a negotiation.
Why You Need to Measure Before Building
How much do you want your fancy storage rack for your car to be a windscreen? It is a fine line. It can make the difference between a garage and a usable one but you might end up with a dent in your roofline every month.
One other limitation comes from the ceiling. An ordinary eight foot ceiling doesn’t provide much wiggle room at all. If you subtract the depth of your bins and how far they hang down from shelf, you are often left with only a few inches between the contents and your head. That is why I include walking clearance as an input. It seems like nobody is short until they have to walk past the tool rack while carrying a box of tools or a ladder. Add in your tallest person and whatever they are carrying. Then, add a bit more space to avoid hitting your head when you turn around with your arms full. That’s where folks mess this up. They measure for empty hands and neglect the load.
But there’s more: the overhead doors themselves is complicated enough to not be mentioned in the instructions. You have the opener rail (which hangs down from the middle) plus the door track (which goes on the ceiling). How’s that going to fit with your rack? If you put your rack in the middle, will there be enough space to service the trolley? If you put your rack in front of the door, how’s the door going to clear the door when it opens? The door doesn’t open straight up and down; instead, it arcs out (hence ‘overhead’ door… get it?).
The tool checks all those obstructions against where you place your racks. So you don’t go through life cracking the door panel or blocking the emergency release each time you exit for work. It is a storage check as well as a safety check.
The last part of this puzzle is load distribution. There’s nothing worse than hanging a six-hundred pound rack off some drywall anchors and learning a very expensive lesson about gravity. The calculator will estimate the number of joists that your rack will span so that you can determine whether you can apply a standard load factor or have to scale back on your target weight. If you are storing engine parts or heavy tires, you want to hit actual wood framing and not just the surface of the ceiling. This prevents the rack from being pulled out of the wall and also prevents the ceiling from sagging as it tries to bear all the weight.
Go through the process mentally before drilling one hole. Get in the car. Open the door. Walk past the rack with a box in your hand. Go through anything you need to do with that box and if there’s any movement that’s even slightly restrictive, the numbers will tell you what’s up. Tweak the rack drop or adjust the bin height so that there’s room for human error based off the math. You’d rather sacrifice a foot of storage space than have a dent in your ride. Measure twice, count once and sleep easy knowing it won’t hit you in the head.