Trampoline Clearance Calculator
Plan a trampoline safety zone from diameter or rectangular frame size, side clearance, 24 ft overhead target, rectangular footprint area, and obstacle setbacks in every direction.
Start with a common frame size, then adjust the clearance band and measured obstacles for the actual yard location.
Live planning snapshot
Clearance results
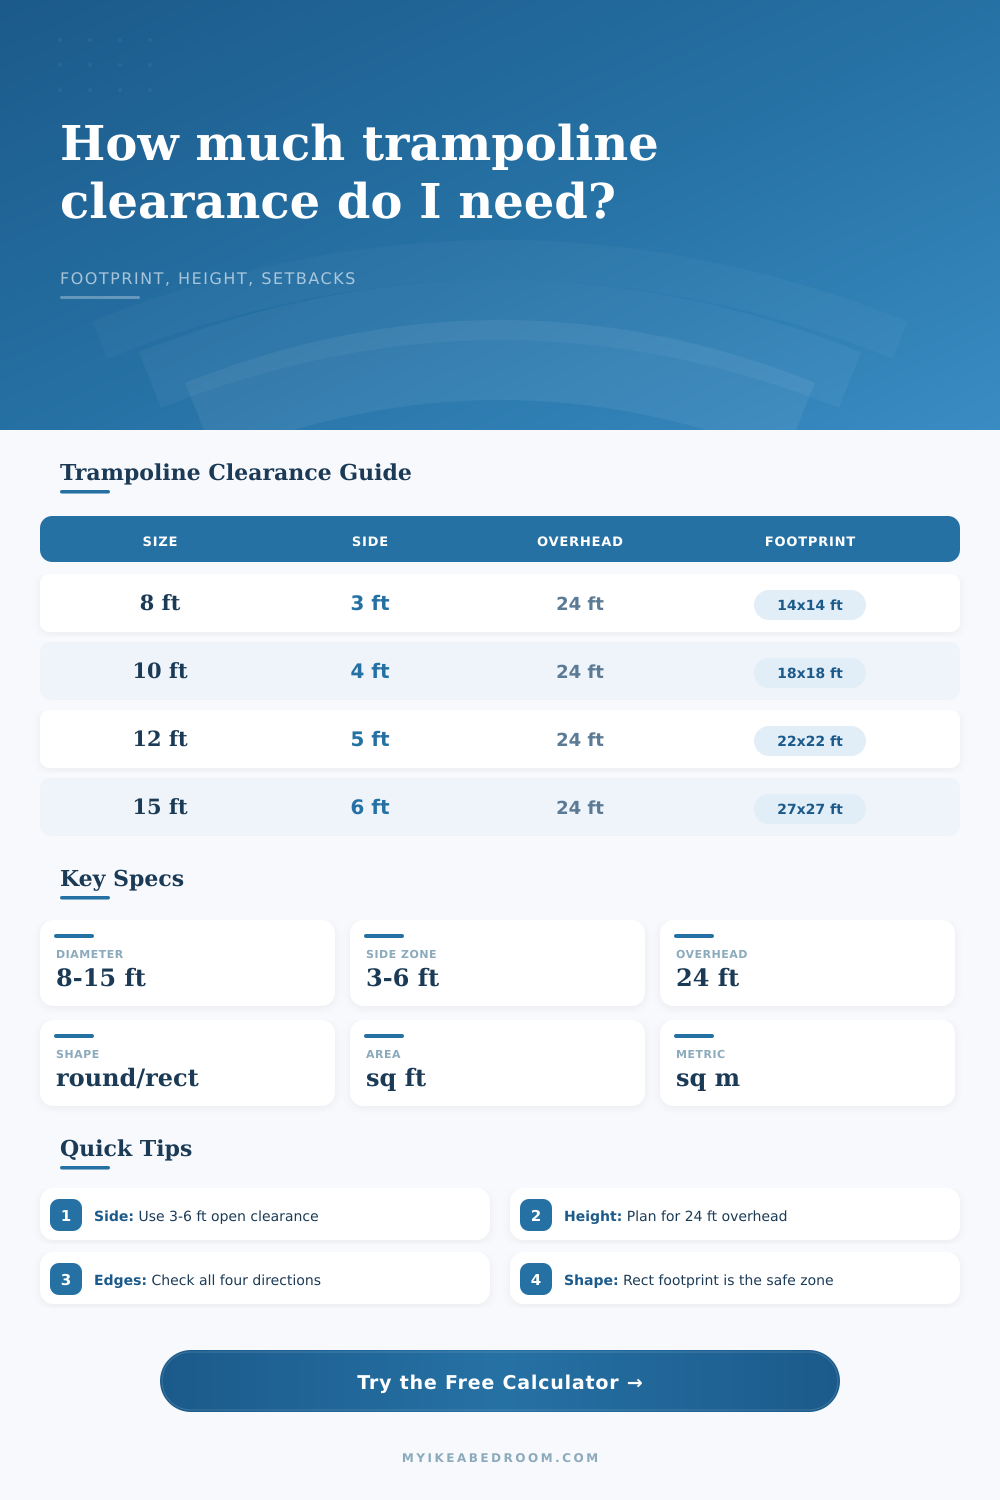
| Frame diameter | 3 ft side clearance | 4 ft side clearance | 5 ft side clearance | 6 ft side clearance |
|---|---|---|---|---|
| 8 ft round | 14 x 14 ft / 196 sq ft | 16 x 16 ft / 256 sq ft | 18 x 18 ft / 324 sq ft | 20 x 20 ft / 400 sq ft |
| 10 ft round | 16 x 16 ft / 256 sq ft | 18 x 18 ft / 324 sq ft | 20 x 20 ft / 400 sq ft | 22 x 22 ft / 484 sq ft |
| 12 ft round | 18 x 18 ft / 324 sq ft | 20 x 20 ft / 400 sq ft | 22 x 22 ft / 484 sq ft | 24 x 24 ft / 576 sq ft |
| 15 ft round | 21 x 21 ft / 441 sq ft | 23 x 23 ft / 529 sq ft | 25 x 25 ft / 625 sq ft | 27 x 27 ft / 729 sq ft |
| Obstacle type | Distance to enter | Calculator check | Typical adjustment | Planning note |
|---|---|---|---|---|
| Fence or wall | Frame edge to face | Must meet side clearance | Move center inward | Hard edges make shortfalls more important. |
| Tree trunk | Frame edge to trunk | Side plus overhead review | Shift away from canopy | Branches can fail the 24 ft height target. |
| Deck or patio | Frame edge to step | Front may include ladder | Rotate entry side | Entry projection is added to the front need. |
| Shed or playset | Frame edge to object | Closest point controls | Increase side band | Use the shortest measured setback in that direction. |
| Preset | Frame size | Side clearance | Rectangular footprint | Safety zone area |
|---|---|---|---|---|
| Starter round | 8 ft diameter | 3 ft | 14 x 15 ft with entry | 210 sq ft before site changes |
| Family round | 12 ft diameter | 5 ft | 22 x 23.5 ft with entry | 517 sq ft before site changes |
| Sport rectangle | 9 x 14 ft frame | 5 ft | 19 x 25.5 ft with entry | 485 sq ft before site changes |
| Large round | 15 ft diameter | 6 ft | 27 x 28.5 ft with entry | 770 sq ft before site changes |
Sure, you get a trampoline, stake it out in sunspot by the back fence and think you’re done. But most injuries occurs before the jumper hits the springy surface. When gravity hit, it doesn’t give a hoot about your lawn decor. What’s around the trampoline’s frame. Specifically, what awaits the bounce-off point, is where the risk arise.
The instant somebody comes off the mat, a patio edge, tree trunk or hard fence change from an ordinary feature to hazard zone. Knowing how much clearance to leave isn’t just a matter of getting the plaything to fit in your garden. It’s about creating a genuine safety cushion, one that will function when required.
How to Set Up a Trampoline Safely
Enter the above calculator: Plug in your figures and let it do the arithmetic. That way, you avoid any guesswork involving conversion factors and such.
That is only half of it. It’s not just the surface of the trampoline but also the empty space surrounding it, the entire safety zone. If you have a traditional twelve foot round, you’ll need approximately five feet in all directions from the frame. So, a box that measures roughly twenty-two by twenty-two feet. People don’t realize how big an area that require. They visualize the circle and neglect the buffer.
And, let’s not forget the entryway/ladder. That will typically extend at least a foot or two beyond the trampoline. So now we’re adding more space. We’re talking about planning a landing zone rather than simply a place to bounce.
The most important measurement is side clearance. I’ve seen 3 feet quoted as the minimum; that’s an absolute minimum, but five to six feet would of be much safer. That’s ample space for the jumper to tumble around in and roll or stumble without crashing into something solid. If there’s a fence nearby, you may wish to shift the trampoline’s center inward so the buffer remains even all around it. Yeah, yeah…you’re losing all this lawn space…but that dead grass is your insurance policy.
The other side of the equation is no less stringent: overhead. Here’s the thing: Twenty-four feet of clear air above the bounce area. Enough clearance for high bounces…and a good distance off the earth to avoid any head injury from roof eaves or tree branches. Before anchoring those legs, scan up and over the bounce zone. From ground level that low oak limb looks great…but at full height, not so much.
Tackles need personal time Your yard isn’t a perfect square of open space, so the calculator test each direction individually. On the left I may have a shed 10 feet off. Right, I’ve got a deck just four feet out. Your safety rating comes down to that narrowest side. One side failing the clearance test mean the entire set up has been compromised. Don’t try averaging out a generous side with a dangerous one. It doesn’t work that way. Why? Because physics doesn’t care about how nice you are.
You’re measuring from actual frame edge out. It is not the net or the mat. The frame is solid. The net can sway. The rail shows where the hard structure actualy ends.
Another unseen variable is ground slope. You may think a gradual rise is no big deal, but that will impact your jumpers’ landing and rolling trajectory. Use the tool to flag any major drop-offs where you’d want to relocate or level the area. Any uneven ground increase the risk of falling awkwardy and turning an ankle. Make the area flat. Seems obvious, but many yards aren’t. Leveling the base with a little digout can be the difference between a good session versus going to the clinic.
The page has a reference table that clearly shows how fast the jumping space grow for typical sizes when you widen the clearance band. Pre-planning beats impulsive decisions. Before assembling anything, tape off the intended area using string or chalk. Then walk it, looking for low wires, sprinkler heads and any other garden ornament. In the heat of the moment, these little things get overlooked, but then turn into hazards when the thing’s being used.
After clearing the zone, the trampoline itself will be cause for joy, not worry. This isn’t a toy purchase; this is an installation of a piece of play equipment which require care for safety and space. Get your size right, and the rest will follow. Maintain that buffer zone, and the jumping will remain safe. Simple: Measure the space, respect the margins, and let the kids fly.