Heat Transfer Vinyl Size Calculator
Estimate HTV cut size, square inches, sheet count, roll length, garment fit, mirror allowance, carrier margin, and layer totals from one practical design setup.
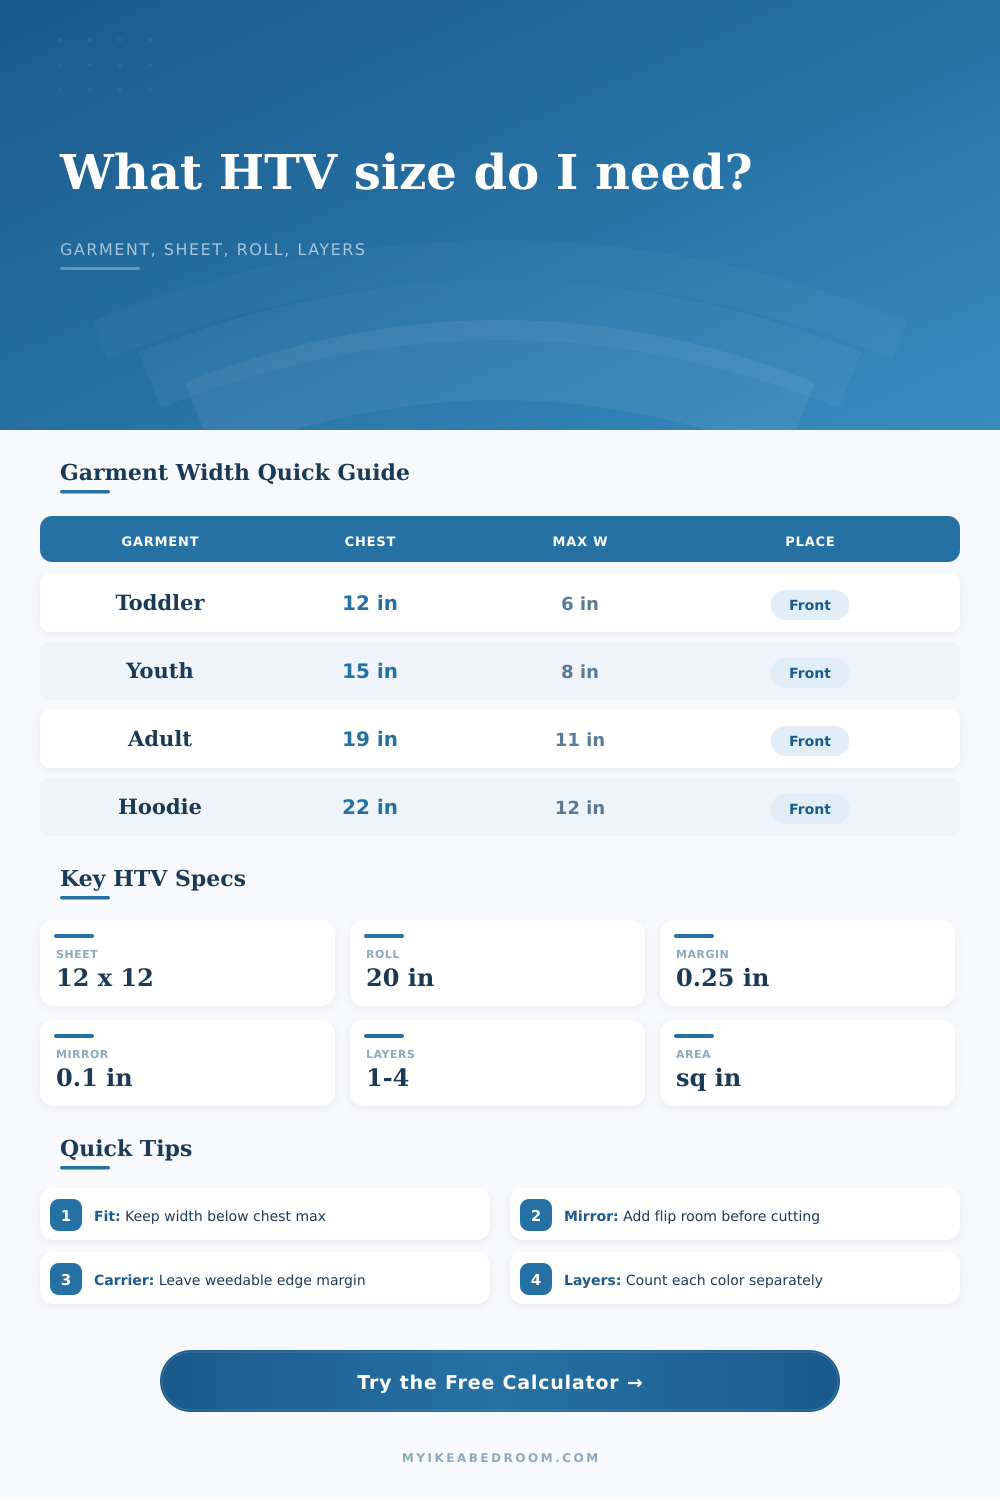
| Garment or blank | Typical flat chest width | Usable design max width | Common placement |
|---|---|---|---|
| Toddler tee | 11 to 13 in / 28 to 33 cm | 5 to 6.5 in / 13 to 17 cm | Center chest with short height and simple details. |
| Youth tee | 14 to 16 in / 36 to 41 cm | 7 to 8.5 in / 18 to 22 cm | Full front graphic sized smaller than adult fronts. |
| Adult small or medium tee | 18 to 20 in / 46 to 51 cm | 10 to 11.5 in / 25 to 29 cm | Center chest, full front, or pocket plus back logo. |
| Adult large or XL tee | 21 to 24 in / 53 to 61 cm | 11.5 to 13 in / 29 to 33 cm | Full front graphic, back graphic, or wide stacked text. |
| Pullover hoodie | 21 to 24 in / 53 to 61 cm | 10.5 to 12.5 in / 27 to 32 cm | Front graphic above pocket with reduced height. |
| Sleeve or pant leg | 4 to 6 in / 10 to 15 cm usable width | 2 to 3.5 in / 5 to 9 cm | Long narrow logo, name, or vertical word mark. |
| Canvas tote or apron panel | 12 to 16 in / 30 to 41 cm panel | 8 to 11 in / 20 to 28 cm | Centered panel graphic with room around seams. |
| Cap, beanie, or patch | 3 to 5 in / 8 to 13 cm usable width | 2.5 to 4 in / 6 to 10 cm | Compact decal with generous carrier edge. |
| HTV stock size | Total area | Good fit examples | Planning note |
|---|---|---|---|
| 12 x 12 in sheet | 144 sq in / 929 sq cm | Left chest, youth front, hat patch, pocket decal. | Check cut box width and height, not just visible design size. |
| 12 x 24 in sheet | 288 sq in / 1858 sq cm | Tall sleeve logo, adult front, jersey name layer. | Long panels help when height is the limiting dimension. |
| 15 x 15 in sheet | 225 sq in / 1452 sq cm | Adult front, tote panel, hoodie chest graphic. | Often gives easier margin around wider front designs. |
| 20 in roll by 12 in panel | 240 sq in / 1548 sq cm | Multiple small logos across roll width. | Use roll width as material width and panel length as cut length. |
| 20 in roll by 24 in panel | 480 sq in / 3097 sq cm | Team batches, back graphics, layered sets. | Panel length should match what your cutter can track cleanly. |
| HTV setup | Carrier margin per side | Mirror allowance per side | Area effect |
|---|---|---|---|
| Simple one-color block text | 0.15 to 0.25 in | 0.05 to 0.10 in | Small increase; mainly helps weeding and placement. |
| Detailed one-color artwork | 0.25 to 0.35 in | 0.10 to 0.15 in | More edge room helps small negative spaces release. |
| Two-color stacked design | 0.25 to 0.40 in | 0.10 to 0.20 in | Each color needs a separate cut box and registration space. |
| Name and number back print | 0.30 to 0.50 in | 0.10 to 0.20 in | Tall layouts may be limited by sheet or mat length. |
| Small decal or hat patch | 0.20 to 0.30 in | 0.05 to 0.10 in | Margin may be a large share of the final cut box. |
| Preset | Design size | Layers or colors | Sheet or roll setup |
|---|---|---|---|
| Toddler tee center chest | 5.5 x 4 in / 14 x 10 cm | 1 layer | 12 x 12 in sheet with small margins. |
| Youth tee front graphic | 7.5 x 6 in / 19 x 15 cm | 2 layers | 12 x 12 in sheet; rotated fit may help. |
| Adult tee full front | 10.5 x 8.5 in / 27 x 22 cm | 2 layers | 12 x 12 in sheet or wider roll panel. |
| Pullover hoodie front | 11.5 x 7.5 in / 29 x 19 cm | 3 layers | 15 x 15 in sheet with reduced height over pocket. |
| Jersey back name and number | 11 x 14 in / 28 x 36 cm | 2 layers | 12 x 24 in sheet or long roll panel. |
Compare with chest width: A design can fit the vinyl sheet but still look too wide on the garment. Use the design max width field as the final placement limit.
Count each color: A two-color design uses two separate HTV cut areas. The calculator multiplies the cut box by layers before adding the buffer.
Measure the cut box: Carrier margin and mirror allowance are added around the visible design, so sheet fit should use the larger mirrored cut area.
Use sheet and roll checks together: Sheet count checks rectangular nesting, while roll length estimates how much continuous material the same square inches require.
How many inches of roll do I need? How many sheets? That’s what the calculator calculates for you in concrete terms. It brings out your concerns from the ether and makes them concrete.
But how does it calculate that? Why did it change? The fun begins because of both design and space around it. New designers just measure the image/artwork. And if it’s ten inches wide they figure a piece of vinyl that’s ten inches wide will be fine. Wrong.
How the Calculator Works
When a piece are cut, the cut box is wider than the art. You want space for carrier sheet… The clear plastic film that holds the vinyl in place while you weed. Sometimes the cutter snags on the carrier, but even worse, sometimes you’re using a tiny letter or design element that rips out with weeder tool. A quarter inch all around are insurance. It’s a margin for your eyes, and a handle for your fingers.
Secondly, the mirror affects size as well. Because you apply heat transfer vinyl face down, that means the cutter needs to view the image in reverse. That is why there will be a mirrored layout buffer or need for registration marks. And for this, the tool will adds a bit of allowance to the overall dimensions.
When nesting several design onto one sheet, those fractions will add up and push a second design over edge. You’ll end up having to purchase an additional sheet you didn’t expect to need. Every color added makes things more complex. For example, a one color design takes half as much time to plan than a two tone design. And each layer will require registration, a carrier margin, and its own cut box.
An adult medium shirt with a full front print may contain 3-4 layers. The cut box times the number of layers are how the calculator works. Then it adds a buffer based off potential amount of waste. Waste buffer is critical and comes into play when there is misalignment and test cuts. For most jobs, ten percent is a safe bet. If your design contains tiny negative spaces, up that buffer to twenty percent. You’ll pay more in vinyl but you won’t run out of material.
The size of the design is only part of it: so is the material format. For small runs, sheets are nice; for big runs, a roll is efficient. You can nest smaller designs side-by-side in a twenty inch wide roll. That’s more efficient than several twelve by twelve sheets. On the other hand, you have to keep track of how far down the roll you’re printing. Your design and its orientation will affect how many times you print. You can see this in the reference table. For example, a long jersey name might not fit on square sheet but could work fine on a roll. It makes you think about what kind of shape the material take.
A logistically sized heat transfer vinyl isn’t just about geometry. It’s about logistics. It’s about working with physical constraints. There’s a shrinking garment, there’s an expanding design and there’s wasteful material. Efficiency meets looks. If it fits from a technical standpoint but feels cramped, you failed. If it fits the shirt but goes past edge of your sheet, you still failed.
Begin by sizing to the shirt’s width at the chest. Use less than the maximum usable width on that specific garment size. Account for margins. Include number of pieces. Allow the tool to handle sheet counts and square inches. Guesswork becomes planning.
Now the vinyl acts as a tool, not a puzzle. And that clarity turns what was once a frustrating afternoon into a succesful production run. You should of used the calculator earlier. It would of helped more.