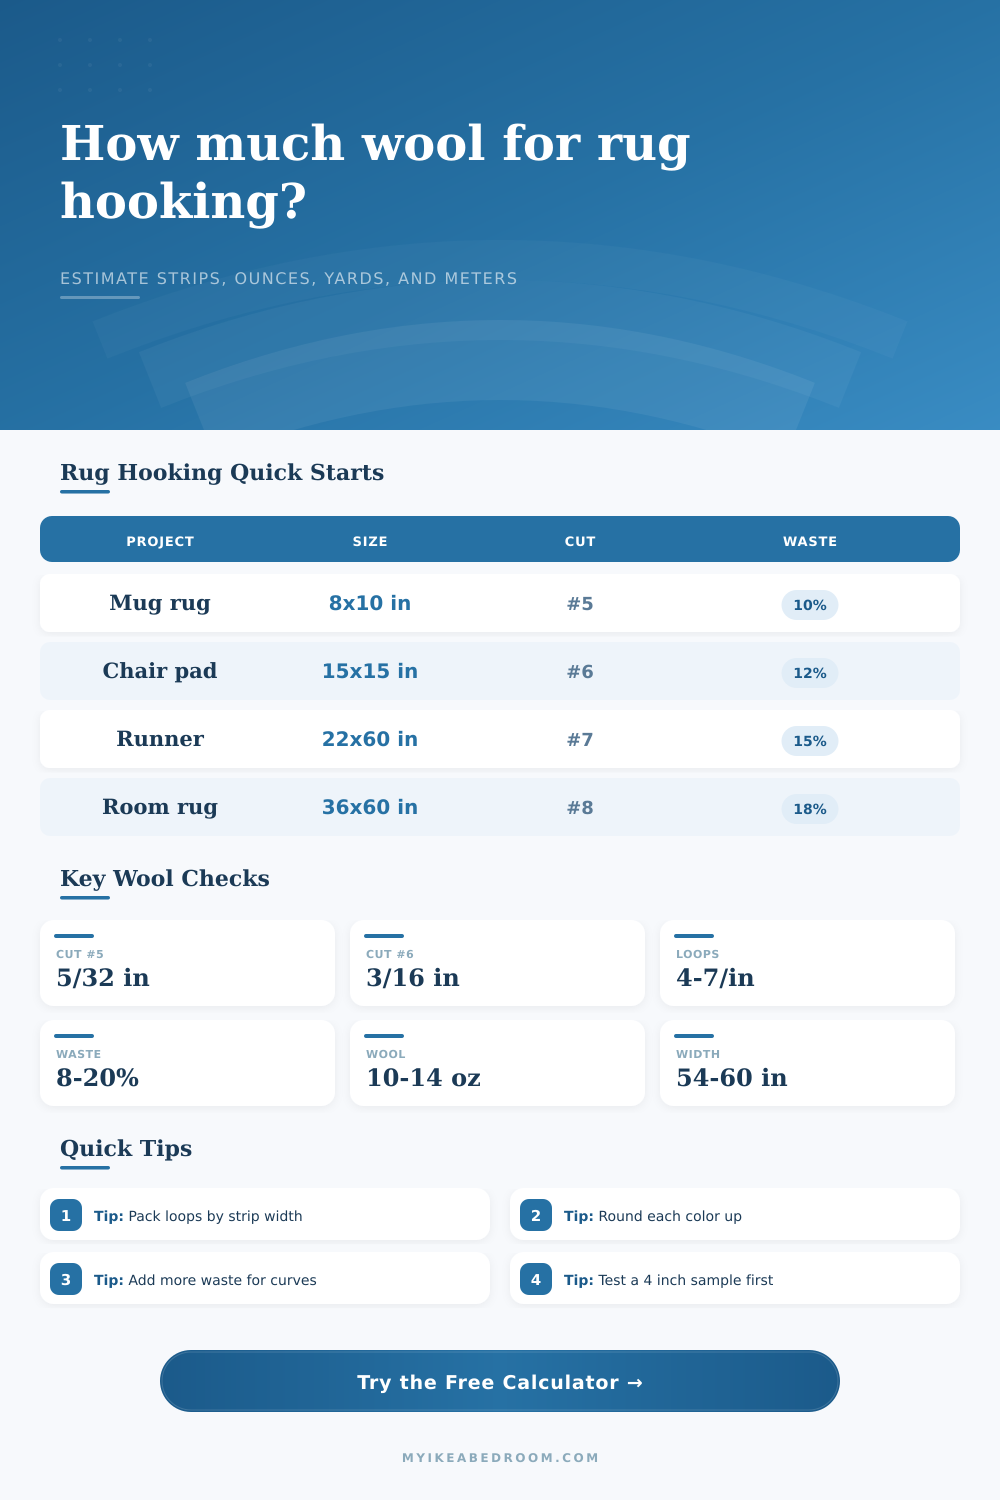
Rug Hooking Wool Quantity Calculator
Estimate wool strip length, fabric yardage, ounces, meters, loop count, and waste allowance from rug area, cut number, loop height, loops per inch, and packing density.
📌Hooked rug presets
⚙Rug, loop, strip, and wool inputs
The calculator converts rug area to square inches, estimates loop count from loops per inch and row packing, then converts total strip length into yards, meters, fabric yardage, and ounces.
Your wool quantity estimate
📏Cut number and strip width reference
📊Reference tables for hooked wool planning
| Cut number | Strip width | Typical use | Rows per inch baseline |
|---|---|---|---|
| #3 | 3/32 in / 0.094 in | Fine outlines, letters, tight turns | About 10.7 rows per inch |
| #4 | 1/8 in / 0.125 in | Small motifs and fine shading | About 8.0 rows per inch |
| #5 | 5/32 in / 0.156 in | Balanced details and fills | About 6.4 rows per inch |
| #6 | 3/16 in / 0.188 in | General rug hooking | About 5.3 rows per inch |
| #7 | 7/32 in / 0.219 in | Primitive fills and borders | About 4.6 rows per inch |
| #8 | 1/4 in / 0.250 in | Wide primitive rug fills | About 4.0 rows per inch |
| #9 | 9/32 in / 0.281 in | Chunky mats and simple shapes | About 3.6 rows per inch |
| #10 | 5/16 in / 0.313 in | Very bold areas and thick wool | About 3.2 rows per inch |
| Packing setting | Multiplier | What changes | Best fit |
|---|---|---|---|
| Open packing | 0.85x | Fewer rows per inch and lower strip length | Wall pieces, light fill, airy primitive work |
| Balanced packing | 1.00x | Rows are roughly one strip width apart | Most rug hooking wool estimates |
| Firm packing | 1.15x | More rows per inch for fuller coverage | Chair pads, runners, floor contact areas |
| Dense detail | 1.30x | Highest wool use for tight motifs and curves | Lettering, flowers, borders, carved outlines |
| Preset rug | Hooked area | Suggested cut | Planning note |
|---|---|---|---|
| Mug rug | 80 sq in / 0.56 sq ft | #5 cut | Small enough to test loop height and packing. |
| Chair mat | 225 sq in / 1.56 sq ft | #6 cut | Balanced density works well for seating use. |
| Pillow front | 324 sq in / 2.25 sq ft | #5 cut | Dense loops help a pillow face look even. |
| Bedside runner | 1,320 sq in / 9.17 sq ft | #7 cut | Wide strips keep large background fields efficient. |
| Round accent | 707 sq in / 4.91 sq ft | #6 cut | Waste rises because circular edges use shorter strips. |
| Oval hearth rug | 792 sq in / 5.50 sq ft | #7 cut | Allow reserve for curved borders and corner turns. |
| Primitive rug | 1,440 sq in / 10.00 sq ft | #8 cut | Lower loop count but wider wool strips. |
| Room rug | 2,160 sq in / 15.00 sq ft | #8 cut | Plan color groups separately before cutting. |
| Formula step | Calculator input | Estimate made | Why it matters |
|---|---|---|---|
| Area | Shape and dimensions | Square inches | Defines the backing surface that receives loops. |
| Rows per inch | Strip width and packing | Packing divided by strip width | Wider cuts need fewer hooked rows. |
| Loop count | Area x loops x rows | Total visible loops | Drives total wool strip length. |
| Strip length | Loop height and backing travel | Length per loop x loop count | Turns the pattern into yards and meters. |
| Wool yardage | Strip width and fabric width | Flat fabric area | Converts cut strips back to fabric yardage. |
💡Practical wool quantity tips
The hook is in your hand and you’ve got the tape stuck on your frame. Your mind conjures up a completed rug, soft and full. And then you grab the wool. You discover you’re missing half a bolt of color you love most.
Rug hooking isn’t necessarily mathematical at all; it’s managing expectations. Before making even one snip, you are attempting to guess just how many yards or what amount of fabric you’ll need. The calculator does this math for you. From fabric yardage to number of strips to square inch conversion, it figures out the answer for you. It makes not enough vs. Enough go from abstract ideas to something tangible you can plan for.
How to Plan Your Rug Hooking
Of all variables you’ll encounter, Cut Number matter the most. This refers to size (width) of the wool strips. Generally speaking, a #6 cut is what people use, since it strikes a good balance between detail and speed. For smaller flowers / finer lines, you’ll go down to either #3 or #4 cuts. Since each inch of space are going to be packed full of loops, you’re burning through your wool at a rapid pace.
Alternatively, if you just want something bold and want to cover some ground fast, you’d go up to #8 or #9. These aren’t quite as precise, but they allow you to move around the tool quick with wider cuts of wool. This results in lower counts on loops per inch and less wool used, but sacrifices tiny details or subtle changes. Narrower strips offer more precision, but they require a bigger investment in fabric.
Another hidden variation in materials requirements are the packing density. How closely do you place your stitches? Do your rows goes tight, like a bunch of soldiers in a platoon? That’s going to be a very dense, durable rug. It will feel substantial under foot. However, you’re using a lot more wool (and it’s heavier) than somebody whose hooking style is all airy and open.
This packing multiplier is one you can dial into the calculator to show that you have your own personal style and tension. You may pack densely if the piece needs to withstand wear. Or you may not mind if something hangs on the wall so it doesn’t require such a strong packing.
Lots of people new to rug hooking makes this mistake: They sample loosely and then realize that when they try to make their loops tighter for a nicer finish, they can’t quite make it work because they’ve used up all the wool. The packing multipliers are in reference table on the page, which shows how your project’s weight changes if you move from a balance loop to a dense packing.
Rug hooking is a budget killer. And there is a silent one: waste. It is not just your trimmings, but also all those short strips you can’t use, the ones you lose when you change colors, and the mistakes you inevitablly make when you rip out a few rows. Add at least ten, perhaps twenty, percent on top of your estimate, say most experts. Lean more towards the high end if your design involves complex borders, lettering or tight curves. Tight curves create short unusable scraps following the contour of a wheel or the petals of a flower. The calculator has a field for entering amount of waste, making you face this fact before purchasing. Better to have some extra fabric sitting around collecting dust than run out mid-project due to optimism.
The bottom line is that a physical test will be most accurate. Cut a 4 inch square of backing fabric and hook it with the same amount of loop and wool as intended for final piece. Cut a piece of strip to size for this little square. Compare its length to the amount the calculator gave you for the same area. If close; go ahead and trust those big numbers. If not. Tweak the variables in until you’re happy.
It’s a craft built on the hands (hooking rug) but you need some anticipation to get it started (planning). Do the numbers and then make it creative. But don’t run out of red wool on page twenty! Plan it out, believe what you see on paper, and let the loops land where they land. First the plan, next the math, after that the fun!