🧵 Bias Tape Yardage Calculator
Estimate finished bias tape length, strip width, continuous bias square size, joins, waste, yards, and meters.
✅ Bias Tape Results
| Finished Tape Width | Double Fold Strip | Single Fold Strip | French Fold Strip | Common Use |
|---|---|---|---|---|
| 1/4 in / 0.6 cm | 1 in / 2.5 cm | 1/2 in / 1.3 cm | 1 1/4 in / 3.2 cm | Piping, tiny curves, doll clothes |
| 3/8 in / 1.0 cm | 1 1/2 in / 3.8 cm | 3/4 in / 1.9 cm | 1 3/4 in / 4.4 cm | Bibs, necklines, armholes |
| 1/2 in / 1.3 cm | 2 in / 5.1 cm | 1 in / 2.5 cm | 2 1/4 in / 5.7 cm | Quilts, aprons, placemats |
| 5/8 in / 1.6 cm | 2 1/2 in / 6.4 cm | 1 1/4 in / 3.2 cm | 2 1/2 in / 6.4 cm | Bags, robe edges, thick layers |
| 3/4 in / 1.9 cm | 3 in / 7.6 cm | 1 1/2 in / 3.8 cm | 3 in / 7.6 cm | Wide binding and soft furnishings |
| Project | Edge Length | Typical Width | Suggested Extra | Notes |
|---|---|---|---|---|
| Baby Quilt 36 x 45 in | 162 in / 4.1 m | 1/2 in | 10% | One continuous outer edge |
| Throw Quilt 50 x 60 in | 220 in / 5.6 m | 1/2 in | 10% | Add overlap for mitered finish |
| Four Napkins 18 in | 288 in / 7.3 m | 3/8 in | 12% | Many corners and starts |
| Two Curved Bibs | 150 in / 3.8 m | 3/8 in | 15% | Curves need relaxed handling |
| Apron Neck And Sides | 175 in / 4.4 m | 1/2 in | 15% | Includes tie extensions |
| Tote Bag Interior Seams | 125 in / 3.2 m | 5/8 in | 15% | Thicker layers need wider tape |
| Cut Strip Width | Square 18 in | Square 24 in | Square 30 in | Square 36 in |
|---|---|---|---|---|
| 1 1/2 in | 6 yd / 5.5 m | 10.7 yd / 9.8 m | 16.7 yd / 15.2 m | 24 yd / 21.9 m |
| 2 in | 4.5 yd / 4.1 m | 8 yd / 7.3 m | 12.5 yd / 11.4 m | 18 yd / 16.5 m |
| 2 1/4 in | 4 yd / 3.7 m | 7.1 yd / 6.5 m | 11.1 yd / 10.2 m | 16 yd / 14.6 m |
| 2 1/2 in | 3.6 yd / 3.3 m | 6.4 yd / 5.9 m | 10 yd / 9.1 m | 14.4 yd / 13.2 m |
| 3 in | 3 yd / 2.7 m | 5.3 yd / 4.9 m | 8.3 yd / 7.6 m | 12 yd / 11.0 m |
| Sewing Situation | Add-On | Why It Matters | Calculator Input |
|---|---|---|---|
| Single quilt perimeter | 6 to 10 in | Gives room for diagonal closing join | Start / finish overlap |
| Many separate pieces | 1 join per section | Each section needs trimming and a clean start | Separate edge sections |
| Tight curves | 15% waste | Bias stretches and relaxes while sewing | Joins and handling waste |
| Continuous bias square | Round up 1 in | Squaring and marking reduce usable area | Largest available square |
| Straight strips across fabric | Use full width | Strip count rounds upward to whole strips | Usable fabric width |
At some point in every quilt, you bind the very last corner and realize you’re all out of tape. This happens to just about everyone at least one time. Ugh! Only 2 inches to go, but your sliver of bias tape is nowhere near long enough. It’s that special sort of sewing frustration that makes an otherwise beautiful project turn into a desperate scramble for similar-looking fabric scraps.
And it doesn’t even have to happen if you know ahead of time how much tape you need before cutting that first strip. Because its complicated geometry and math conversions, the calculator above take care of it for you so you can concentrate on sewing part and not the math part.
How to Calculate the Right Amount of Bias Tape
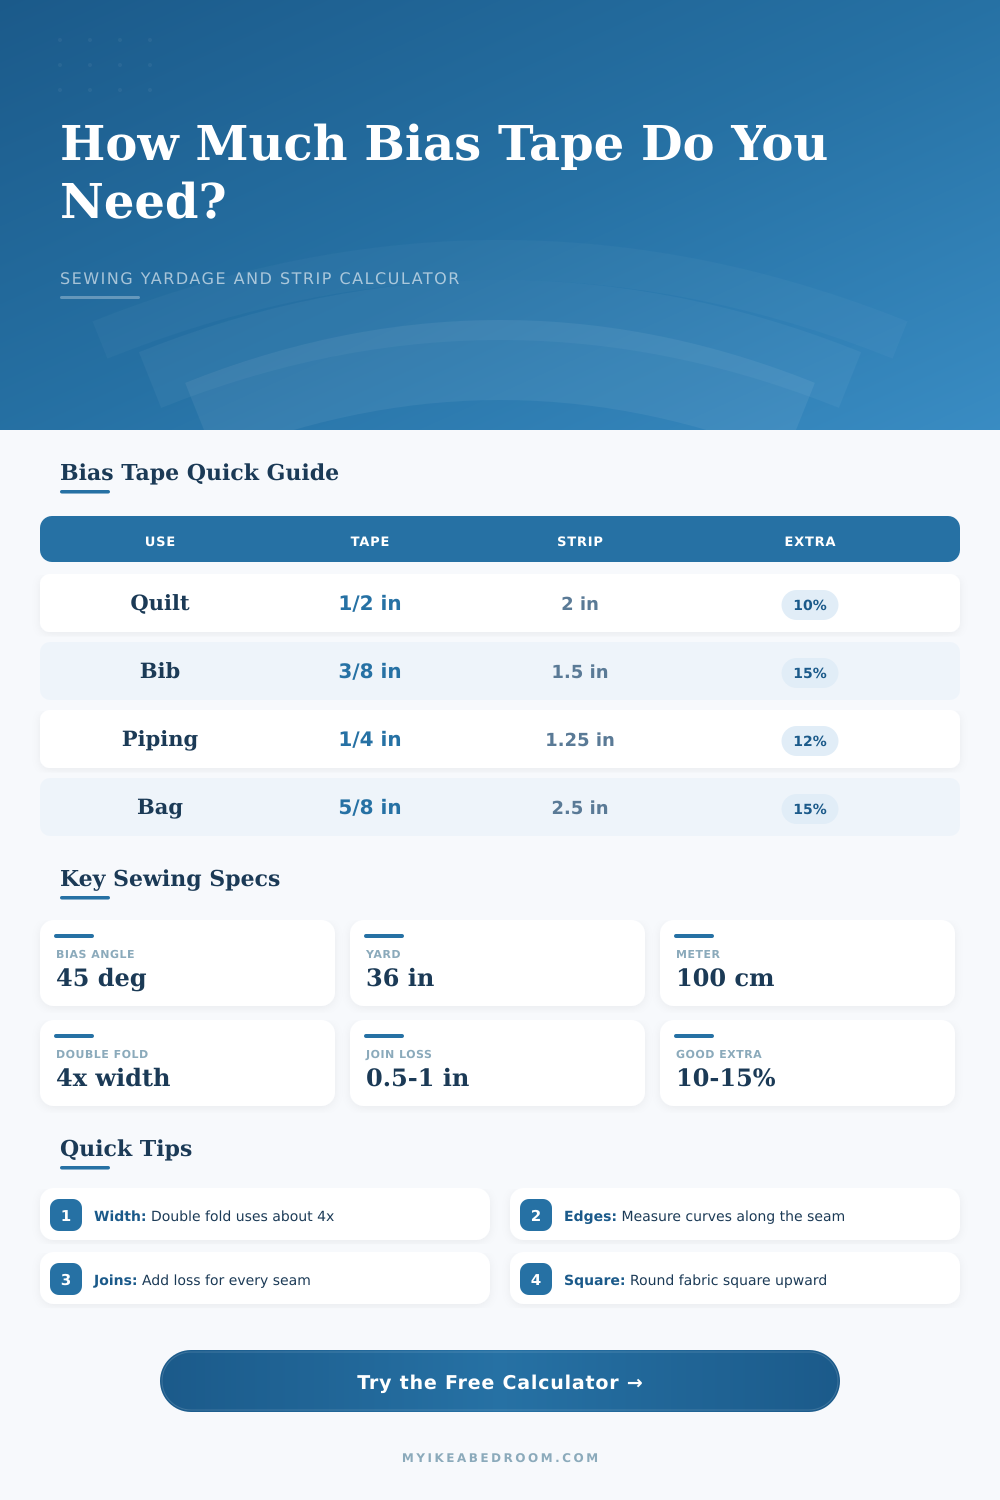
The problem with bias tape, though, is that the actual width you have when it’s folded up and in your hand isn’t how much you had on the spool/package/whatever. Because you are cutting diagonally, each inch of strip become less than one inch once finished. And then there’s the matter of folding over your strips (a standard double fold usually requires a strip that is four times wider than the finished edge you want). And then, oh yeah: a regular-old double fold binding needs a strip that’s 4x as wide as what you’d like the finished edge to be. Which means if you want a half-inch finished binding, then you need to cut a two-inch wide strip. It doesn’t matter how much of that stuff you bought; that’s just physics, baby. This tool take that into account and lets you type in your desired final width, then it adjusts the strip calculations to match.
The Perimeter, Most folks underestimate this number. When we think of perimeter, we measure the right angles in a rectangle or square. However, curves add a lot more. Scallops? There are curved necklines. Yep, more tape, as that means fabric stretches/compresses to fit the form. With a bag open or on a curved bib, you aren’t measuring from one point to another but rather the actual distance your needle will travel.
The waste percentage is where most projects go wrong. You can put a percentage into the calculator for handling or waste allowance for things like joining. That 10-15% for corners and curves isn’t being optimistic. It is insurance for the trimming and stretching that occurs during construction.
And then there’s the matter of cutting the tape. You might want to make one long continuous strip, what we call a bias strip… By sewing together fabric into a tube that spirals around itself. That’s nice, though it requires at least as big a square of fabric as the desired length. Or you could just cut along the grain, making separate strips, each as wide as you’d like: fast, but with lots of seam. The tool helps you see the tradeoffs, through a series of reference tables showing how long you get out of say an eighteen-inch square compared to a thirty-six-inch square, given different strip widths.
Say you only had a tiny bit of some fabric and needed six yards of binding. No way! Individual strips would of be your only choice. The tool tells you how many strips you’ll have to cut and sew back together again; it does the math based on whatever width of fabric you’re working with.
Waste is another silent budget killer. Each time you sew on a piece of bias tape, you’re losing a little bit of it to the seam allowance and then again to tapering your ends. Those small amounts can quickly add up if you’ve got several distinct edge to deal with; say, for a bunch of napkins or even just a garment that requires several pocket. You can tell the calculator how many distinct sections there are, so it takes into account both the beginning and end of each section. It sounds like nitpicking to count off half an inch lost to every seam, but that’s kind of the idea. Planning in precision keeps you from panicking at the last minute.
So really, this all comes back to respecting the geometry of the bias. You must recognize that a piece of cloth acts one way if you cut it straight across, but another if you cut it on the diagonal. Plugging your numbers into the tool eliminates guesswork. Instead, it creates a trustworthy plan with confident cuts and enough material to cover each curve, corner, and last stitch. You will have enough tape left over at the end of that last corner to show exactly how it was done.