Spray Paint Can Quantity Calculator
Estimate spray paint cans from furniture shape, measured surface area, object count, finish coats, can coverage, overspray, primer coats, clear topcoat coats, and metric equivalents.
▶Furniture Presets
Choose a starting object, then adjust the dimensions, shape, coats, coverage per can, overspray, primer, and topcoat settings.
⚙Surface And Can Inputs
Your Spray Paint Can Result
Calculation Breakdown
🧮Can Coverage Snapshot
📐Reference Tables
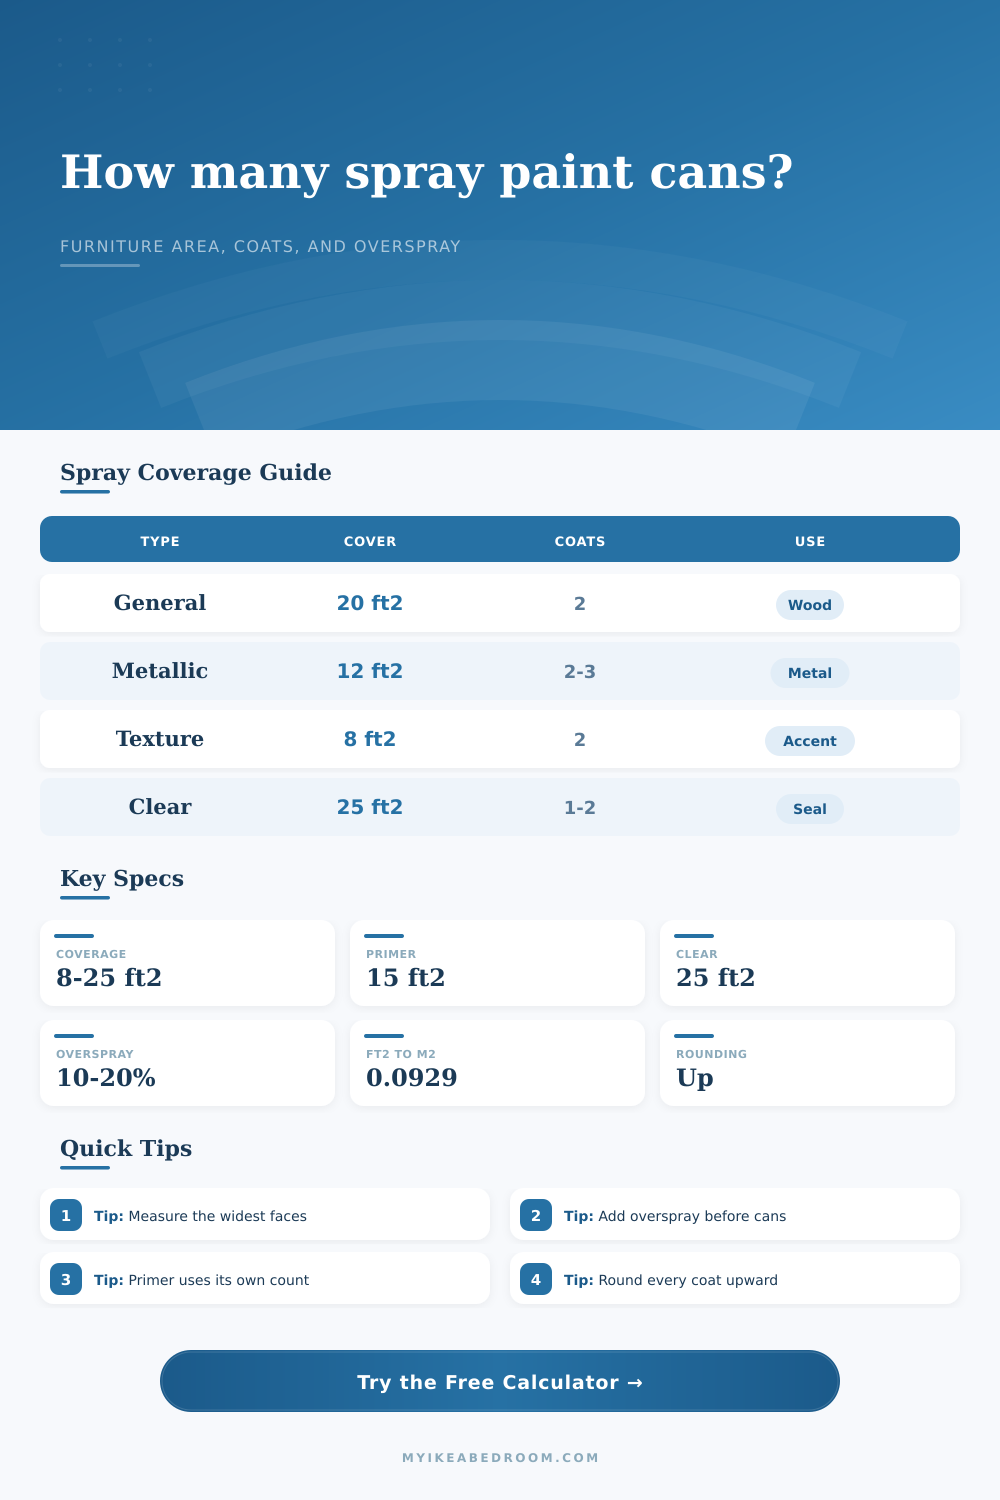
| Spray type | Planning coverage | Metric coverage | Typical furniture use |
|---|---|---|---|
| Texture spray | 8 sq ft/can | 0.74 sq m/can | Accent texture, heavy film, decorative panels. |
| Metallic spray | 12 sq ft/can | 1.11 sq m/can | Hardware, metal cabinets, thin decorative coats. |
| Chalk finish spray | 14 sq ft/can | 1.30 sq m/can | Matte furniture refreshes with softer coverage. |
| Primer spray | 15 sq ft/can | 1.39 sq m/can | Bare wood, laminate prep, bonding coats. |
| Plastic bonding spray | 16 sq ft/can | 1.49 sq m/can | Plastic bins, laminate trim, coated surfaces. |
| Enamel furniture spray | 18 sq ft/can | 1.67 sq m/can | Durable finish coats for dressers and tables. |
| General purpose spray | 20 sq ft/can | 1.86 sq m/can | Wood furniture, shelves, drawers, simple panels. |
| Clear topcoat spray | 25 sq ft/can | 2.32 sq m/can | Sealing coats after color cures as directed. |
| Shape | Surface area formula | Dimension inputs | Furniture examples |
|---|---|---|---|
| Flat rectangle | L x W x painted sides | Length, width, sides | Wardrobe doors, drawer fronts, headboard panels. |
| Box or cabinet | Selected faces from L, W, H | Length, depth, height, face set | Dressers, cubes, file cabinets, shelves. |
| Cylinder | pi x D x H plus selected caps | Diameter, height, cap count | Round side tables, stool bases, lamp shades. |
| Sphere or rounded | 4 x pi x radius squared x visible % | Diameter, visible percent | Rounded knobs, globe decor, ball feet. |
| Custom direct area | Entered area x object quantity | Measured area | Irregular slats, frames, mixed small parts. |
| Furniture preset | Shape basis | Default coats | Planning note |
|---|---|---|---|
| Nightstand | Box, all except back | 1 primer, 2 color | Good for one small cabinet with drawer fronts. |
| Wide dresser | Box, all except back | 1 primer, 2 color, 1 clear | Large face area and hardware cut-ins raise allowance. |
| Tall bookcase | Box, all six faces | 1 primer, 2 color | Shelves and inside faces often need extra passes. |
| Wardrobe doors | Flat panels, both sides | 1 primer, 2 color | Use object quantity for multiple matching doors. |
| Lamp shade | Cylinder, no caps | 0 primer, 2 color | Open cylinder shell uses side area only. |
| Overspray setting | Multiplier | Best fit | Calculator effect |
|---|---|---|---|
| 0% | 1.00x | Tight direct-area math | No extra allowance before can division. |
| 10% | 1.10x | Simple flat panels | Adds a light handling and pass overlap buffer. |
| 15% | 1.15x | Typical furniture | Default for edges, legs, drawer fronts, and touch-ups. |
| 20% | 1.20x | Slats or round parts | Useful when more spray misses the target surface. |
| 30%+ | 1.30x+ | Open frames | Use for spindles, mesh, grids, and thin parts. |
💡Spray Paint Measuring Tips
⚠Planning Note
The reason most furniture refinishes don’t succeed is because the painter never makes it home with enough paint. It’s 10 mins until the hardware store closes and you’ve got a dresser looking all patchy and you’ve only got two cans left, I think we all know what that feels like when trying to spruce up a room over the weekend.
Spray paint promises X number of square feet if used ideally (which your living room will never be). The math on how much you’ll need isn’t forgiving. Knowing what you’re getting into is more important than choosing the perfect shade of blue. To eliminate any math, here’s an easy-to-use calculator that figures in the surface areas when you enter your piece dimensions (and how many times you want to paint it).
How to Calculate the Right Amount of Paint
This also does the work for you by dividing things into 3 categories (one for each layer). Each perform differently by layer type (primer, color, and topcoat) so they needs their own category. They perform differently on wood, so they need their own category. Primer is like the glue, it creates a stick to the wall base. Because it penetrates and is generally a bit thicker, it covers less area per can than the color coat. The color coat provide the visual layer that you see. The clear topcoat seals what lies beneath.
Mixing them together in one average means you’ll end up with way too much of one and not enough of another (or worse yet… None at all!). The actual amount of paint used depend hugely on surface shape. A flat wardrobe door is easy enough to estimate, but a dining chair with carved legs and spindles? That’s a trap. Those skinny bits has big air gaps between them and they waste a lot of spray. This is where the overspray allowance setting comes into play. It’s not just about what surface you’re painting, it’s about painting the air around it…to an extent.
When you have something really complicated (lots of holes, lots of edges), it makes sense to up that number by twenty percent or more. This accounts for missed shots, drift, and the extra passes required to get even coverage on tricky angles. People make this mistake all the time by ignoring overspray. That’s why the dreaded last-can struggle happens as a result of this oversight.
Unlike regular decorative paint, primer also follows unique physical rules. For instance, it takes metal and laminate to bind properly, and bare wood will soak it right up as if it were a sponge. Primer coverage estimates are conservative: The tool assumes you want enough for a consistent base layer. Under-estimating, or skipping this entirely, is often why people end up with a peeling job later on, defeating the entire point of refinishing. Better to have half a can leftover of primer than discover halfway through that there’s no place for your color coat to adhere.
Expectations should of been adjusted based off the type of finish as well. Specialty formulas such as metallic paints or textures tend to lay down a thicker film, which obviously will cover less surface area than a more standard general purpose paint. Expect lower coverage when applying a specialty formula if you’re looking for heavy opacity. This is all explained in the reference table on the page, where it becomes obvious that a single can of spray texture could only cover a fraction of what a can of clear sealant could.
It’s give and take: want that thick texture of a specialty can? Then expect to use more material. Want that kind of coverage rate that a thin primer provides? Not gonna happen.
The last step is measuring your furnitures correctly. We all do it. We underestimate the actual surface area, whether that is the back of a headboard or the inside of a shelf or dresser drawers. You can choose which sides are showing in the calculator, which helps to adjust the amount. For example, if you’re painting a piece against the wall like this bookcase, you may not need the back. Or if you have a free standing side table, you want to paint every inch, so make sure you get precise! It’ll save you money and eliminate waste.
To conclude. The bottom line: Stopping in the middle of your project isn’t worth it; just buy an additional can. While this calculator provides a good starting point, a number of real world factors could alter the number. These include spray technique, humidity, and nozzle wear. Consider these results more of a floor (rather than a ceiling). Having a little extra helps you stay sane when the paint starts running low and those fumes realy kick in.