EV Charger Circuit Size Calculator
Estimate the breaker size, continuous-load margin, charger power, and miles added per charging hour for common home EV charger settings.
Detailed Breakdown
| EVSE output | 125% minimum | Common breaker | Power at 240 V |
|---|---|---|---|
| 12 A portable Level 1 | 15 A | 15 A or larger allowed setup | 1.4 kW at 120 V, not 240 V |
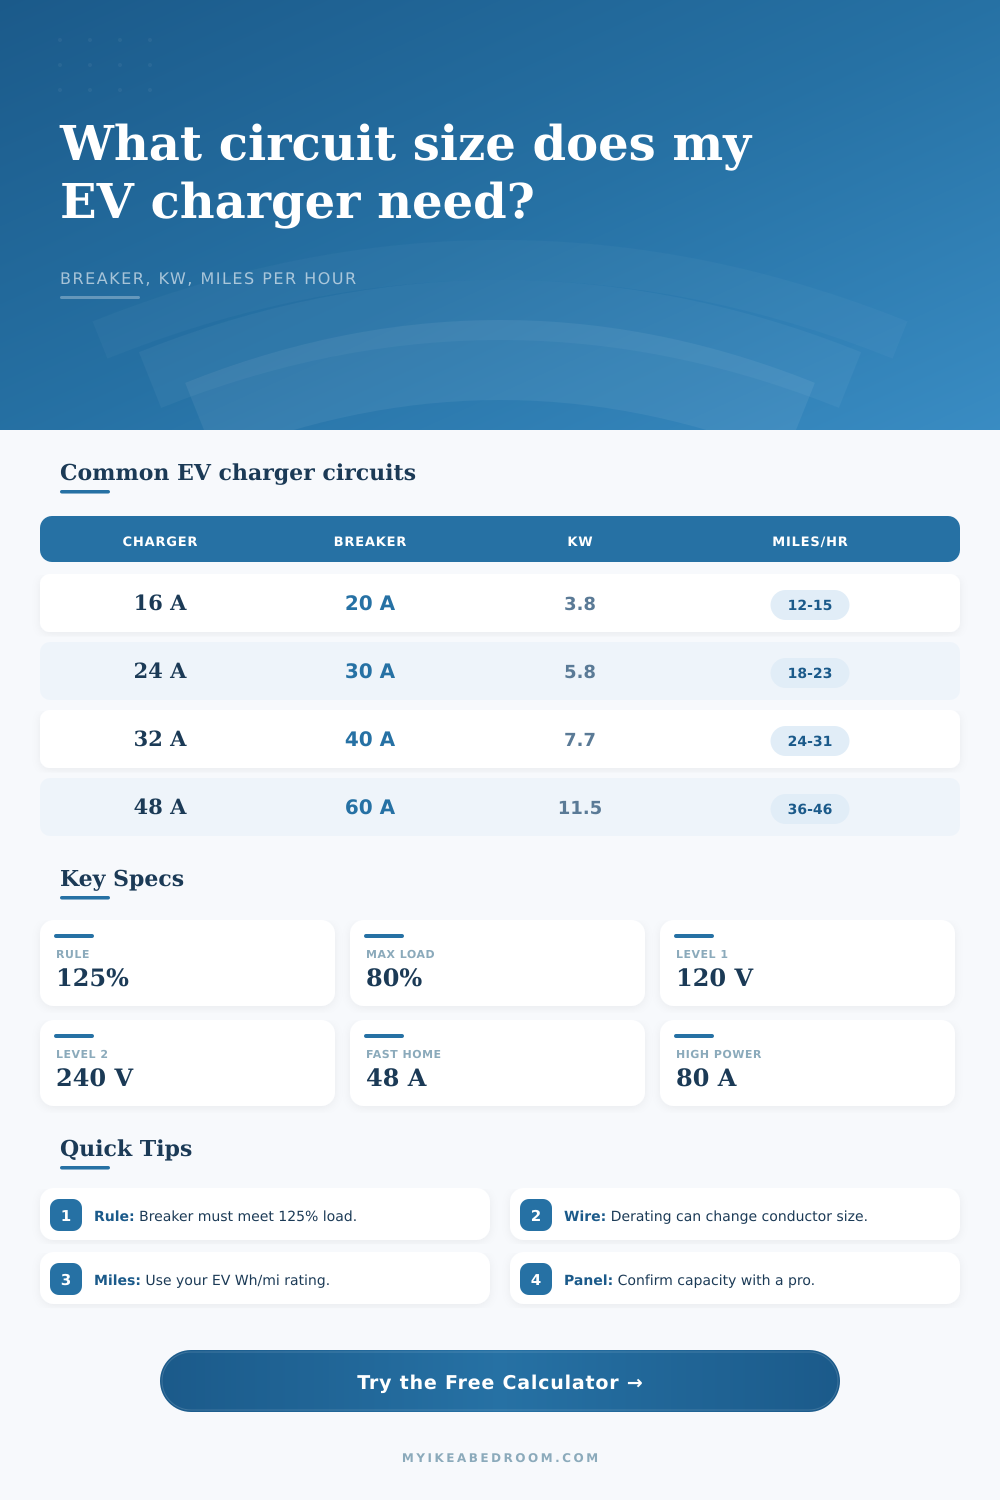
| 16 A Level 2 | 20 A | 20 A | 3.8 kW |
| 24 A Level 2 | 30 A | 30 A | 5.8 kW |
| 32 A Level 2 | 40 A | 40 A | 7.7 kW |
| 40 A Level 2 | 50 A | 50 A | 9.6 kW |
| 48 A Level 2 | 60 A | 60 A | 11.5 kW |
| 64 A high output | 80 A | 80 A | 15.4 kW |
| 80 A high output | 100 A | 100 A | 19.2 kW |
| Breaker size | Max continuous EV load | Matching charger setting | Typical planning use |
|---|---|---|---|
| 20 A | 16 A | 16 A EVSE | Compact Level 2 where panel space is limited. |
| 30 A | 24 A | 24 A EVSE | Useful upgrade from Level 1 without a large load. |
| 40 A | 32 A | 32 A EVSE | Common home charging pace for daily driving. |
| 50 A | 40 A | 40 A EVSE | Often used with plug-in or hardwired wall chargers. |
| 60 A | 48 A | 48 A EVSE | Common hardwired high-output home charger. |
| 100 A | 80 A | 80 A EVSE | High-power residential or light commercial charging. |
| Wire reference | Reference ampacity | EV load examples | Important note |
|---|---|---|---|
| 12 AWG copper | 20 A reference | 16 A charger on 20 A breaker | Check cable type and termination limits before using. |
| 10 AWG copper | 30 A reference | 24 A charger on 30 A breaker | Common reference for smaller Level 2 circuits. |
| 8 AWG copper | 40 A reference | 32 A charger on 40 A breaker | Some conductor types have different allowable ampacity. |
| 6 AWG copper | 55 A reference | 40 A charger, sometimes 48 A if allowed | Terminal rating and cable type can decide the final breaker. |
| 4 AWG copper | 70 A reference | 48 A charger with extra margin | Used when derating or long runs require more ampacity. |
| 2 AWG copper | 95 A reference | 64 A charger on 80 A breaker | High output circuits need careful load and voltage-drop review. |
| 2 AWG aluminum | 75 A reference | 48 A charger with margin | Aluminum sizing and terminations must be listed for the equipment. |
| 1 AWG aluminum | 85 A reference | 64 A charger where allowed | Use actual code tables and equipment markings for final sizing. |
| Vehicle efficiency | 32 A at 240 V | 48 A at 240 V | What it means |
|---|---|---|---|
| 240 Wh/mi efficient EV | 32 mi/hr | 48 mi/hr | Smaller cars and efficient driving add more miles per kWh. |
| 300 Wh/mi average EV | 26 mi/hr | 38 mi/hr | Useful planning value for many mixed-use daily drivers. |
| 360 Wh/mi crossover | 21 mi/hr | 32 mi/hr | Larger vehicles need more energy per mile. |
| 450 Wh/mi truck or van | 17 mi/hr | 26 mi/hr | High consumption makes charger amperage feel more noticeable. |
Installing an EV charger isn’t as simple as plugging a cord into a wall; you also need to convince your house’s electrical panel that it has enough capacity to continuously run this new appliance. Panic ensues for most when they buy the car then realize they should of get the wiring sorted out.
The calculator above takes care of the numbers for you after you input how fast you’d like to charge. It converts amperage into miles, saving you from having to guess at what number you’re supposed to use, or what conversion rate applies. The only unit that really matters is miles, as they is what matter to your morning routine.
How to Use the EV Charger Calculator
Know the 125% rule. Since EV chargers are typically used for at least three hours, and because they are electrical loads, the electrical code considers them an ongoing demand rather than a short burst. A circuit breaker isn’t made to constantly pull 100%, or else it will trip after a little while. (This is where most folks gets tripped up.) So if you’d prefer having a 32-amp charger, your breaker must actualy be rated for 40 amps. The code says it has to size the breaker for 125% of continuous load. That is why a 32-amp charger requires a 40-amp breaker. Yes, it sucks. But it’s just a built-in safety margin. The app handles the multiplication for you; no need for the brain math when you’re looking at a white wall with nothing on it.
How much power are you actualy getting? And that’s where voltage comes in. A regular old 120 volt outlet is convenient, but not quick. This is called Level 1 charging, and you’re talking about adding twelve to fifteen miles of range per hour. Maybe sounds like plenty for a city commuter, but what if you have a bad day of traffic, there’s not a lot of wiggle room there. Step up to Level 2 charging, at 240 volts, that’s the same kind of juice your dryer runs on. Doubling the voltage doubles the power delivered (for the same amount of current). The tradeoff is clear from the calculator. Plug in your amperage and voltage, and it will tell you exactly how many miles of range per hour you’ll be gaining, along with how many kilowatts you’re pulling down. It makes those abstract electrical specs into something concrete: driving range.
The part that gets expensive and tricky is wire size. You can’t take whatever copper wire you have laying around and run it from the panel to the charger. That would be too big. Too small and you’ll melt the insulation off the wire, maybe start a fire. Too large and you’re throwing away money on unneccessary materials. The calculator covers this with a wire reference section that allows you to select the correct gauge based on breaker size. It also factors in derating, which means lowering the wire capacity because it’s run in conduit or exposed to some kind of heat. A lot of folks overlook this. They don’t realize that running six wires through one conduit will lower each wire’s ampacity. It flags this on calculator so you know what to change before purchasing materials.
That’s because your vehicle’s efficiency is much more relevant than you realize. While an efficient electric sedan may only require 240 watt-hours of electricity per mile, a heavy electric truck might require 450. The same 40-amp charger would top up the sedan much more effective than it would for the truck. Plug your own vehicle’s efficiency into the calculator. That makes results personal. It is no longer a vague guess, but instead something that can give you a decent idea of when you’ll need your car plugged in to get you through the day.
The last thing is panel capacity. If your house is older, chances are its panels is maxed out. Adding another circuit (such as a 60-amp or a 40-amp) may put it over. There’s a box on the calculator where you enter the “spare” capacity of your panel. This way you can do a basic check that there’s still some breathing room in the system. Not a substitute for a pro load study, but at least it’ll give you a general sense if you’re digging yourself into a hole. Always double check with an electrician though. He/she will verify the local code details, terminations, GFCI requirements and more, that the calculator won’t know about.
How far does it go? What gauge wire do I need? How big of a breaker? The calculator removes the noise. You get your answers in miles. You get your answers in ranges. Your answers in wire gauge and breaker size. It’s a manageable set of decisions that translates an otherwise confusing electrical project into something you can wrap your head around.