Extractor Duct Length Calculator
Total straight duct, vertical rise, elbows, terminal caps, and duct type allowance to estimate the equivalent length of a bathroom, laundry, or kitchen extractor run.
Extractor Duct Length Result
Detailed Breakdown
| Round duct | Inside area | Typical fan range | Velocity at 100 CFM |
|---|---|---|---|
| 4 in / 100 mm | 0.087 sq ft | 50 to 90 CFM | 1,146 fpm |
| 5 in / 125 mm | 0.136 sq ft | 70 to 130 CFM | 733 fpm |
| 6 in / 150 mm | 0.196 sq ft | 100 to 250 CFM | 509 fpm |
| 7 in / 180 mm | 0.267 sq ft | 180 to 350 CFM | 374 fpm |
| 8 in / 200 mm | 0.349 sq ft | 250 to 450 CFM | 286 fpm |
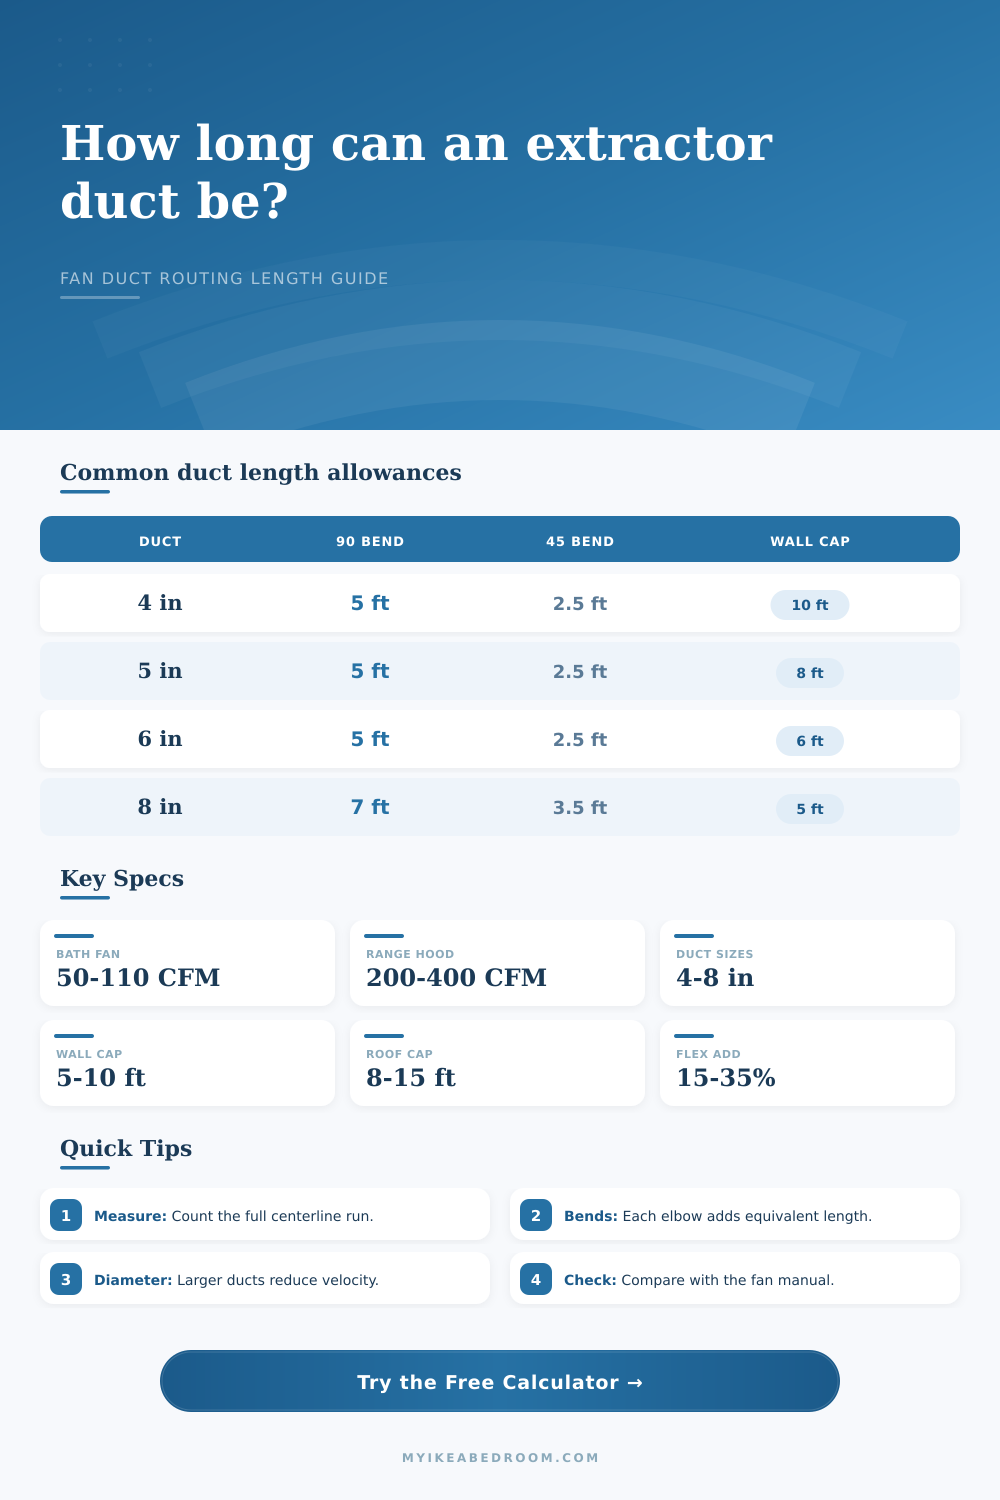
| Duct diameter | 90° elbow | 45° elbow | Wall cap | Roof cap |
|---|---|---|---|---|
| 4 in / 100 mm | 5 ft / 1.5 m | 2.5 ft / 0.8 m | 10 ft / 3.0 m | 15 ft / 4.6 m |
| 5 in / 125 mm | 5 ft / 1.5 m | 2.5 ft / 0.8 m | 8 ft / 2.4 m | 12 ft / 3.7 m |
| 6 in / 150 mm | 5 ft / 1.5 m | 2.5 ft / 0.8 m | 6 ft / 1.8 m | 10 ft / 3.0 m |
| 7 in / 180 mm | 6 ft / 1.8 m | 3 ft / 0.9 m | 6 ft / 1.8 m | 10 ft / 3.0 m |
| 8 in / 200 mm | 7 ft / 2.1 m | 3.5 ft / 1.1 m | 5 ft / 1.5 m | 8 ft / 2.4 m |
| Extractor route | Common duct | Practical equivalent run | Planning note |
|---|---|---|---|
| Small WC or powder room fan | 4 in / 100 mm | 25 to 35 ft / 7.6 to 10.7 m | Short wall exit is preferred |
| Bathroom ceiling fan | 4 to 5 in / 100 to 125 mm | 35 to 50 ft / 10.7 to 15.2 m | Limit bends in loft runs |
| Laundry or utility extractor | 4 to 6 in / 100 to 150 mm | 25 to 45 ft / 7.6 to 13.7 m | Keep lint-access points reachable |
| Standard cooker hood | 6 in / 150 mm | 35 to 50 ft / 10.7 to 15.2 m | Use smooth metal where possible |
| High-output cooker hood | 7 to 8 in / 180 to 200 mm | 30 to 45 ft / 9.1 to 13.7 m | Upsize if velocity is excessive |
| Detail | Common planning clearance | Why it matters | Check before cutting |
|---|---|---|---|
| Exterior exhaust to opening | 3 ft / 0.9 m minimum | Helps stop moist air re-entering | Local code and fan manual |
| Exhaust to mechanical intake | 10 ft / 3.0 m typical | Reduces air contamination risk | Local ventilation rules |
| Condensation slope | 1/8 in per ft outward | Lets moisture drain outside | Route pitch and support spacing |
| Cooker hood above hob | 24 to 36 in / 610 to 914 mm | Maintains capture and heat clearance | Hood and hob manufacturer limits |
The most common mistake people make with bathroom fans (and kitchen hoods) is they buy an expensive motor, and then kill it by pairing it with lousy ductwork. That’s a familiar pain point in renovations: You spend big bucks to get a powerful extractor, fire it up and all you can hear is a roar … but barely feel any breeze.
The solution isn’t usually your fan. It’s usually the path it must travel, which create resistance. Just as water in a pipe loses pressure at each bend and foot of distance due to friction, air does too. Without planning for this resistance, the fan stumble well before it removes cooking grease (or moisture from a bath).
Why Your Bathroom Fan Is Loud and Weak
You’ll notice it’s not that straight distance. Nope. It’s not just straight pipe and turns; it accounts for friction, bends, and drag. Rather its a calculated number: the equivalent length. Equivalent length is the one number that includes all the physical limitations, and this page has a calculator to do just that.
First, it takes in what you entered (the vertical rise and the straight run) which basically maps out the physical route. Then you enter all your bends and it calculate the penalty for each one. It also calculates drag of exit cap and the friction of the straight duct.
The bends is the critical part most folks overlook. You measure the tape, sure, but then you don’t account for the fact that 90 degree turns aren’t free. Each one creates turbulence… Slowing down the air considerabley. The tool considers that turn to be like adding more feet of straight duct. That’s where most folks get tripped up.
Choosing the right duct diameter is also important. Four inches may slide nicely behind a vanity, but requires air to travel very fast to get sufficient volume. Fast = loud and also higher resistance. Six inches or eight inch ducts will move equal air at much lower, quieter velocity. See the reference table on the page which show velocity reduction with increasing diameter. If you can frame for it, go big (i.e., 6 or 8).
A small change in materials make a big difference in performance. This shifts the math based off the kind of duct material used as well. Round duct made of smooth metal is the gold standard: Air flows cleanly through it. Corrugated interiors in flexible duct create enormus amounts of friction. When you choose your flex options on the calculator, it adds an allowance for this fact, flex duct will make your system far less efficient. Where possible, use rigid (or semi-rigid) metal. It’s more work to install but saves huge on fan stress.
Terminal caps also make a difference. For example, a roof cap must contend with both wind and gravity pressure, while a simple wall cap isn’t quite so restrictive. These differences is included in the set of preset options from the tool.
It may well turn out that the proposed run for your fan through the loft are longer than its maximum rated length. In this case, you’ve got only two choices: Either increase the power of your fan, or reduce the run by taking a more direct route. Occasionally, you’ll need to do both.
To be thorough, I like to measure down the middle line of the duct. That way you’re taking into account real amount of material the air moves through and not simply the exterior wall thickness. It doesn’t matter much on short runs, but adds up with long ones. Consult your fan’s manual to see what its static pressure limitations are. The calculator provides a decent guess, but the manufacturer’s information is what matters most. You should of checked that first.
Ultimately, a good, low-key ventilation system is all about balance. It’s about balancing the weakness of the route with the strength of the fan. Plan your ducts carefully and don’t suffer through the inefficiency and noise that plague so many DIY installs. Air screaming isn’t the name of the game; it’s air moving. Get that moisture out while making as little noise as possible. Let the air do its job and measure twice, calculate once.