Polka Dot Wall Quantity Calculator
Estimate how many wall dots you need for a bedroom accent wall, including real wall geometry, dot diameter, row spacing, edge margins, openings, furniture-blocked areas, and layout extras.
Choose a real bedroom wall scenario, then tune the dimensions and spacing for your exact wall.
| Wall shape | Measurements needed | Area formula | Bedroom use |
|---|---|---|---|
| Rectangle wall | Width x height | Width x height | Most headboard, dresser, desk, and wardrobe accent walls. |
| Triangle gable wall | Base width x peak height | 0.5 x base x height | Attic bedrooms, sloped ceiling ends, and tent-like alcoves. |
| Circle mural zone | Diameter of circle | 3.1416 x radius squared | Round dot fields above dressers, reading chairs, or crib rails. |
| Custom dot zone | Known square area | Entered area minus blocked area | Use for partial panels, renter boards, or measured masking zones. |
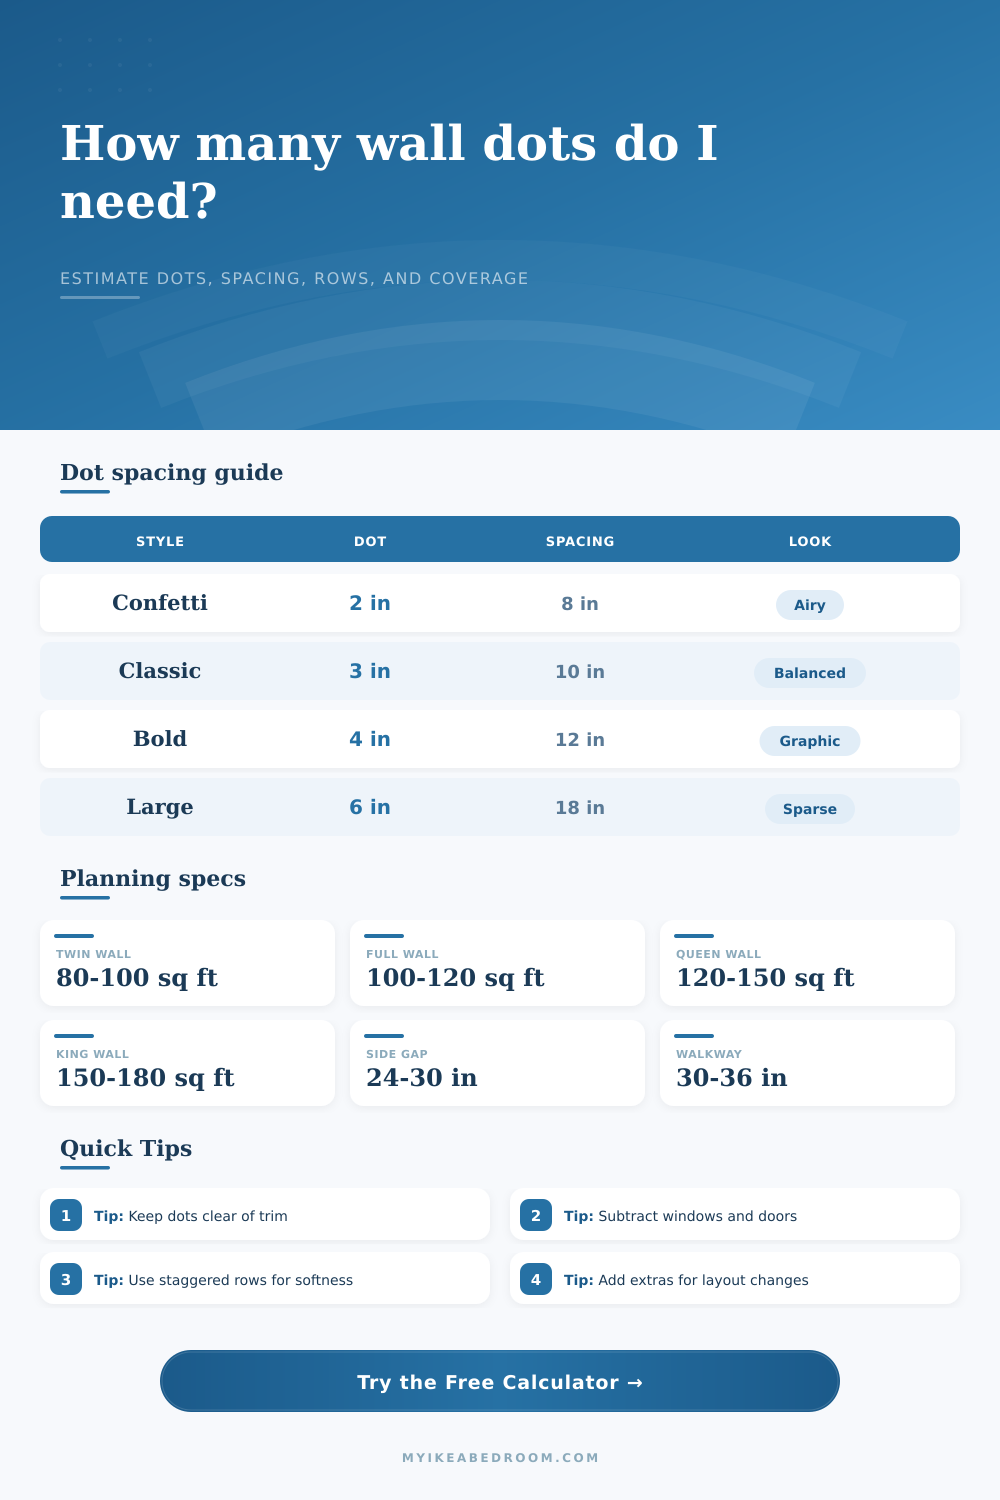
| Dot style | Diameter | Center spacing | Approx. count per 100 sq ft |
|---|---|---|---|
| Mini confetti | 2 in | 8 in centers | About 225 dots in a straight grid before extras. |
| Classic bedroom dots | 3 in | 10 in centers | About 144 dots in a straight grid before extras. |
| Bold headboard dots | 4 in | 12 in centers | About 100 dots in a straight grid before extras. |
| Large statement dots | 6 in | 18 in centers | About 45 dots in a straight grid before extras. |
| Bedroom wall | Typical dimensions | Approx. area | Planning note |
|---|---|---|---|
| Twin bed wall | 8 x 8 ft | 64 sq ft | Works for a compact room or a single bed nook. |
| Full bed wall | 10 x 8 ft | 80 sq ft | Often leaves space for one nightstand or a small desk nearby. |
| Queen headboard wall | 12 x 8 ft | 96 sq ft | A common accent wall size behind a queen bed and two tables. |
| King feature wall | 14 x 9 ft | 126 sq ft | Use wider spacing so the wall does not feel crowded. |
| Furniture zone | Common clearance | Dot planning effect | What to subtract |
|---|---|---|---|
| Beside bed | 24-30 in walking clearance | Keep dots visible outside the bedside path and nightstand footprint. | Subtract tall nightstand or lamp-backed wall area if hidden. |
| Bed foot walkway | 30-36 in clear walkway | Leave lower dots durable and easy to clean near foot traffic. | Subtract benches, trunks, or low storage that cover the wall. |
| Dresser front | 36 in drawer clearance | Center a dot field above the dresser rather than behind open drawers. | Subtract mirror, dresser height, or wall-mounted organizer area. |
| Wardrobe doors | 30-36 in swing or slide zone | Avoid placing precise dot rows where door panels visually break them. | Subtract wardrobe face, closet doors, or tall storage silhouettes. |
The calculator treats the clear border as empty wall, then places the first dot center one half spacing inside the usable grid.
For a bedroom, tall headboards, mirrors, wardrobes, windows, and closet doors can hide enough wall to change the dot quantity noticeably.
When it comes to using polka dots on the wall of a bedroom, don’t do it willy nilly. If you just start placing circles and hope for the best, chances are your wall will look like a confetti cannon exploded inside the room instead of looking like an intended design element. Your wall will likely look like it exploded from a confetti cannon rather then looking like a planned design choice.
The problem isn’t that you don’t like them. It is the math of how far apart they need to be spaced. You have to space them so furniture doesn’t hide parts of the wall you already paid to decorate. You can use specific calculator for this purpose.
How to Space Polka Dots on Your Wall
The majority of people think you divide the amount of wall space by how big each dot is. And then they gets confused. Because it doesn’t take into account that walls aren’t blank canvases! You have tall headboards, windows, doors…dressers that obscure those dots you paid money for.
You can enter your own unique wall dimensions and what is blocking the dots, like a tall headboard. A wide wardrobe door?), the tool does all the math for you. It’ll take into account the space behind your king-sized headboard, or remove the space occupied by a large wardrobe door, so you don’t waste any dot.
The personality of the room come down to choosing the correct dot size. Small dots (such as two inches) are airy and light. They are perfect for rooms that need a touch of softness, like small nooks or perhaps nurseries. Large dots (such as four inches or even six) really make a bold statement! They demand your attention. They look best on a large wall behind a larger bed.
Here’s the trick: Match the dot diameter to the spacing. So if you want big dots but close together it will look crowded on the wall. Or if you go for tiny dots but space them wide apart it just feels like it was an accident. The calculator balances all this out to keep a rhythm in the pattern.
More than anything else, layout pattern is important. A straight grid is simple to tape out, looks clean, and feels orderly. Staggered half-drop rows look like traditional wallpaper. Because the eye doesn’t follow straight lines around the space, it feels softer. Random fills are the most challenging to pull off. They have to look random but with some thought behind them otherwise they just look like a mistake.
When using this layout, plan on a buffer zone in terms of your dot count. Things happen when installing. Maybe you miss a dot. Or maybe one of those lines on your ceiling isn’t exactly level. Having an extra 10-15% buffer will account for the flaws without having to replace any dots.
The same holds true for bedroom walls. When calculating how much to spend, take into account clearances. If you place a bench or nightstand in front of your wall, nobody will see the lowest rows of dots. To prevent this, make sure there are at least thirty inches of clearance between the wall and the bed. Why bother counting dots that are blocked? Deducting these blind spots not only cuts costs but also minimizes frustration.
On this page, a table of references explains how various bed sizes relates to common wall sizes plus obstacle footprints. Does density change how it looks in different lighting? A dense pattern of tiny dots may read as noise in a dimly-lit room but pop and be clear when light is bright and sunny. You sometimes have to increase your spacing so that the wall doesn’t overwhelm. Visual preview trumps any formula here. The calculator tells you how much; your eyes tell you whether or not it feels overwhelming.
First; draw it out. On paper. Or use a computer drawing program. Mark where your existing furnitures sits. Then mark where you’d like the clear boundaries to be (on the walls). You’ll see how far you can push back the dots from the corners and trim work. Measure these clear spots, then don’t purchase your dots until you know what those measurements are.
The more you can push back the dots from the corners, the more it’s going to feel like this was meant to be on the wall…. It is not just something slapped up there.
Then, lay down the law… literally! Use the numbers you drew out and stick to them. That’s where the satisfaction in completing a perfect pattern lies… It isn’t just about the dots, but also about the discipline required to do the layout correctly! You should of followed this to get it right. It may sound silly, but trust me, it matters. After all, when it’s finished, you’re going to have a wall that doesn’t just feel decorated, it feels designed. You would of loved the result if you used the tool.