Stripe Width for Wall Calculator
Calculate painted stripe width, neutral gap spacing, margins, coverage area, and tape marks for vertical or horizontal bedroom wall layouts.
Each preset loads real room-scale dimensions and recalculates the stripe pattern.
| Wall or room span | Imperial width | Metric width | Layout use |
|---|---|---|---|
| Closet return or alcove | 72 in / 6 ft | 183 cm | Narrow vertical stripe set |
| Small bedroom wall | 120 in / 10 ft | 305 cm | Balanced 5 to 8 stripe layouts |
| Queen bed wall | 144 in / 12 ft | 366 cm | Centered feature wall behind bed |
| King bed wall | 168 in / 14 ft | 427 cm | Wider 9 to 13 stripe layouts |
| Long wardrobe wall | 192 in / 16 ft | 488 cm | Extended repeat beside storage |
| Mattress size | Width | Length | Useful stripe check |
|---|---|---|---|
| Twin | 38 in / 97 cm | 75 in / 191 cm | Center stripes over a narrow bed |
| Twin XL | 38 in / 97 cm | 80 in / 203 cm | Same width as twin, longer frame |
| Full | 54 in / 137 cm | 75 in / 191 cm | Check stripe symmetry at bed edges |
| Queen | 60 in / 152 cm | 80 in / 203 cm | Common centered accent reference |
| King | 76 in / 193 cm | 80 in / 203 cm | Needs wider wall margins |
| California king | 72 in / 183 cm | 84 in / 213 cm | Slightly narrower, longer footprint |
| Furniture reference | Typical width | Metric width | Measurement note |
|---|---|---|---|
| Single nightstand | 18 to 24 in | 46 to 61 cm | Check if a stripe lands behind each stand |
| Compact chest | 30 to 36 in | 76 to 91 cm | Compare with one or two stripe pitches |
| Wide dresser | 54 to 72 in | 137 to 183 cm | Use centerline to balance backdrop |
| Wardrobe frame run | 39 to 79 in | 99 to 201 cm | Reserve clear edge margins before striping |
| Bedside walking aisle | 24 to 30 in | 61 to 76 cm | Useful for visible wall beside the bed |
| Measured run | Stripe count | Gap width | Calculated stripe width |
|---|---|---|---|
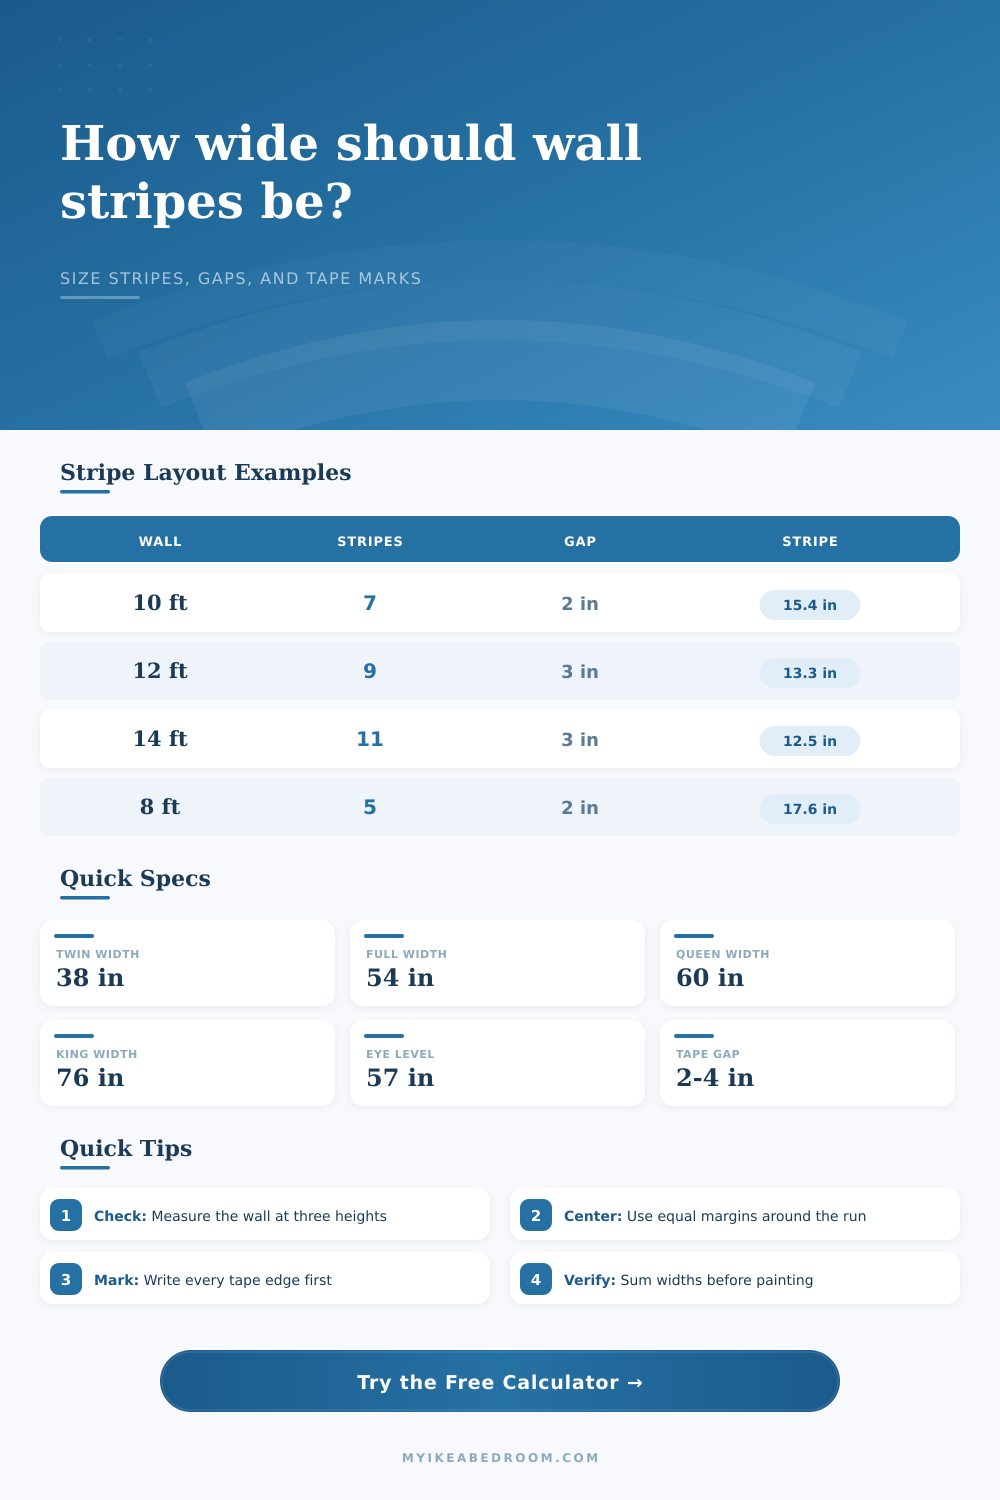
| 96 in active run | 5 painted stripes | 2 in gaps | 17.6 in each |
| 120 in active run | 7 painted stripes | 2 in gaps | 15.4 in each |
| 120 in active run | 9 painted stripes | 3 in gaps | 10.7 in each |
| 144 in active run | 9 painted stripes | 3 in gaps | 13.3 in each |
| 168 in active run | 11 painted stripes | 3 in gaps | 12.5 in each |
It’s the kind of project where most folks begin by selecting their paint color, and wind up painting a bar code on the wall. Wall stripes is really just spatial math; they’re as much about proportion than they are about geometry. When they feel wrong, it’s almost always because the size of the gap in relation to the painted section doesn’t align with the room’s scale.
That’s why I created the calculator above, to do the math for you, while you decide if the pattern feels right for how your furnitures is arranged. Just input your wall dimensions, select the number of stripes you want, specify your gap preferences, and the tool will spit out the exact width of every single painted stripe and total area required to be covered. No guesswork! No awkward mid-corner cuts!
How to Plan Your Wall Stripes
DIYers tend to forget about the margins. Walls pressed up against each other in a line from corner to corner can be visually claustrophobic: like the room is being squeezed. Giving yourself a neutral margin on both sides help create a visual frame where your eye can rest. With the calculator, you can specify exactly what those start/end margins should of be. For example, maybe you want twelve inches on either side of a queen bed wall so that the focus stay centered around the headboard. That’s shown in the reference table at the bottom of the page which shows how typical bed width correspond to typical wall spans. Those margins vanish completely if you’re working with a skinny alcove and you have to use closer stripes to prevent visual clutter. It is a little thing, but a big deal in how it affects the overall look.
Stripe direction affects perceived space in a way that’s always predictable. A horizontal band makes the wall appear wider; a vertical stripe make it appear higher. To help you determine how much to adjust, the tool allows you to toggle between vertical and horizontal orientations. This automatically re-calculates the pitch (distance from the beginning of one stripe to the beginning of the next, accounting for the gap), depending on whether you’re measuring up the height of a wall, or across its width. Maintaining a consistent pitch is key to creating professional-looking result. By the time you get all the way around the room, if your pitch isn’t consistent, not even a little bit; the pattern will have drifted out-of-whack, making it look amateur.
Of course how many stripes you have also determines just how bold a statement it will make. If you use fewer but wider stripes, you’ll achieve more of a moddern, graphic look, great for a large space with high ceilings. Narrower and you get more of a texture which could be warm in a nursery or small bedroom. To adjust to the right amount of stripes, simply choose a stripe count (the tool will auto-adjust the stripe width based on the number of stripes you’ve chosen). For example, if you’re working with a 14 foot long wall and you’d like 9 stripes, we’ll figure out exactly how wide each band need to be to fit all those stripes into available space. That way you won’t end up with a situation where your last stripe is half as wide as the rest… who wants that? You want balance. And you want symmetry.
Take some measurements before you go anywhere near any tape! Your walls might be sloped slightly, and that small difference can add up to a few inches along the length of the wall. You want the smallest measurement, taken at the bottom, middle, and top of the wall. This creates a slightly larger gap where the wall bulges, but it ensures the pattern fits all the way across.
There are handy reference cards on the tool for quick conversions from square footage to square meters, inches to centimeters, etc., in case you’re trying to compare with design guides from around the world or buy paint by volume.
It takes a steady hand and some patience to stripe paint on. Use painter’s tape where you have calculated lines, then seal with a light coat of base color along all taped edges to keep it from bleeding. Starting at one end, roll out the stripes in sequence as labeled until they are all applied and allowed to set somewhat before rolling out the next. Don’t try to rush this or you’ll be dragging wet paint down into other spaces. It should appear that someone was purposeful about it and didn’t just slap it on randomly.
When you do the math first, there is no guessing once you pick up the brush. This makes the wall more a structure behind the action and less a canvas for unplanned decorating. This transforms a decorated wall into a designed room.