Picture Wire Length Calculator
Estimate the cut length for bedroom wall art wire, including D-ring spacing, pulled sag, wrap allowance, wire angle, and a conservative load check.
Pick a common frame setup, then adjust the dimensions to match your exact hardware.
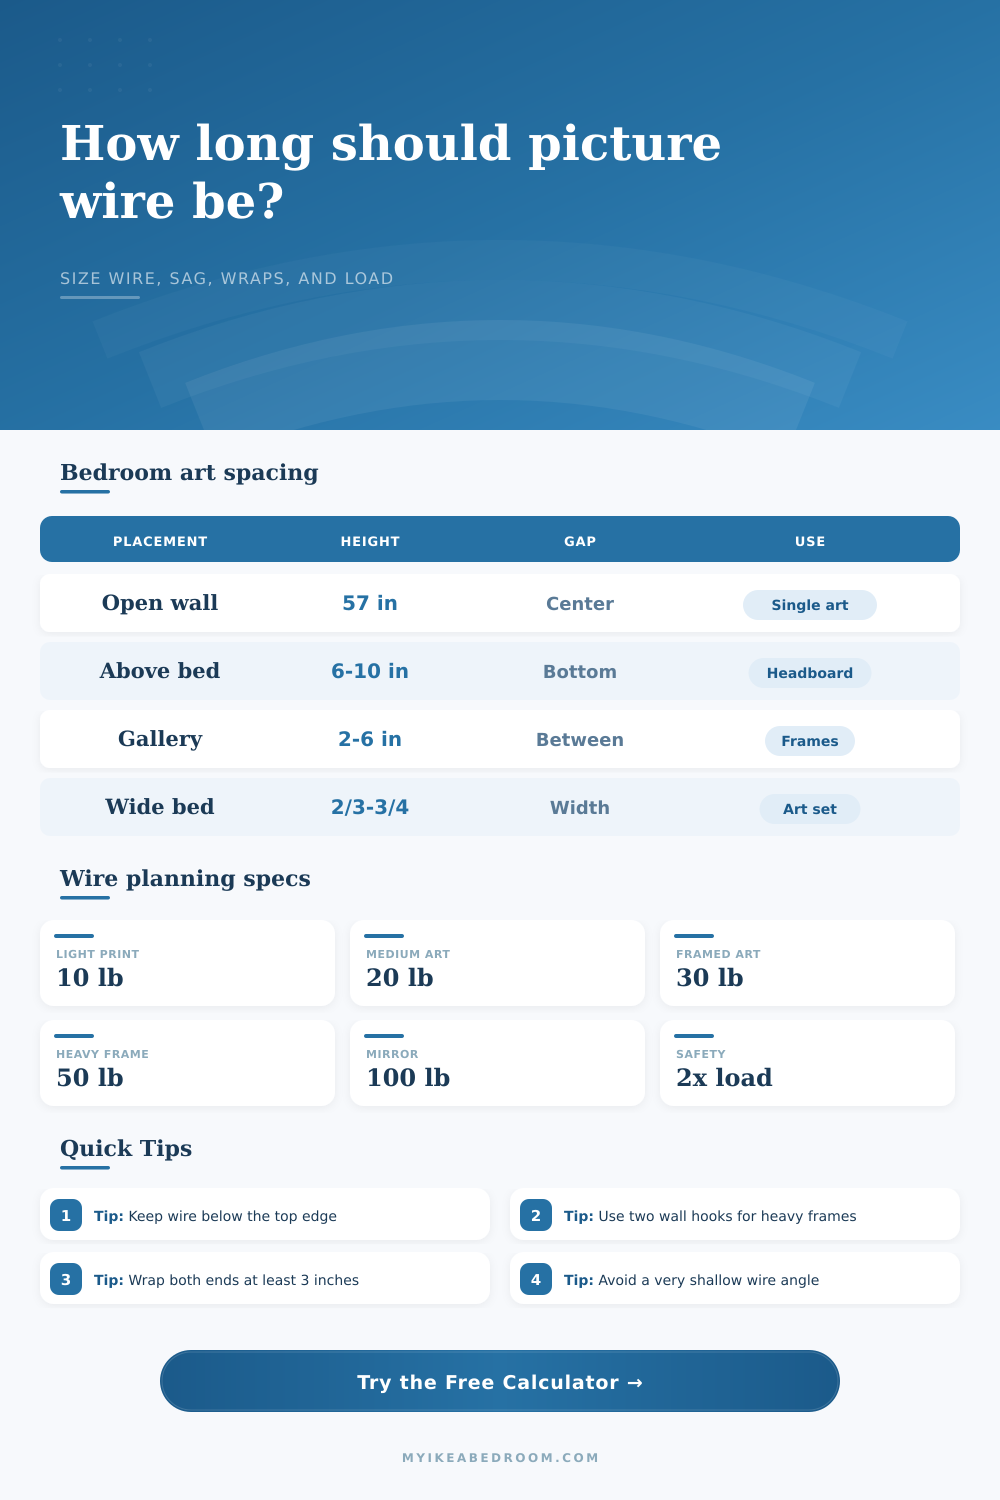
| Placement | Common measurement | Calculator use | Bedroom note |
|---|---|---|---|
| Open wall artwork | 57 in centerline from floor | Nail height = centerline + half frame height - peak drop | Works well beside wardrobes, dressers, and reading chairs. |
| Above a headboard | 6-10 in between headboard and frame bottom | Nail height = headboard top + gap + frame height - peak drop | Use the higher end when pillows sit tall. |
| Gallery wall group | 2-6 in between frame edges | Use equal peak drops so top lines stay level | Small frames usually look tighter; large frames need more air. |
| Art over a bed | About 2/3 to 3/4 of bed or headboard width | Helps choose frame width before wire sizing | Keep edges inside the headboard width for balance. |
| Wire rise vs ring span | Approx. angle | Side tension multiplier | Practical read |
|---|---|---|---|
| 10% of ring span | 11° | 2.55x per side | Too shallow for most framed art; increase rise or move rings inward. |
| 15% of ring span | 17° | 1.74x per side | Usable for light frames when hardware ratings are generous. |
| 25% of ring span | 27° | 1.12x per side | Good common target for bedroom prints and canvases. |
| 35% of ring span | 35° | 0.87x per side | Steeper, easier on hardware, but wire may show if the peak is high. |
| Frame setup | Typical size | D-ring position | Starting wire plan |
|---|---|---|---|
| Nightstand accent frame | 12 x 16 to 16 x 20 in | 2-3 in from sides, 3-4 in down | Keep peak 1-1.5 in below top so the wire stays hidden. |
| Queen bed landscape | 30 x 20 to 40 x 28 in | 4-5 in from sides, 5-7 in down | Use a 2-3 in peak drop for simple single-hook hanging. |
| Gallery wall portrait | 16 x 20 to 24 x 30 in | 3-4 in from sides, 4-6 in down | Match peak drops across frames to simplify nail marks. |
| Large above-bed art | 48 x 30 to 60 x 36 in | 6-8 in from sides, 7-10 in down | Use heavier wire and consider two hooks or fixed hangers. |
| Marked rating | Best use range | Hardware match | Load caution |
|---|---|---|---|
| 10 lb wire | Up to about 5 lb art with 2x margin | Small D-rings or screw eyes | Check light frames after doors slam nearby. |
| 20 lb wire | Up to about 10 lb art with 2x margin | Medium D-rings and picture hook | Shallow sag can still overload one side. |
| 30-50 lb wire | About 15-25 lb art with 2x margin | D-rings screwed into solid frame stock | Use wall anchors suited to the wall material. |
| 75-100 lb wire | Heavy framed art or mirrors | Heavy D-rings, screws, and rated hooks | For beds, fixed mirror hangers are often steadier. |
Attach one side, pull the wire to the intended hook point, and confirm the peak remains below the frame top. Then add the second wrap allowance and cut.
A shallow wire angle raises tension on the wire and D-rings. If the warning mentions a shallow angle, move the rings inward or increase the rise before hanging.
Remember that time you hung a picture only to find it crooked? And then you sat down only to bash your head on the picture frame because you’d hung it too low? Blame gravity. Most people blame their nails, but they aren’t the real culprit. Blame your spouse for standing in front of it while you hammered. Nope, the culprit was likely your wire. Namely: your wire’s tension and its length.
This page do the geometry for you. Plug in your frame size and get exact number of inches you need to cut. Why? Knowing why will save you from patching drywall.
How to Hang Pictures Level and Safe
First, measure your frame’s outer width. Don’t measure interior width (the mat). The reason is that you’re hanging D-rings on the outside corners. Each inch of additional width add to the distance for wire to span.
Next: Where do you want the rings located in relation to the top edge? Many people hangs their frames with rings positioned too near the top. When the rings are too high, there’s no way for the wire to sag. So the hook has to rides really high to maintain an even frame. By dropping those rings down 6″ or so, it allow the wire to drop into a mild V. It also hides tip of loop behind the top molding.
Next, the calculator request a “peak drop” number. That sounds techy, but it’s simply how far down from the top of the frame the top of your wire sits when suspended. Ideally, you want that to be below very top of the frame so you don’t see any wire. Too high and you’ll see the wire. If you set that number too low, the frame will hang too high. It’s a tiny visual detail, but it makes difference between a pro-looking install and a makeshift one.
Weight Matters
Weight is more important then anyone realizes. Not only does the wire has to be strong enough to hold the mirror up without snapping, but it has to hold weight of whatever’s back there against the wall. That fifty pound mirror doesn’t sound so bad until you remember that because the wire hangs at a shallow angle, the tension can double or triple on both sides.
The tool tell you to use wire rated for twice what it weighs. So if you have a five pound picture, the tool recommend using a wire rated for at least ten pounds. They say they give themselves some wiggle room for angle and shock as you pull up on the frame. Don’t scrimp in this department. Use a heavier gauge if you’re hanging a heavier piece. A print behind glass probably want sturdier support.
Take into account where you want to place it as well. A gallery wall has different rhythm than art placed above a bed. You typically want at least 6 inches between the bottom edge of your frame and the top of your headboard. That way there’s space for the piece without it feeling too tight or unbalanced.
When hanging pieces on a gallery wall, maintain the consistent feel by keeping the drop (the part that shows) relatively equal across all pieces. You don’t necessarily have to have the exact same amount of wire showing through, but you do want the visual center of each piece to line up with one another. This is true even if the pieces themselves is different heights.
Pull the wire through one D-ring before cutting to simulate a hang. Feel how it hangs. Too tight? Your span may be wider than that wire can bend. Or maybe you have the hook hung wrong. There are some general spacing recommendations in the tool, found on those handy reference tables, but go with your eyes here. Does the frame look right? A fraction of an inch up or down can make all the difference in the hook height. Get close but don’t sweat perfection.
After cutting it to the desired length, simply thread the end of wire through both D-rings and secure tightly. Thread on about 4 inches. This is typically more than enough to wrap around three or four times. Then, wrap over and loop back under a couple of times before wrapping again and looping back again. Knot or use a small zip tie to secure, if necessary. Try not to use too large of a knot as that might stop the flat mounting of the frame to the wall.
Putting a picture on the wall isn’t just an exercise in locating some wall space. It’s an exercise in wrestling with those invisible forces that keep it hanging up there. Learn to respect the load rating, get the length of the string right, and your art in the bedroom will hang level, out-of-sight, and safe from falling down. People gets that part wrong. They think about the nail, not the string. When you fix the string, the nail takes care of itself.