Green Glue Quantity Calculator
Estimate damping compound tubes, cases, pails, treated sheet area, compound volume, and handling weight for double-layer wall, ceiling, and floor assemblies.
Each preset fills a real sheet-area scenario, chosen for wall, ceiling, subfloor, and room isolation takeoffs.
Green Glue Quantity Results
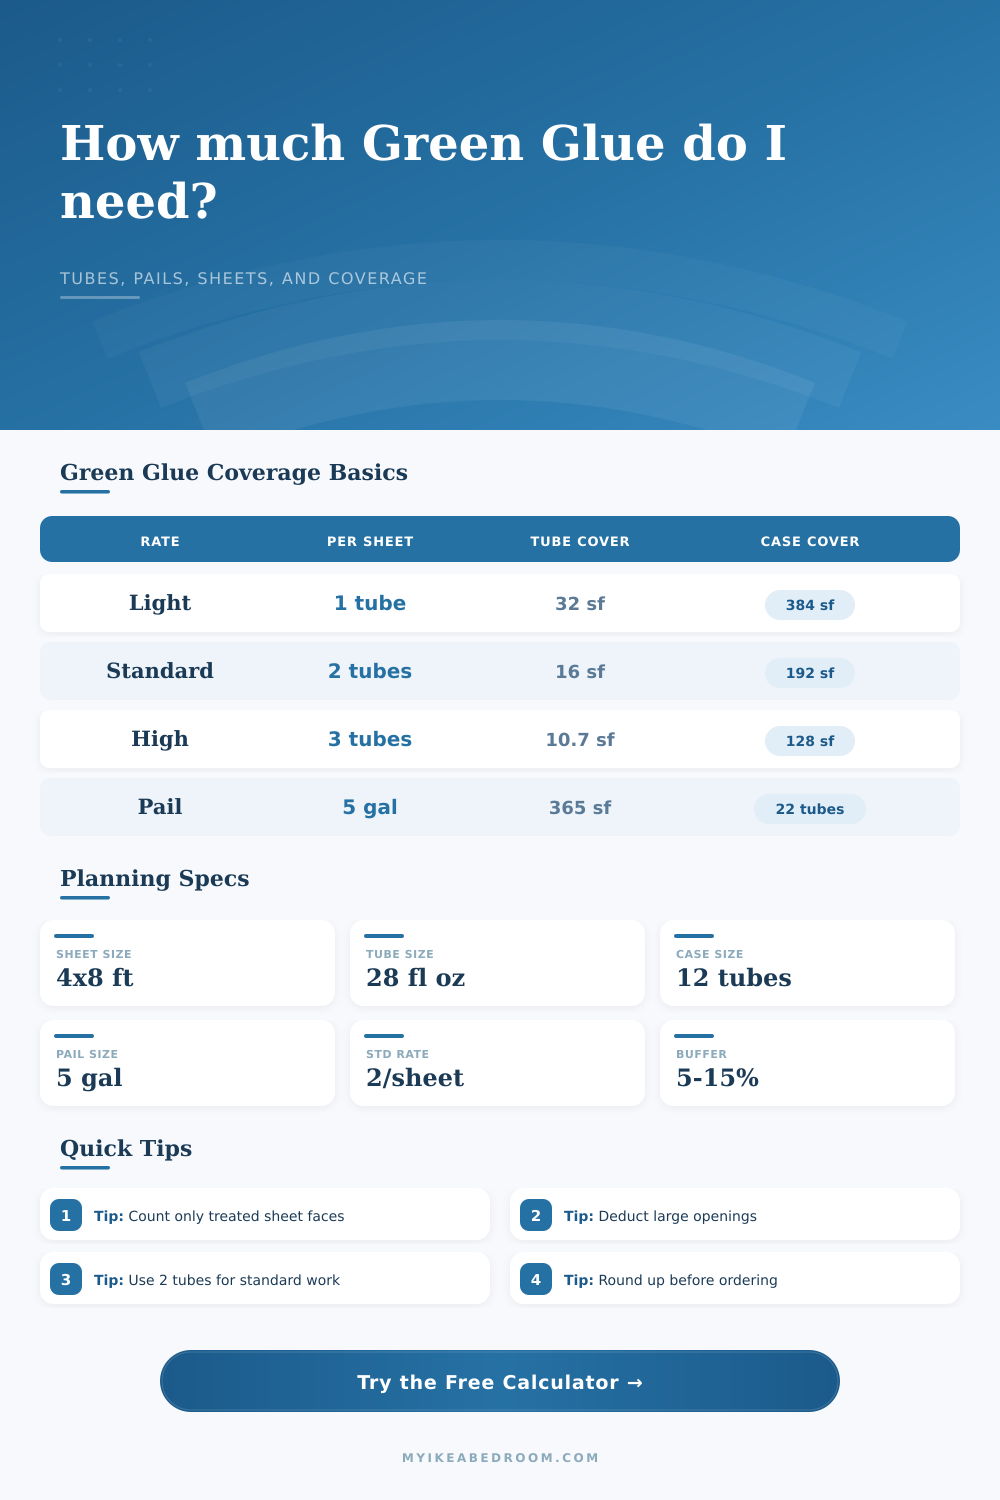
| Application target | Tubes per 4 ft × 8 ft sheet | Coverage per tube | Coverage per 12-tube case | Best use in calculator |
|---|---|---|---|---|
| Light damping | 1 tube | 32 sq ft | 384 sq ft | Low compound quantity, partial damping target |
| Standard damping | 2 tubes | 16 sq ft | 192 sq ft | Default for most sheet-on-sheet Green Glue takeoffs |
| High damping | 3 tubes | 10.7 sq ft | 128 sq ft | Higher damping target where low-frequency control matters |
| Do not exceed | Over 3 tubes | Not planned | Not planned | Too much compound can reduce intended performance |
| Package | Net compound | Standard-rate coverage | Equivalent planning unit | Calculator formula |
|---|---|---|---|---|
| Single tube | 28 fl oz / 828 mL | 16 sq ft at 2 tubes per sheet | 0.5 sheet at standard rate | Tubes = area ÷ 16 |
| Tube case | 12 tubes | 192 sq ft at standard rate | 6 sheets at standard rate | Cases = tubes ÷ 12, rounded up |
| 5 gal pail | 640 fl oz / 18.9 L | About 365 sq ft at standard rate | About 22 tubes by product guidance | Pails = area ÷ adjusted pail coverage |
| Bulk pail at high rate | 5 gal | About 243 sq ft at 3 tubes per sheet | 7.6 sheet equivalents | 365 × 2 ÷ 3 |
| Treated sheet area | Sheet equivalents | Standard tubes before buffer | 12-tube cases | 5 gal pails |
|---|---|---|---|---|
| 64 sq ft | 2 sheets | 4 tubes | 1 case | 1 pail |
| 128 sq ft | 4 sheets | 8 tubes | 1 case | 1 pail |
| 192 sq ft | 6 sheets | 12 tubes | 1 case | 1 pail |
| 320 sq ft | 10 sheets | 20 tubes | 2 cases | 1 pail |
| 384 sq ft | 12 sheets | 24 tubes | 2 cases | 2 pails |
| Common assembly takeoff | Base area | Deduction | Standard tubes | Notes for repeated surfaces |
|---|---|---|---|---|
| Bedroom shared wall | 12 ft × 8 ft = 96 sq ft | 0 sq ft | 6 tubes | Use 1 surface unless both sides are rebuilt |
| Door wall in nursery | 14 ft × 8 ft = 112 sq ft | 21 sq ft door | 6 tubes | Deduct the door before applying buffer |
| Basement ceiling | 18 ft × 20 ft = 360 sq ft | 0 sq ft | 23 tubes | Use high buffer for many partial sheets |
| Two office walls | 10 ft × 8 ft = 80 sq ft | 0 sq ft | 10 tubes | Set repeated surfaces to 2 |
In a well-treated room it is quiet, really quiet, very much so. And that all begins with math. You don’t have to love the math as a homeowner. But the calculator (above) converts that sheet area into weight, volume, pail, case, and tube size. That’s how to stage a floor, wall, or ceiling dampness project preciseley. Don’t guess if one case of compound will work for the media wall. The tool does those conversions for you; you just works out the strategy of installing it.
How does viscoelastic damping compound work? Essentials it converts sound energy to heat. When sound waves hit two pieces of drywall with a layer of this stuff sandwiched between them, the drywall flexes and resulting friction kills the sound. The amount you use really matter though, too little and there is gaps which allow sound through; too much and it’s like glue, locking the sheets together so that they’re no longer decoupled (defeating point). That’s why accurate quantity guesses are important (finding that sweet spot is not easy).
How to Use the Sound Dampening Calculator
Typically, we begin with our wall dimensions, length x height. This provides us with our square footage, but doesn’t take into account building specifics. Before proceeding, eliminate big holes such as window openings, door openings, or voids in ceilings above stairs. With this calculator, you can instantly remove those dead spaces. You don’t need to buy material for empty spaces where no compound will be applied.
For other small cut outs near outlet boxes, or where ceilings slope, there’s a different approach. Add some wiggle room to your total rather then trying to let the calculator handle every jagged inch manualy. And then there’s that buffer setting. Experience tends to beat theory here. In a typical room without any obstacles, maybe five percent is all you’ll need for waste. If you have a complicated assembly of many partial sheet, multiple angles, or difficult-to-reach areas, you may require fifteen or twenty percent. You can see in the reference table on the page how varying rates affect your bottom line.
One tube per sheet provide light damping and covers more area, but it doesn’t provides as much isolation. Two tubes per sheet is standard damping, which generally strikes a sweet spot for most residential applications. Three tubes moves into high damping territory, when you’re trying to stop low-frequency rumbles. For those wondering whether to go with big pails vs tubes, the answer depends on what’s best for your back, and what size project you’re tackling. Tubes weigh about two pounds, are easy to handle on a ladder or in tight wall cavities, and fit easy inside small spaces. Pails are heavier (about five gallons), contain enough compound to equate to about twenty-two tubes per five gallon pail, and require bulk application methods.
When figuring out exactly how many pails or cases align with your estimated number of tubes, the tool lays it all out for you. And it will convert that amount to pounds so you can plan accordingly for staging and transport purposes. Ten gallons of compound can weigh a lot more then you think…until you need to pick it up and carry it upstairs.
One other frequent error is that people assume that entire floor area is the treated area. With Green Glue, you use surface area of the face where the compound goes. So if you’re making a two-wall build out that runs in parallel, each face adds to the total. Ditto with a two wall and ceiling build out, all three planes comes into play. There’s a multiplier within the calculator that makes this mental calculation easier… So you don’t end up ordering twice the material to cover half a wall assembly!
Next, order based off the numbers. Round up and order so that you’ll never run out mid-joint (then have to make a mess pausing and risk inconsistent application thickness). Unopened tubes and sealed pails last a long time in storage, but the compound does has a shelf life. Better to have some extra on hand rather than scramble at the last minute for more from a far-away hardware store mid-weekend build. You should of planned ahead.
Buying is not the point. Buying enough is not the point. Getting a bunch of something that makes an effective barrier over time, that’s the point. This means selecting tubes correctly, spacing your beads properly, and calculating how many are needed to cover everything, which brings back that thick, quiet feeling when the room is finished. That math gives you the power to create it with no shortage or waste.