Awning Width for Window Calculator
Plan a window awning width from window size, trim, desired side shade, mounting landing, projection, side sun angle, and awning material so the recommended width covers both shade and bracket needs.
Each preset loads a realistic window size, projection, side sun condition, casing allowance, and awning material. Adjust the fields to match your measured window.
Fixed Fabric
Best width logic: shade-driven sizing with 36 in bracket spacing.
Panel note: 46 in usable fabric panels are common after hems and seams.
Use when: the awning needs a soft face and moderate projection.
Retractable Fabric
Best width logic: cassette width and arm spacing usually govern.
Panel note: fabric seams still matter even when the tube is continuous.
Use when: shade depth changes by season or room use.
Aluminum Hood
Best width logic: bracket landing plus formed end caps often set the width.
Panel note: wider formed pans can reduce visible seams.
Use when: a fixed low-maintenance cover is preferred.
Polycarbonate
Best width logic: round up to panel modules and support ribs.
Panel note: 24 in modules keep joints and ribs predictable.
Use when: rain cover and daylight transmission both matter.
| Projection | 15 deg side sun | 30 deg side sun | 45 deg side sun | Formula basis |
|---|---|---|---|---|
| 18 in projection | 4.8 in | 10.4 in | 18.0 in | projection x tan(angle) |
| 24 in projection | 6.4 in | 13.9 in | 24.0 in | projection x tan(angle) |
| 30 in projection | 8.0 in | 17.3 in | 30.0 in | projection x tan(angle) |
| 36 in projection | 9.6 in | 20.8 in | 36.0 in | projection x tan(angle) |
| Planning condition | Trim per side | Extra shade per side | Mount landing per side | Useful awning width formula |
|---|---|---|---|---|
| Flush modern frame | 0.5-1.5 in | 3-4 in | 3 in | window + 2 x larger side allowance |
| Standard exterior casing | 2-3.5 in | 4-8 in | 3-4 in | window + 2 x trim plus shade |
| Strong west side sun | 2-4 in | projection x tan(angle) | 4-6 in | use side shade as governing value |
| Wide decorative awning | 3-5 in | 8-12 in | 5-8 in | window + visual return both sides |
| Awning material | Conservative bracket span | Common panel or seam module | Minimum side landing | Calculator use |
|---|---|---|---|---|
| Fixed fabric on metal frame | 36 in | 46 in | 4 in | adds seams and brackets |
| Retractable fabric cassette | 48 in | 54 in | 6 in | allows wider support intervals |
| Fixed aluminum hood | 48 in | 96 in | 3 in | often governed by landing |
| Polycarbonate panel canopy | 32 in | 24 in | 5 in | rounds to panel modules |
| Standing seam metal canopy | 60 in | 24 in | 6 in | tracks pan count across width |
| Wood frame with metal cap | 36 in | 48 in | 6 in | keeps fasteners near framing |
| Window condition | Window width | Projection | Side angle | Estimated awning width |
|---|---|---|---|---|
| Small bathroom awning | 24 in | 18 in | 10 deg | 34-38 in |
| Bedroom casement awning | 32 in | 24 in | 18 deg | 50-56 in |
| Kitchen sink awning | 36 in | 24 in | 22 deg | 58-64 in |
| Living room picture awning | 60 in | 30 in | 25 deg | 90-98 in |
| Wide sunroom bank | 96 in | 36 in | 30 deg | 144-152 in |
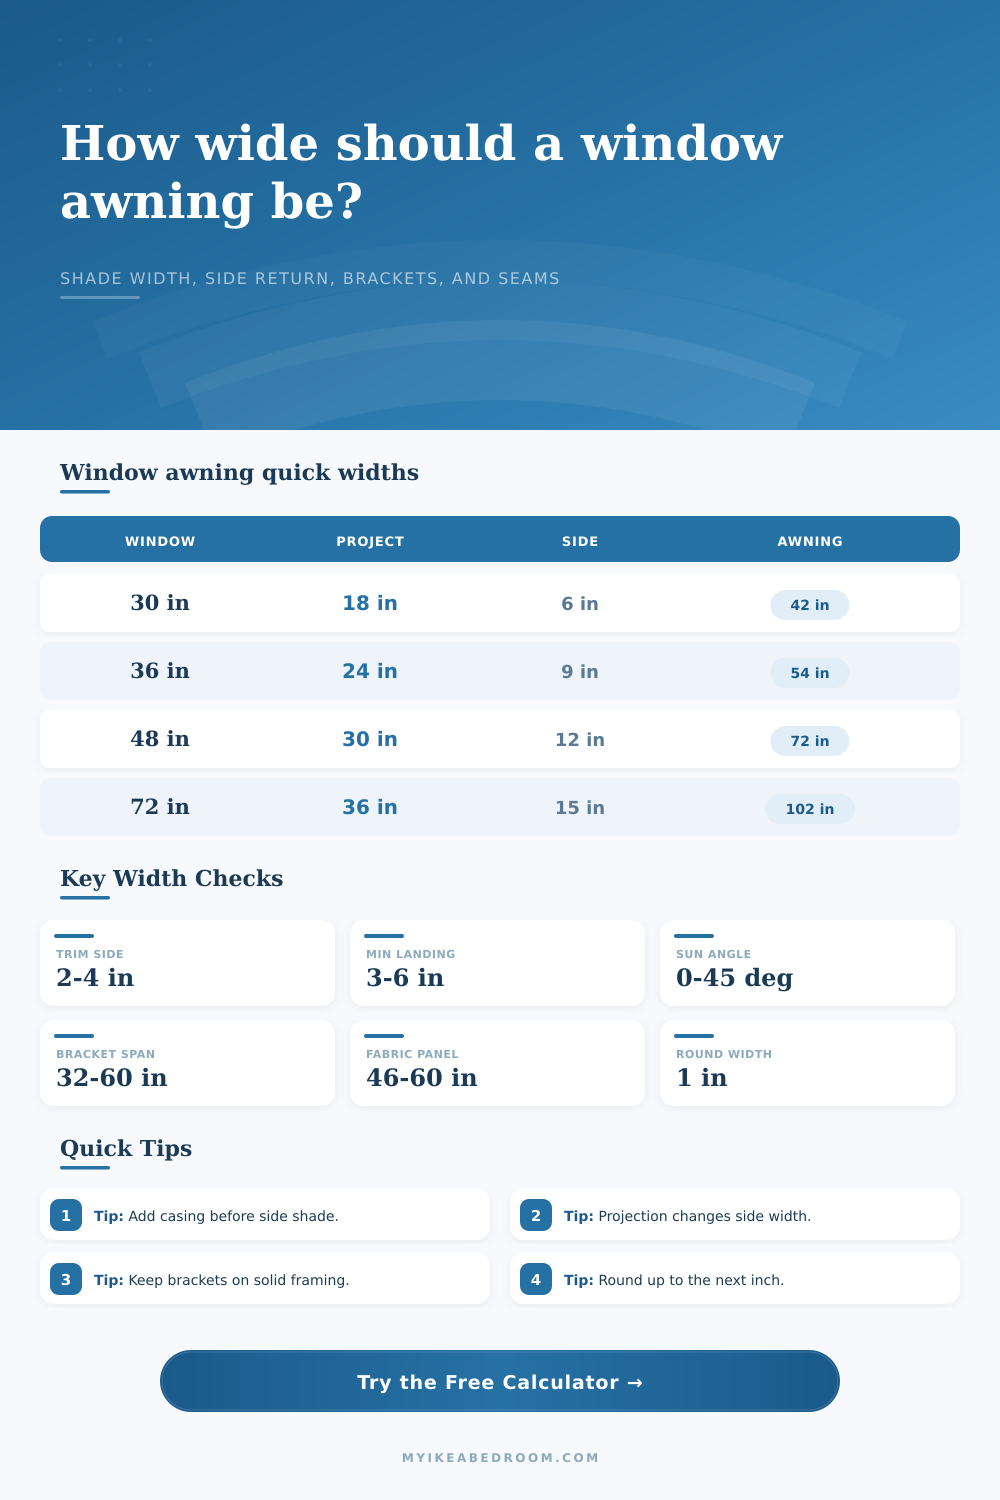
Measure the casing, not just the glass. A narrow awning that covers the clear glass can still look undersized if it stops inside the exterior trim. Add casing width first, then add the side shade return or mounting landing.
Use projection to shape width. A deeper projection throws a longer side-shifted shadow when sun arrives from an angle. The calculator uses projection multiplied by the tangent of the side sun angle so wide shade needs show up before brackets are counted.
In the abstract, this is a perfectly acceptable-looking window; until you go ahead and measure it and realize that nothing will fit. It’s 36-inches across, but plus four on either side for trim, plus another four or so for mounting hardware, and because of the way sun angles in during the afternoons there are shadows extending out into the room to the right.
So most folks simply buy an awning large enough to cover the glass, end of story. And therein lies the problem…usually. An awning that is only as wide as your window will look too small and will not protect wall next to the window. The secret is all about knowing what you’re measuring. And this is where the math comes into play: If you enter your exact circumstances into the calculator above, it will do the math instead so you don’t have to guess at conversions and coefficients.
How to Measure for Your Window Awning
We makes you consider three different categories of width that most people forget about. The physical window includes its casing or brickmold, which juts out past the glass. 2) An overhang is necessary to provide shading, especially if sun hits it from the side rather than directly. 3) You must make a structural allowance for anchor and bracket placement so they does not hang down past your sheathing or drywall.
You must plan for every one of these. Not just one. People do the wrong thing there. They’ll just take the measurement of the clear opening, then they want some more for looks. They don’t consider the geometry of their house. On the west-facing window, the sun comes in late afternoon at a low angle. A normal projection will cast its shadow way off to the right. To fix this problem, you would of have to increase the depth of your awning to add more shade. However, this also changes how much extra space you need on each side so that the fabric or metal follows the surface of the wall. This tool takes this shift into account so you won’t wind up with an awning that’s overhanging next door’s land on one side while exposing a stripe of hot wall on the other.
Material considerations also matter beyond size. For example, how does a standing-seam metal hood differ from a polycarbonate canopy, or a fixed fabric awning? A metal hood can be far longer between seams, but each end must land on something wide enough and strong enough to provide a firm base for the hood’s brackets. Thin, flexible materials like fabric come in stock widths. These is typically about 46 inches usable after hemming. If your desired finished width is more than this, plan on allowing for seam allowances.
The calculator factors all of this into consideration by checking whether your chosen landing margin matches the minimum requirements based off the type of material you select. That way you know, long before considering cost, that what you’re designing will hold up under load.
“Measuring casing trumps all other measurements when it comes to most contractors,” they’ll say. An awning that just barely spans the clear opening looks awkward because it does not look like it is framing the window. Adding a couple inches of return on either side helps balance out the visual proportion and ties the awning back to the architecture of the house.” In other words: You’ve got a design element now, not just a practical cover-up.
Want that thing to read like an intentional choice, not a rushed one? This reference table shows exactly how much shade you will gain or lose depending on sun’s angle and your house’s orientation. A fifteen-degree side sun may only require an inch or two more width, but shift that angle up to forty-five degrees, and suddenly things gets a bit more substantial. It is small stuff, but it makes a difference when you are hoping to cool down a bedroom in August or eliminate as much glare as possible from a kitchen sink area.
Don’t skimp! Don’t round down! Order 31. 32? Make it 33. If the calculation is for thirty point two-inches of space needed for your brackets, make it 31. It’s like putting on your pants too big. It just doesn’t fit right. You can’t screw it up and have it look good if you start out small. Every single inch counts from the moment you get your drill out.
All that math of material limitations, landings for structure and coverage for shade come together in one place and suddenly you’ve got a plan instead of a guess. Casing comes first, then shade goes up and the brackets is cleared. Let the math be your guide to where those edges actualy belong.