Retaining Wall Block Quantity Calculator
Estimate retaining wall courses, blocks per course, total wall blocks, cap blocks, setback footprint, face area, pallet count, and waste allowance from real block dimensions.
Imperial mode uses feet for wall length and height, and inches for block size and batter setback.
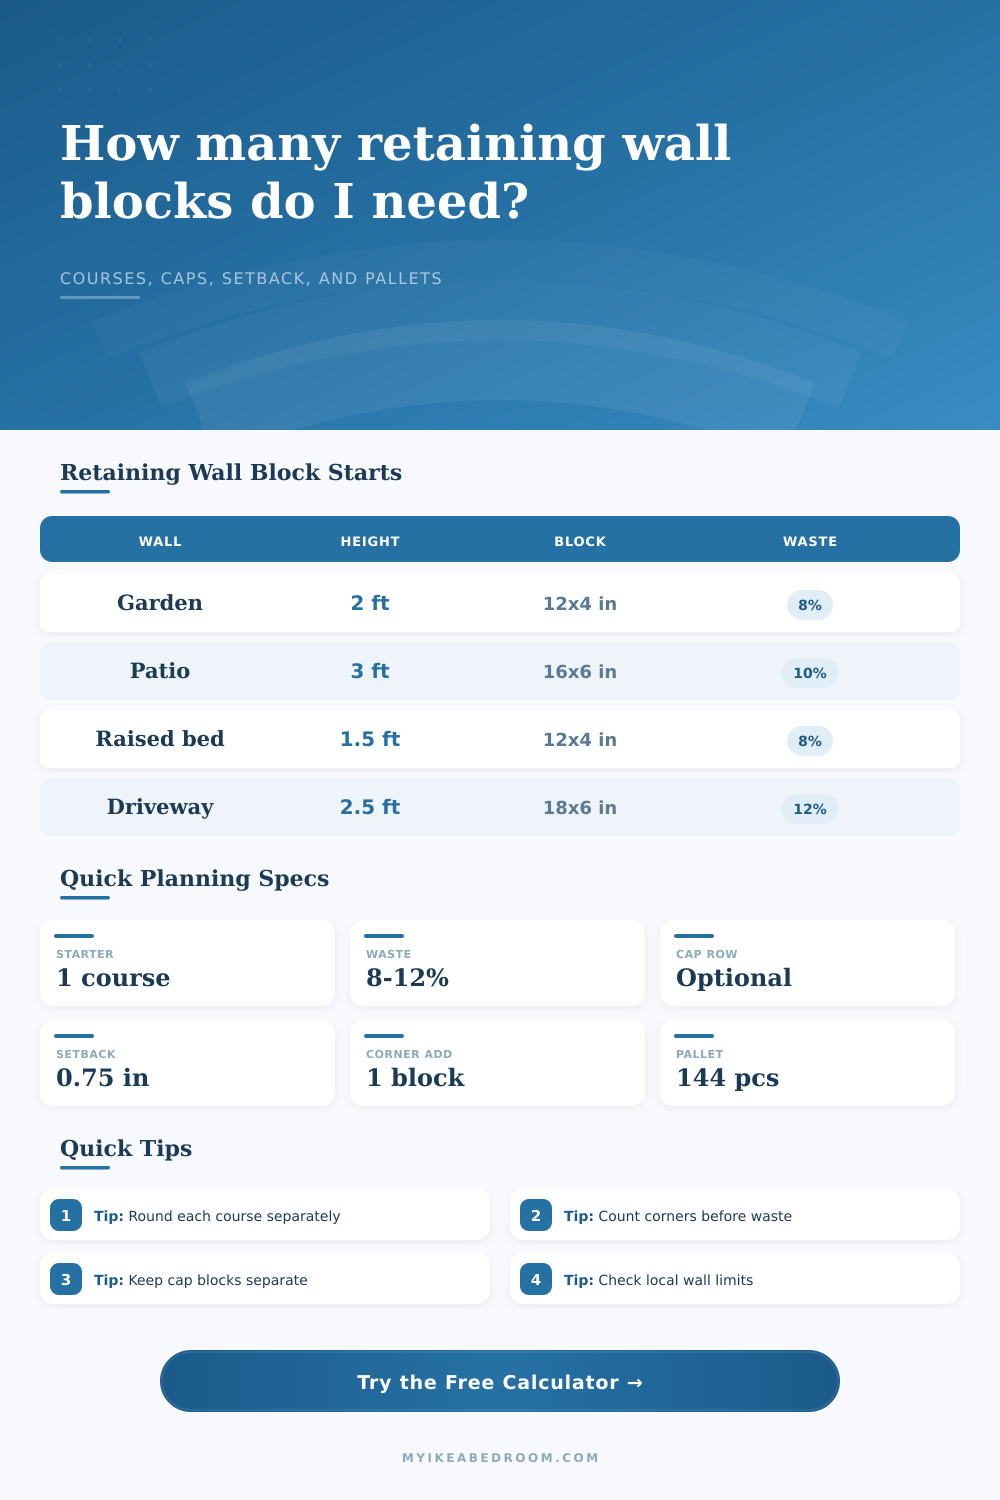
Start with a common wall layout, then adjust length, height, block size, cap course, batter, corners, waste, and pallet size to match the selected block system.
Small garden block
Face: 12 x 4 in.
Best use: short garden beds, light terraces, and curved borders with many small layout adjustments.
Standard wall block
Face: 16 x 6 in.
Best use: patios, low landscape walls, and straight runs where course count should stay moderate.
Large face block
Face: 18 x 6 in.
Best use: longer driveway, boundary, and slope-edge walls that benefit from fewer blocks per course.
Cap or coping block
Face: often 12 to 18 in.
Best use: top course finish, seating edge, and water-shedding cap separate from structural wall blocks.
| Formula item | Calculation | Result meaning | Planning note |
|---|---|---|---|
| Course count | Ceiling of wall height divided by block height, plus buried starter courses | Total rows of wall blocks to order | Exposed height and buried base are tracked separately in the breakdown |
| Blocks per course | Ceiling of wall length divided by block face length, plus corner blocks | Full blocks needed across one course | Curved walls should use centerline length, then keep waste higher |
| Total wall blocks | Course count x blocks per course, then waste percentage | Main structural block order quantity | Cap blocks are counted separately so they do not inflate wall block pallets |
| Setback footprint | Batter setback per course x exposed course transitions | Horizontal shift from base to top face | Use this to check if the wall still fits the available bed depth |
| Face area | Wall length x exposed wall height | Visible wall surface | Useful for comparing block face size and visual scale |
| Block type | Face size | Blocks per 10 ft | Typical use |
|---|---|---|---|
| Mini landscape block | 8 x 3 in | 15 per course | Edging, small curves, decorative low runs |
| Garden wall block | 12 x 4 in | 10 per course | Raised beds and short terraces |
| Standard retaining block | 16 x 6 in | 8 per course | Patio walls and broad straight runs |
| Large face block | 18 x 6 in | 7 per course | Driveway and longer boundary walls |
| Long modular unit | 24 x 8 in | 5 per course | Large-format engineered systems |
| Wall condition | Suggested waste | Corner handling | Cap planning |
|---|---|---|---|
| Straight low wall | 5 to 8 percent | Often none | One cap block per face-length position |
| Curved garden wall | 10 to 15 percent | Corners usually zero | Cap blocks may need extra cuts |
| Step-down wall | 10 to 12 percent | Count each return | Cap each exposed step landing |
| Corner planter | 12 to 15 percent | Add one per course per corner | Order cap blocks after checking return length |
| Long boundary run | 8 to 12 percent | Count end returns | Separate cap pallets if caps ship differently |
| Preset | Size | Block face | Typical quantity driver |
|---|---|---|---|
| Garden terrace wall | 24 ft by 2 ft | 12 x 4 in | Many shorter courses plus starter row |
| Low patio seat edge | 18 ft by 1.5 ft | 16 x 6 in | Cap course often matters visually |
| Driveway edge wall | 36 ft by 2.5 ft | 18 x 6 in | Long length drives block count |
| Step-down wall section | 28 ft by 3 ft | 16 x 6 in | Waste and corner count cover stepped cuts |
| Metric courtyard wall | 8.5 m by 0.9 m | 40 x 15 cm | Metric dimensions converted internally |
Round the layout by course: The calculator rounds blocks per course before multiplying, because half-block remainders rarely repeat perfectly across stacked rows.
Separate wall blocks from caps: Cap blocks often ship, cut, and overhang differently, so keep them as their own quantity even when the face length matches.
At some point, you’ve probably grabbed a tape measure and set out in your yard with one specific intention: stabilize this hillside. Build a wall. Order the correct number of concrete blocks. Call up the block company. How do I know how many concrete block to order? Too little and you’re sitting there with an open trench waiting on another truck. Too much and you’re now paying to store those bulky materials in your driveway.
The answer is not complicated; it’s basic math, if you think about the geometry of stacking stone. But we like to complicate things. We forget all of the elements of building the structure. While the calculator does all the easy multiplying for you, it still expects you to think through those factors you might otherwise skip considering till build time arrive.
How to Count Your Concrete Blocks
The primary one? It’s not simply how long the wall will be. That depends a lot on size of the block face you choose. A 12- x 4-inch garden block behaves very differently than an 18-inch by 6-inch retaining unit. And while smaller sizes allow for greater flexibility in curving around corners, they also means more separate piece to lay out and account for individually. Bigger sizes go up fast visually and structurally, less to count overall, but require larger beds and heavier lifting to install each one. Choose your look first; the rest will follow based off size.
Then there’s the course count: How many rows? Answering this question depends entirely on height. For example, if each block is four inches tall and your wall is two feet high, you’re looking at six courses. Seems simple right? This changes if you remember that most walls does not begin at ground level. For stability, they require a buried foundation layer. These initial courses consume blocks just as their above-grade counterparts, so the tool takes them into account. People often forget about the foundation row (it’s hidden after all) and end up coming up short on there first delivery. It is a small oversight with expensive consequences.
Another variable that affects footprint is setback, also known as batter. Typically, retaining walls back off at an angle to counteract soil pressures. So every successive row are set back into the ground a bit. This adds up. To make sure you understand the final footprint of your wall, the calculator records all this incremental movement and tells you precisely where your wide and thin points on the wall would be. That additional inch or two can make a big difference if you’re working against a narrow border. No one likes the shock of discovering you’ve run out of bed width before reaching the last row.
You also need to account for another number you don’t see, which is waste. Expect to make cuts on the ends of some of those blocks for corners. Maybe you crack one (or several) when moving them around. Maybe you offset a row and want to swap out the block(s). The old rule of thumb is to add 10% to your final tally. For something like a step design or curving wall, add more then that. This chart at the bottom of the page breaks things down by wall shape so you can dial up the fudge factor according to how complicated your plan is. Better to have half a dozen spares left over than a partial wall staring at you come Saturday afternoon.
And speaking of caps, cap blocks are their own line item. These things is like wall units, only they’re shipped separately and used for a different application. You can mix them in with your regular block number or not, which will usually cause confusion on the loading dock. Separating out the caps guarantees that you’ll recieve the correct finish pieces while keeping the structural strength of the wall. A little bit of logistical habit prevents a lot of headaches later.
There’s nothing more precise than the measuring and prepping of a retaining wall. Once you know the relationship between setback, block face size and course height, the measurements start to make sense. They’re no longer guess work; they’re planning. You know how much block to buy because you measured the slope, you selected your block, and the simple arithmetic told you how much you needed to buy. Row after row, the wall rises up sure and steady, knowing exactly what was required before you placed the first stone. It should of been planned out carefuly.