Garage Bike Rack Spacing Calculator
Estimate garage bike rack center spacing, total wall length, stagger savings, aisle depth, collision risk, and rack capacity for wall, vertical, ceiling, angled, and floor bike storage rows.
Start with a common garage row, then tune bike count, handlebar width, tire width, rack type, wall length, angle, and aisle clearance.
Current layout readout
Current summary: adjust the fields above to calculate wall capacity and clearance risk.
Center spacing formula: max(rack minimum, handlebar sweep + tire allowance) after stagger savings.
Total wall length formula: end clearance x 2 + center spacing x (bike count - 1) + one bike center zone.
Aisle depth formula: projected storage depth + entered front aisle clearance.
| Rack type | Typical center spacing | Typical storage depth | Best use |
|---|---|---|---|
| Horizontal wall rack | 22 to 32 in | 14 to 22 in from wall | Few bikes, display wall, low lift height |
| Vertical wall hook | 14 to 20 in | 48 to 72 in from wall | Many bikes on one wall when aisle depth is available |
| Staggered wall rail | 12 to 18 in | 50 to 72 in from wall | Mixed adult bikes with alternating heights |
| Angled wall rack | 18 to 26 in | 36 to 58 in from wall | Narrow garage side walls where full depth is hard |
| Floor wheel rack | 16 to 28 in | 60 to 78 in from wall | Kids bikes, rentals, or bikes moved daily |
| Ceiling hoist row | 18 to 30 in | Bike width plus lift path | Long-term storage over car or workbench zones |
| Bike type | Handlebar width | Tire width | Planning note |
|---|---|---|---|
| Road bike | 15 to 18 in | 0.9 to 1.2 in | Narrow bars allow close hooks if pedals are offset. |
| Hybrid or commuter | 22 to 27 in | 1.5 to 2.2 in | Use the widest fender or basket as the true width. |
| Mountain bike | 28 to 32 in | 2.2 to 2.8 in | Wide bars usually set the spacing, not tire width. |
| Kids bike | 16 to 22 in | 1.5 to 2.4 in | Shorter length helps depth, but pedals still catch. |
| E-bike | 24 to 30 in | 1.75 to 3 in | Leave extra aisle room because the bike is heavier. |
| Bike angle | Wall spacing effect | Depth effect | When it helps |
|---|---|---|---|
| 90 degrees | Shortest wall run for vertical hooks | Deepest pull-out zone | Open garage wall with at least one bike length of aisle. |
| 60 degrees | Moderate wall run | Moderate depth | Side wall storage next to cabinets or laundry zones. |
| 45 degrees | Longer wall run | Lower depth | Angled floor racks in single-car garages. |
| 30 degrees | Longest wall run | Shallowest depth | Tight aisles where bikes are rolled out from one side. |
| Bike mix | Best rack match | Start spacing | Clearance priority |
|---|---|---|---|
| Two road bikes | Horizontal or vertical hooks | 16 to 20 in | Pedal overlap and end clearance |
| Family mixed row | Staggered wall rail | 18 to 24 in | Alternating adult and kids handlebars |
| Wide mountain bikes | Staggered or angled wall rack | 24 to 32 in | Bar-end collision and brake lever reach |
| Daily kids bikes | Floor wheel rack | 14 to 20 in | Easy roll-in access and handlebar swing |
| E-bike commuters | Floor or heavy wall rail | 24 to 30 in | Aisle depth and lifting comfort |
| Seasonal overflow | Ceiling hoist row | 20 to 30 in | Lift path and car roof clearance |
Staggering tip: A real height offset only helps when neighboring handlebars can pass above and below each other. If bikes have baskets, mirrors, child seats, or very tall brake levers, reduce the stagger savings and keep more center spacing.
Aisle tip: Wall capacity is only useful if bikes can be removed without scraping a car, cabinet, or door track. For heavy bikes and vertical hooks, treat the entered aisle clearance as a working zone, not just a walking path.
Walls in garages are straightforward until you have several bikes hanging from them. Reaching for your handlebars can knock down a kid’s ride or scrape the paint job off your commuter bike. The problem is rarely about having enough room, it’s about forgetting that a bicycle has real width, beyond its frame. People tend to think that all they need to do is look at their tires and go from there, measuring for thickness. That’s not the case though; that fails to consider how far out your handlebars sweep.
Instead, this calculator looks toward real world clearance, avoiding the trap of minimums that only exist on paper. First among those inputs is handlebar width (because that establishes the minimum hook-to-hook spacing on most wall mounts). Even with the same tire size, a road bike with narrow drop bars will occupy less lateral space then a mountain bike with wide flat bars. Once you type in those numbers, the calculator will do the math for you. It will turn your raw measurements into workable spacing guidelines, clearances that takes into account the realities of everyday life.
How to Store Bikes in Your Garage
Vertical wall hooks are very dense, but they require significant aisle depth. These racks will save wall length because they stack side-by-side with bikes, alternating between high and low wheels on each rack to minimize overlap. But their efficiency comes at the price of almost three feet of open floor space in front of the rack; otherwise, pulling a bike out means dragging it down the wall. In a tight garage, consider an angled floor rack or a horizontal wall mount instead (which give up wall length to allow more shallow depth). Essentially, you’re trading off floor clearance vs. Wall real estate, and there’s no free lunch going either way.
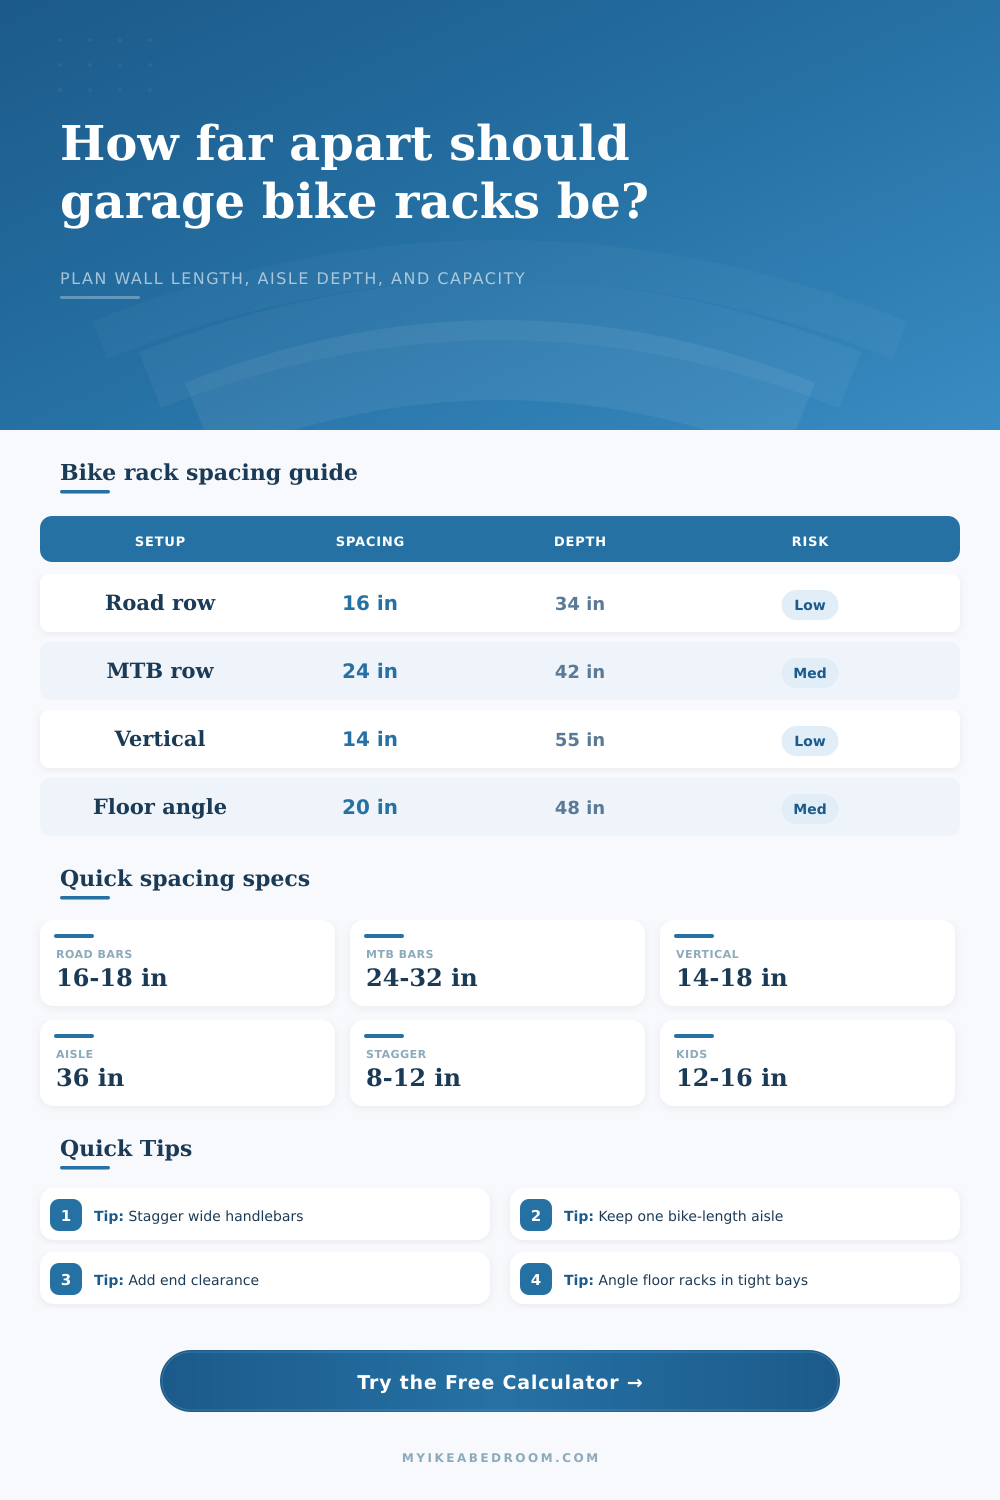
When space is tight, staggering tricks reduce handlebar collision damage. If you mount alternate hooks high or low you enable the handlebars of neighboring bikes to slide over and under one another instead of banging side-to-side. Alternating hook height reduces needed spacing from 24” down to 18”, as illustrated in this page’s handy table. This trick is most effective if all the bikes are roughly similar size (large differences in tire volume or wheel base can still create leverage problems pulling them apart). This little tweak frequently avoids the need for extra rack hardware and saves some cash.
When it comes to everyday use, nothing matters as much as aisle width. Saving six inches of floor space might seem helpful, but it turns retrieving a heavy e-bike into a frustrating chore. Ideally, there should be enough aisle width to allow you to take a step back, grab the handlebar(s) and push away without banging your bike against the cabinet or your neighbor’s car door. 36″, the typical width of garage aisles; is good enough for nearly all adult bikes and offers plenty of work space. Narrower means picking your way around (especially in low light first thing in the morning), plus higher risk of scratching or denting a precious vehicle.
Surprisingly, it’s also important to consider the angle at which you install your rack. Racks mounted at right angles (perpendicular) to the wall maximize depth requirements (but use the least amount of wall length). Forward-tilted racks (thirty or forty-five degrees) minimize how much they extend into the room and spread them out along the wall. That’s good if you have narrow side walls (next to tool cabinets, washing machines, etc.) that can’t support a full bike-length aisle. The tradeoff is simple: lose wall space and gain floor space; lose floor space and gain wall space.
People are always surprised at how long their wall has to be… Don’t forget about end clearance in addition to center spacing! The first and last bike require some more space to swing open and not bang up against corners or the door frame. Don’t just multiply center spacing by the number of bikes. Account for some wiggle room so you won’t get frustrated if your rack works perfectly on paper but actualy blocks the outermost bikes from swinging out. Better to have a few less bikes planned in with plenty of breathing room than pack every square inch to max capacity.
Bike weights vary; e-bikes are now at 30 lbs or more, so mount hardware should be rated to handle both weight and torque (the leverage forces when pulling a bike off a hook). Pulling hard on a heavy bike directly off a vertical-mounted hook will rip standard drywall anchors right out. Use proper lag bolts if mounting into wood framing or concrete block, and find studs where possible. While you should account for handlebar width and aisle depth rather than just spacing mounts evenly, neglecting the right hardware is what really ruins a layout: crashed bikes + pulled-out anchor = not pretty.
At its core, bike storage is about flow not density. When a rack is spaced out enough, it allows for human motion of retrieving bikes, and it also respects size of each bike itself. It took me some time to measure handle bars, check aisle width and make angle decisions based off my garage shape, but the result is a system I actualy use everyday. The end result is tons of breathing space where it counts, organized wheels and a clean wall.