Woven Wall Hanging Warp Length Calculator
Estimate warp length per end, total warp yarn, number of warp ends, fringe allowance, take-up adjusted length, shrinkage allowance, color section groups, and a yarn weight proxy for tapestry and decorative woven wall hangings.
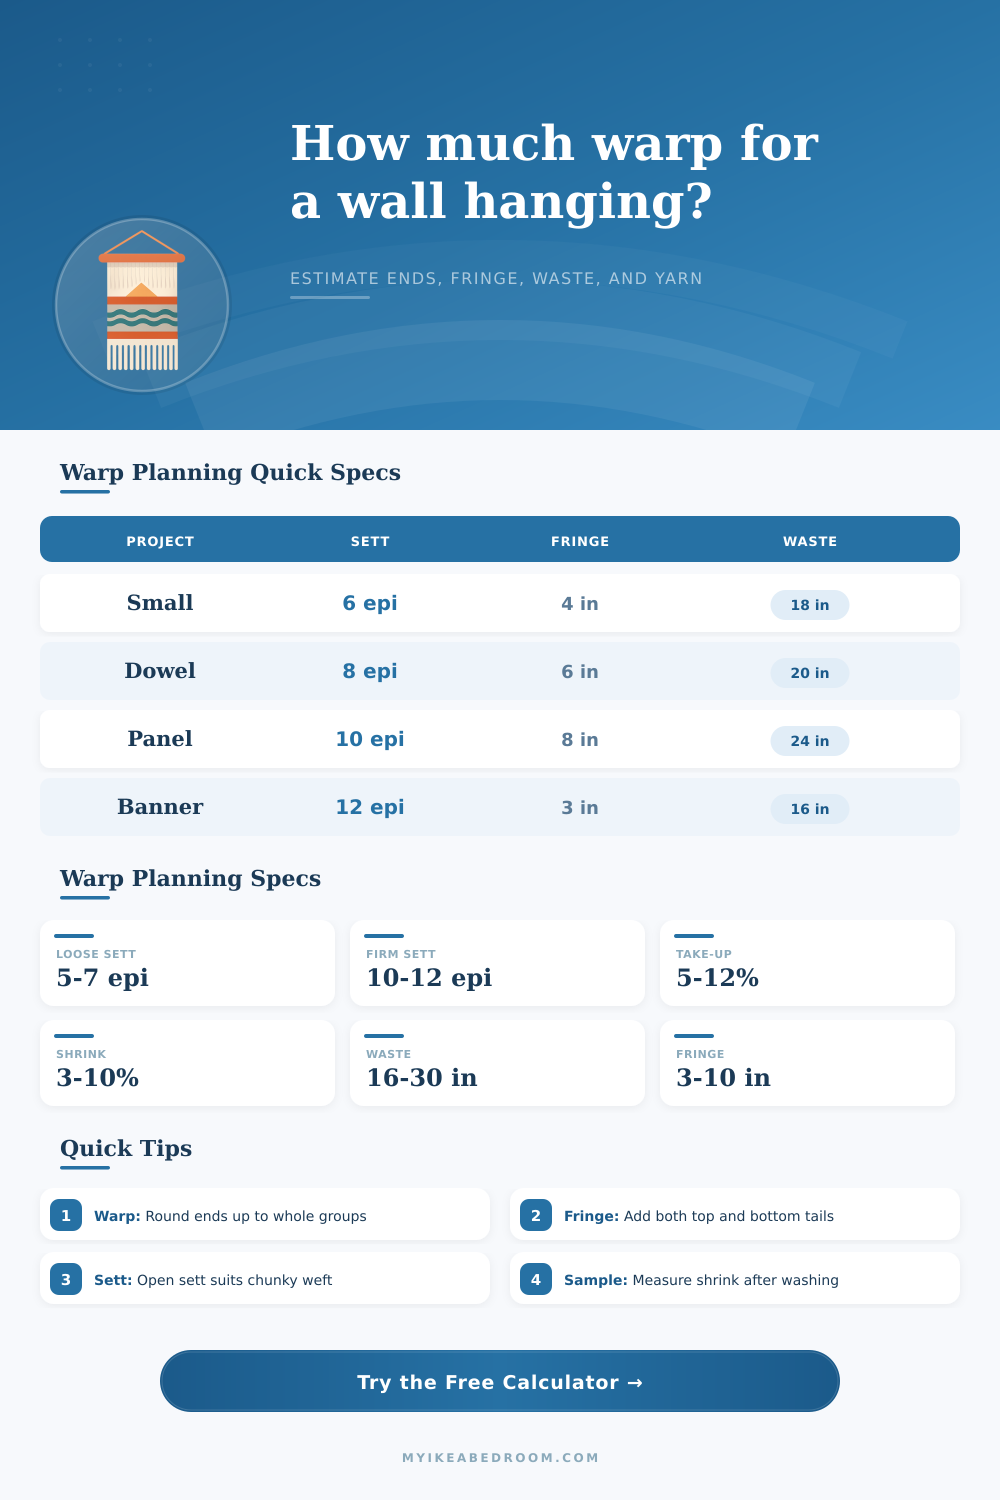
| Project | Finished size | Typical sett | Warp notes |
|---|---|---|---|
| Mini loom sample | 8 x 10 in / 20 x 25 cm | 6 to 8 epi | Short loom waste, small color sections, good for testing shrinkage. |
| Small wall hanging | 12 x 16 in / 30 x 41 cm | 6 to 8 epi | Soft fringe, open spacing, and flexible yarn choices. |
| Dowel tapestry | 18 x 24 in / 46 x 61 cm | 8 to 10 epi | Balanced sett with enough extra warp for tying to a dowel. |
| Large woven panel | 30 x 42 in / 76 x 107 cm | 10 to 12 epi | Longer loom waste and careful section planning keep the warp even. |
| Sett | Best for | Ends on 18 in width | Texture effect |
|---|---|---|---|
| 5 to 6 epi | Chunky roving and heavy rya | 90 to 108 ends | Open structure with visible weft texture. |
| 7 to 8 epi | Beginner wall hangings | 126 to 144 ends | Balanced surface for mixed wool and cotton weft. |
| 9 to 10 epi | Dowel tapestries | 162 to 180 ends | Cleaner edges and better detail in small shapes. |
| 11 to 12 epi | Firm woven panels | 198 to 216 ends | Dense face with less open warp showing. |
| Allowance | Light wall piece | Textured piece | Firm tapestry panel |
|---|---|---|---|
| Loom waste | 16 to 20 in / 41 to 51 cm | 20 to 26 in / 51 to 66 cm | 24 to 32 in / 61 to 81 cm |
| Fringe per edge | 3 to 5 in / 8 to 13 cm | 7 to 12 in / 18 to 30 cm | 0 to 4 in / 0 to 10 cm |
| Take-up | 5 to 7 percent | 8 to 12 percent | 6 to 10 percent |
| Shrinkage | 3 to 5 percent | 5 to 10 percent | 4 to 8 percent |
| Sections | Planning use | Round to | Practical note |
|---|---|---|---|
| 1 color | Plain warp | Pair | Use even ends if the edge finish benefits from symmetry. |
| 2 to 4 sections | Wide stripes or borders | Group of 4 | Divide rounded ends by section count before cutting bundles. |
| 5 to 8 sections | Repeating color bars | Group of 8 | Round up first, then rebalance a few ends at the side borders. |
| 9+ sections | Fine stripe repeats | Pattern repeat | Use a threading chart so color repeats match the visual width. |
So how does warping work? It’s a little bit science and a lot of math. When it comes to making wall hangings, you know what you want the end result to look like (a textured panel, maybe, or a gradient of colors made from wool). But how do you get that finished product when all you’re working with is yards and yards of string-like material that needs to be measured, cut, threaded, then woven?
The wrong length means your project will either have holes at the bottom or won’t even be long enough to hang on the wall at all. That’s annoying because itll mean wasting more yardage to accommodate shrinkage and friction. Once you know what you want your finished piece to be, then you plug it into the calculator and it do all the math for you. No need to juggle formulae in one hand and a ball of yarn in another.
How Warping Works
Here’s the trick: “warp length” isn’t simply the height you see. It is a combination of factors. Some factors is for looks and some are for structure. It is the sum of them all. You begin with desired finished height of your weaving. Then you has to allow for fringe and hemming. Fringe can eat up a lot of yardage! If you account for 6 inches of tail at either end, that’s an extra foot of length total before accounting for loom mechanics.
Then there’s the matter of take-up and shrinkage. What does that mean? Take-up is what happens as you insert your weft thread, causing the warp threads to shift out of the way. The amount of take-up will depend on several things, such as the sett (how tightly woven) and weight of your weft yarns. So if you use a heavier weft with a tighter sett, then the yarn follow a bit of a diagonal line so it takes up more space.
The other thing about take-up is that different fibers behave differently and only testing can tell you how much one particular fiber will shrink. Cotton retains its dimensions relatively well; wool shrinks a lot once wet and blocked. A twenty four inch wall hanging may end up being two inches shorter than expected without consideration given to these elements. Few do at the planning stage.
The number of warp threads that span the width is called the sett. For a chunky weft, use a loose sett (for example: six ends per inch) and an open structure. For intricate tapestry work, you’ll need a firm sett (ten to twelve ends), which makes for a dense canvas. The tool calculates total number of ends needed. It will also adjust the sett to give you more or less density.
It helps with color planning by splitting the ends into blocks or stripes according to pattern’s repeat. That way, if your color doesn’t divide evenly by the pattern repeat, you won’t run out of one color partway through. What type of material will make up the rug affects the estimated weight. For example, if you want something with really clean edges try using cotton warp. Heavy weft items is better suited to stronger, thicker rug cotton.
The weight is estimated based off standard yardages per hundred grams. This will give you an idea of about how much yarn to purchase. You can use this as a good estimate… then increase it a bit just in case!
The process of warping takes both creativity and discipline. If you measure correctly, it flows like water through a stream. If you don’t get the measures correct, you end up creating more tension than necessary. You might also create some shorter threads without realy weaving at all. By using this as your starting point you are sure that you can cut your warp bundles accurately. Then you just have to get in the groove of the rhythm of the shuttle and enjoy the beauty of the weave.