Mirror LED backlight planning
Mirror Backlight Strip Length Calculator
Calculate LED strip length, rounded-corner allowance, cut-segment length, wattage, driver size, glow offset ratio, and connector count for vanity mirrors, full-length mirrors, arched mirrors, medicine cabinets, and IKEA-style bathroom mirrors.
| Brightness class | Typical watts per foot | Mirror use | Driver note |
|---|---|---|---|
| Accent halo | 1.6 to 2.2 W/ft | Bedroom mood light, low glare mirror glow. | Small driver works when total run is short. |
| Soft vanity glow | 2.8 to 3.4 W/ft | Most bathroom and dressing mirrors. | Use 20 percent or more headroom. |
| Task vanity glow | 4.0 to 4.8 W/ft | Brighter face lighting with wall reflection. | Prefer 24 V on medium and wide mirrors. |
| Bright wall wash | 5.5 to 6.5 W/ft | Large mirrors, darker tile, deeper channels. | Check driver ventilation and dimmer rating. |
| High-output task strip | 7.0 to 9.0 W/ft | Strong light with careful thermal path. | Use aluminum channel and larger driver headroom. |
| Cut interval | Common voltage | Cut behavior | Best mirror fit |
|---|---|---|---|
| 1 in / 25 mm | 5 V specialty | Very precise but higher current. | Small decorative mirrors and tight shapes. |
| 2 in / 50 mm | 12 V or 24 V | Good balance of accuracy and availability. | Most round, oval, and vanity mirrors. |
| 2.5 in / 62.5 mm | 24 V COB tape | Slightly larger trim steps. | Dotless flexible tape on medium mirrors. |
| 4 in / 100 mm | 24 V high output | More length left unused at the feed gap. | Large rectangles and full-length mirrors. |
| Mirror preset | Starting size | Suggested backset | Glow planning note |
|---|---|---|---|
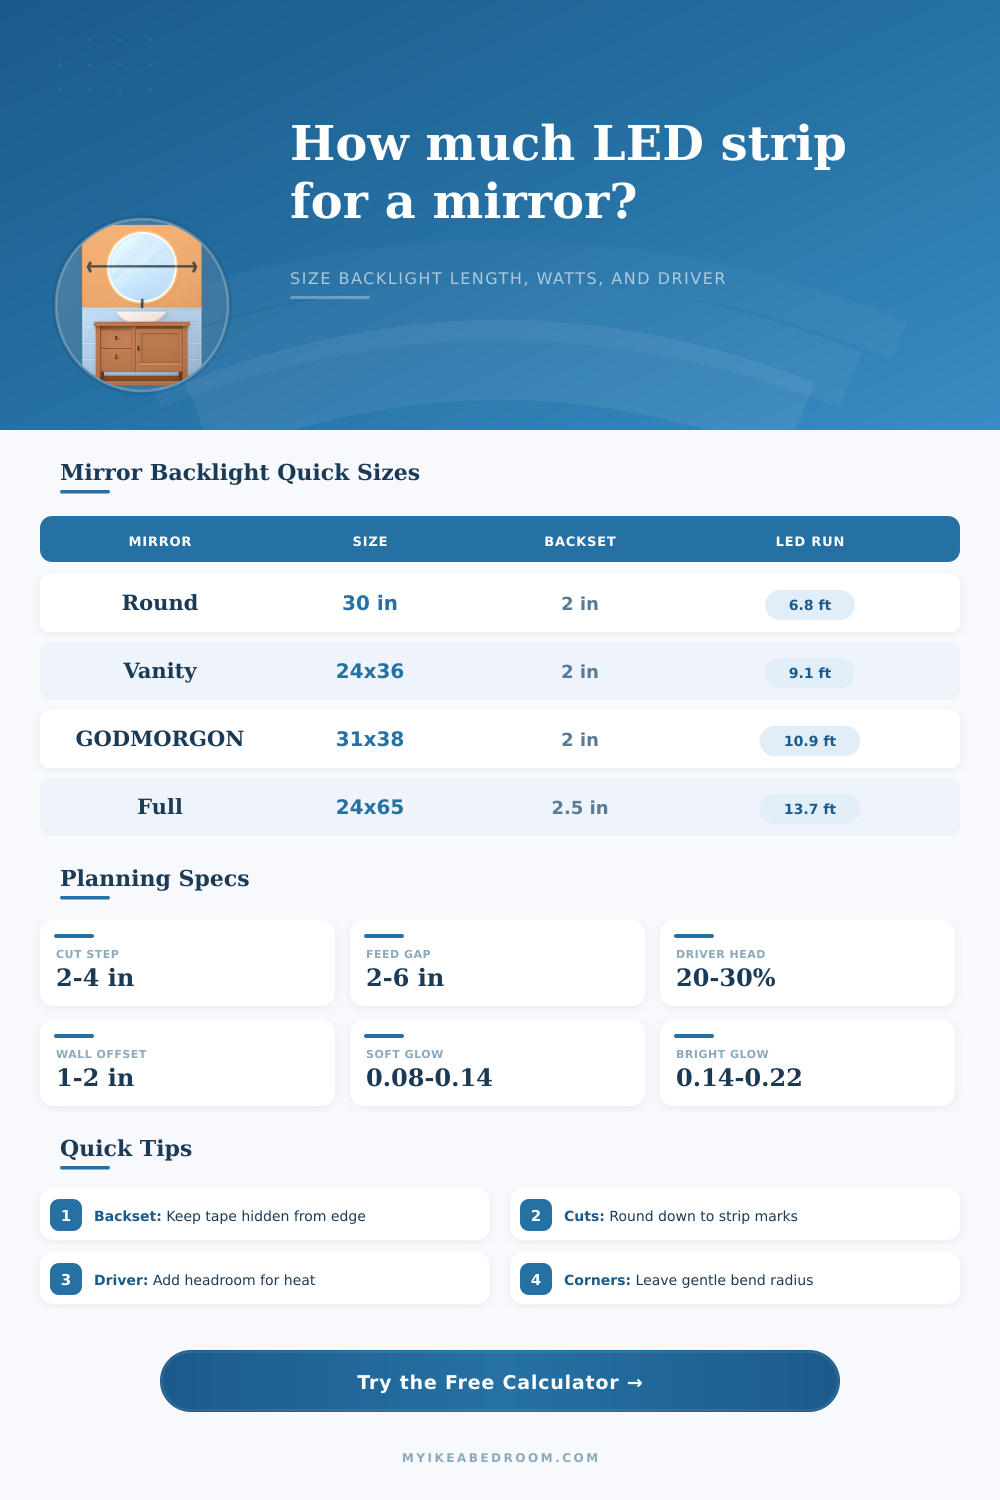
| Round vanity mirror | 28 to 36 in diameter | 1.75 to 2.5 in | A continuous flexible strip keeps the halo even. |
| GODMORGON style bath mirror | 31 x 38 in | 2 in | Use the feed gap near the bottom hinge or outlet zone. |
| Full-length mirror | 20 to 30 x 60 to 72 in | 2.25 to 3 in | Long sides benefit from 24 V tape and neat wire routing. |
| Medicine cabinet mirror | 20 to 30 x 26 to 36 in | 1.25 to 1.75 in | Keep hardware, hinges, and doors clear of channels. |
| Arched mirror | 24 to 36 x 36 to 48 in | 2 in | Use a bend-friendly diffuser at the arch shoulder. |
| Wall offset ratio | Glow look | What it means | Adjustment |
|---|---|---|---|
| Below 0.07 | Narrow rim | LED is close to wall compared with mirror size. | Use longer spacers or lower the brightness. |
| 0.07 to 0.14 | Soft halo | Balanced spread for most vanity mirrors. | Good default with frosted or shallow channel. |
| 0.14 to 0.22 | Wide glow | Light spreads farther beyond the mirror edge. | Use dimming to control wall glare. |
| Above 0.22 | Washed wall | Offset is large enough to reveal more wall texture. | Use deeper diffuser or lower-output strip. |
Backlighting a bathroom mirror is such a common DIY project, it’s typically doomed on the first try: The LEDs aren’t dimmed properly; they’re too close (or too far) to the wall; or they’re not evenly distributed around the frame. Instead of a nice even halo, the result look like a neon sign. Everyone gets hung up on the product selection (i.e., which light strip to purchase), but no one thinks about geometry.
Think of mirror as an optical device, not just something reflecting light. Once you enter your measurements into the calculator, it crunches out all the math for you, including electrical load and perimeter length. Let’s look at the first parameter: the “backset,” or distance from the centerline of the LED tape to the edge of the mirror.
The Secret to Perfect Mirror Lighting
Too close and you get a harsh rim; too far out and light spillover hit the wall. You ideally want some offset so that the light can spreads over the face of the mirror, without being visible from straight-on. Two inches from the mirror edge seem to strike a good balance for most vanity mirrors. The tool will adjust the perimeter calculation based off this input so that you don’t have to buy extra feet for a tighter radius different than necessary.
Corners and curves… oh my! How do you make sure all the corners is lit equally when the tape bend sharply around a square corner? Arches and rounded corners are difficult to plan for without kinking the channel and blocking the lights. Whether it’s a round medicine cabinet or an arched bathroom mirror, the calculator take into account the shape and corner radius. And it deducts the appropriate allowance for these curves, so that you’re never left with a gap in the glow or with leftover tape.
This is why people mess up, They end up measuring the outside frame rather than the actual path the light must travel. The second consideration are diffuser choice. The length and the choice of diffuser both makes a big difference. Aluminum channels and frosted sleeves are great at evening out the beam but also absorbs some of energy. Bare tape is efficient but obviously noticeable; it has distinct dots of light.
The table of outputs below show the factor by which different housings compare. For example, a deep dotless channel demand more power than bare tape to achieve the same brightness, but it looks far better. This is the tradeoff that changes your wattage needs considerablly (do you want something visually perfect), or are you after maximum raw efficiency?
I’ve seen a lot of people forget about electrical planning until it’s too late and the lights starts flickering. Not only do LED strips draw current, but they also experience voltage drop over long runs when the driver isn’t sized accordingly. The calculator uses your selected brightness class and total wattage to recommend a driver size. It adds an extra 20% to ensure safe and cool operation. Going up a size bigger than you feel is necessary is always preferable to running something at full tilt. A little bit more money now mean longevity later.
The amount of offset from the wall also affect how the light and its surroundings work together. With less gap, the glow will hug closely to the mirror, emphasizing the mirror itself. More gap will project light on the wall, potentially beneficial for dark walls (though you may get glare when looking right at it). To see where it spreads, the tool show you a glow ratio to help you visualize this spread. Too big? Consider using a dimmer on the light or a lower brightness class.
Wall color and tile gloss affect how much light reflects back toward your eyes, so it’s smart to test temporary spacers before sticking anything permanent. The last part of installation is hanging the assembled piece. It takes care and effort. Position the feed gap in an area easy to fix or replace later on. You don’t want it hidden by an outlet box or door hinge. If the mirror is large/heavy, use powerful adhesives and reinforce critical points with mounting tabs if the surface is uneven.
Ideally this type of tech would of dissapears, leaving nothing but light. That gentle halo brings some warmth and dimension into whatever space it’s installed. Do it correctly and the lighting goes unnoticed…except when it gets noticed because it’s always appreciated.