Low-voltage lighting driver planner
Transformer Size for Low Voltage Lights Calculator
Size a 12V or 24V transformer for LED strips, puck lights, step lights, cove runs, wardrobe lighting, vanity strips, and other low-voltage lighting zones while checking amps, voltage drop, wire gauge, headroom, efficiency, dimming type, and max run length.
Choose a common lighting layout, then adjust count, wattage, voltage, wire, dimming, run length, and zone split.
| Connected load | 20% headroom target | Common driver output | Use case |
|---|---|---|---|
| Up to 24 W | 28.8 W | 30 W | Small closet, display shelf, short vanity strip. |
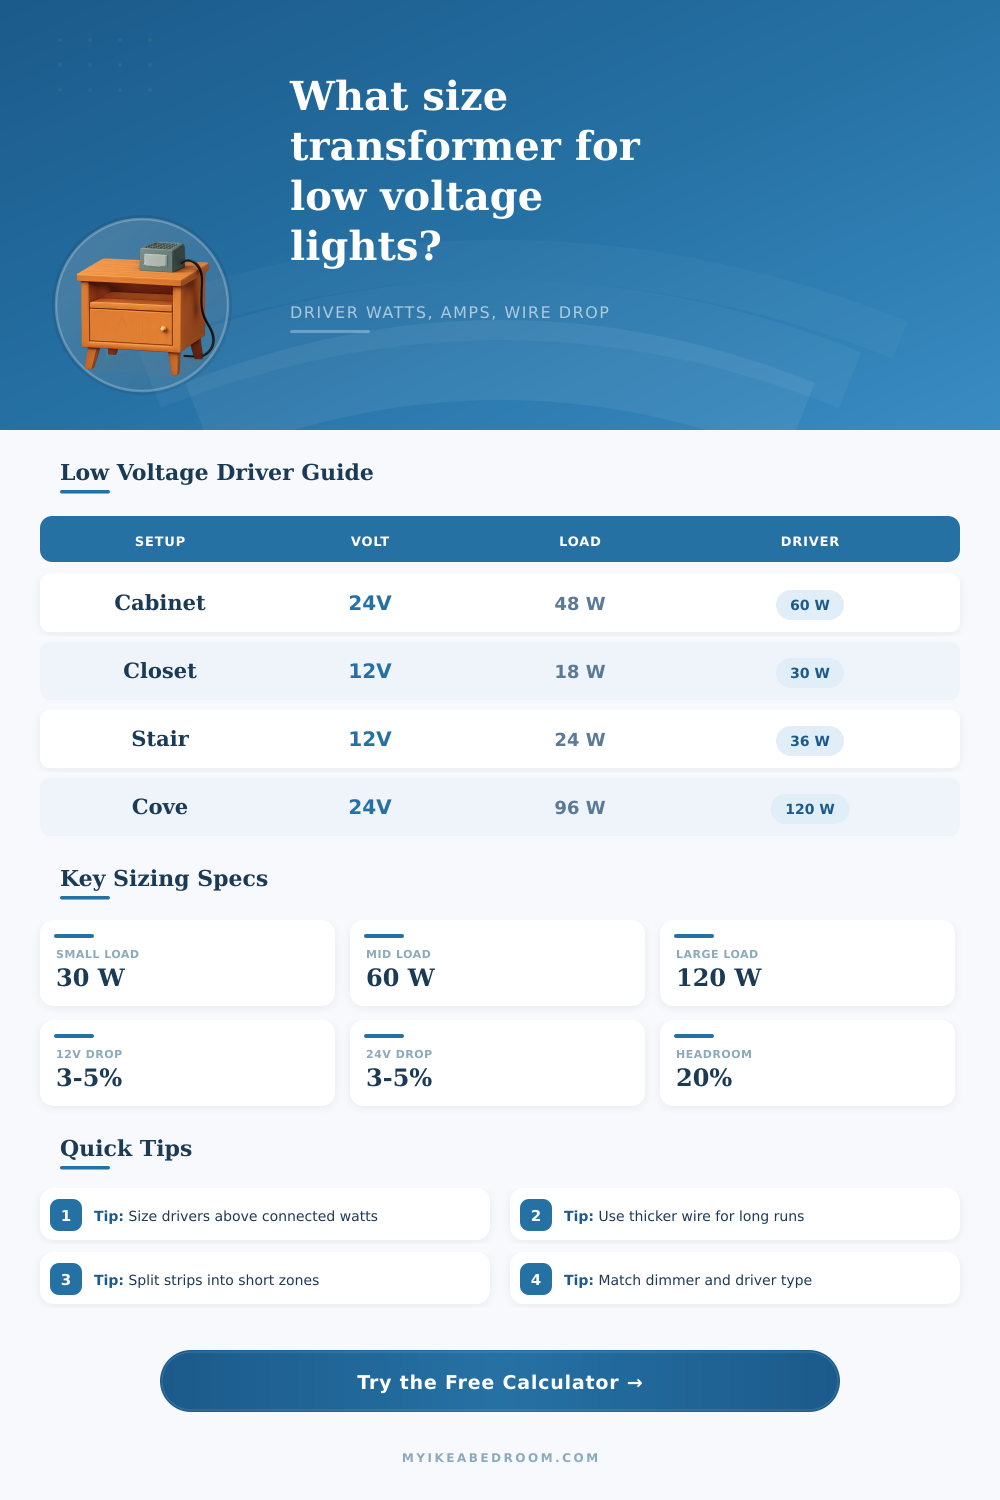
| 25-48 W | 30-57.6 W | 60 W | Under-cabinet run, toe-kick lights, grouped pucks. |
| 49-80 W | 58.8-96 W | 96 W | Longer shelf runs, stair zones, medium cove lighting. |
| 81-100 W | 97.2-120 W | 120 W | Large cabinet wall or room-length cove accent. |
| 101-160 W | 121.2-192 W | 192 W | Split large rooms into zones if runs are long. |
| Wire gauge | Ohms per 1000 ft | Best fit | Voltage drop note |
|---|---|---|---|
| 22 AWG | 16.14 | Very short pucks or signal leads | Use only for low amps and short branch lengths. |
| 20 AWG | 10.15 | Short display shelves | Keep runs short at 12V, especially above 1 amp. |
| 18 AWG | 6.385 | Small pucks and cabinet lights | Common default for modest loads. |
| 16 AWG | 4.016 | Medium 12V or 24V lighting zones | Good balance for many cabinet and stair layouts. |
| 14 AWG | 2.525 | Longer strips and higher load zones | Reduces drop without changing the driver. |
| 12 AWG | 1.588 | Long home runs or high-watt strips | Useful where voltage drop is the limiting factor. |
| Dimming type | Driver requirement | Where it fits | Planning note |
|---|---|---|---|
| Non-dimming | Constant-voltage output | Closet sensors, simple task lights | Simplest load sizing, but no brightness control. |
| Triac or ELV | Line-voltage dimmable driver | Wall dimmer retrofit | Confirm the driver supports the exact wall dimmer. |
| PWM | Constant-voltage driver plus PWM controller | LED strips and many zone controllers | Size the driver before the controller load rating. |
| 0-10V | 0-10V dimmable driver | Built-in architectural lighting | Often cleaner for larger integrated systems. |
| Smart controller | Constant-voltage driver and rated controller | Scenes, schedules, cabinet zones | Controller channel amps must exceed zone amps. |
| Lighting layout | Typical voltage | Starting wire | Zone approach |
|---|---|---|---|
| Under-cabinet LED strips | 24V | 18 or 16 AWG | Split left and right cabinet banks. |
| Closet puck lights | 12V | 18 AWG | One zone for small closets, two for walk-ins. |
| Stair step lights | 12V | 16 AWG | Feed from landing or split upper and lower flights. |
| Cove lighting strips | 24V | 16 or 14 AWG | Use multiple feeds to avoid dim far ends. |
| Vanity mirror strips | 24V | 18 or 16 AWG | Pair side strips on one balanced zone. |
Did you also observe that the light is not as bright at one end compared to the other? That’s due to voltage drop and transformer size. Both are caused by physics (not an electrical failure). The wire resists electricity and behaves as a resistor. And low-voltage DC electricity flow down the wire. By the time it hits the LEDs, it have less potential. Knowing how this plays out will help you properly define your lighting zones.
There is some basic rules. Designing requires understanding the numbers, so you has to know what they represent. Then there’s the math which is done for you by calculator on the page.
How to Plan Your LED Lighting Design
The first decision is whether to go with a 12V system or a 24V system. Every aspect of your design hinges on that decision. On a 12 volt system, every watt of lighting pull more current than it will on a 24 volt system. Wires has resistance when current flows through them. Resistance cause voltage to drop farther along the same run of wire.
For instance, 12 volt is readily available so it makes sense to go with it if your lights are going to be close together, such as a closet or vanity. If your cabinet lighting needs to reach across a long kitchen span, or maybe you’re creating an illuminated cove along a long ceiling, then 24 volt is better since it cuts the amperage in half for equal watts. This means voltage drop remain reasonable at longer distances.
Once you know the system voltage you’ll need, you’ll need to account for headroom and driver’s capability as well. Many people make mistake of finding the exact amount of power their transformers will need to supply based off the combined wattage of all their lights. This leaves no room for error and pushes the driver to work at its maximum capacity constantly. That means it will wear out sooner and doesn’t leave you any leeway for adding more stuff down the road.
Try to plan for roughly 20% headroom over what you’re using. So if you have 60 watts of lights, you’d like to see 80 watts on your driver. This gives you some wiggle room when all those LEDs kicks in at once to ensure each one has consistent voltage. It is a small difference but it makes a big difference long term.
Most folks also forget about wire gauge until it is too late. Thin wire limits current which result in voltage loss and heat. The resistance chart clearly shows how resistance changes with varyin gauges. Going up a size like from 22 AWG to 16 AWG is just a couple bucks more per foot but will keep your light from having a dull amber color on the ends. When the lights are installed, you can’t change the wire gauge with larger transformer. Do it right the first time and save yourself from tearing up channels or drywall later.
When dealing with a complicated layout, zoning is helpful. Rather than running all that light from a single huge driver around your whole room, break the lights down to branches. Not only does this drop the current drawn by each individual wire run, but it lets you dim those sections independently from one another. For example, maybe you want the perimeter cabinet to have soft ambient light while the kitchen island need bright task lighting. With zones broken up like this, you don’t have to add complicated smart controllers throughout or anything. Also, if one zone goes out, at least the rest of the room can stay lit making for easy troubleshooting.
Lastly, there’s the matter of dimming compatibility. Not all drivers plays well with others. There are two main types: triac dimmers (which you’ll often find at home) and 0-10V or PWM systems. The former will flicker on incorrectly matched dimmers; the latter provide smooth dimming for LED strip but need compatible hardware. Mess up here, and you’re stuck with buzzing fixtures or lights that won’t turn down past 50%. Pick your dimming system first and buy a driver designed for it. Don’t assume you’ll be able to force it to play nicely later.
Good lighting design isn’t just where to put fixtures; it’s also what kind of light. Understanding headroom and voltage drop upfront means you get the light you thought you were getting. Getting the physics right in the design stage removes the dissapears of dim ends.