Desk task light, beam spread, and glare planner
Task Lighting Lumens for Desk Calculator
Calculate desk work-surface area, target task lumens after ambient light, reflectance adjustment, beam footprint, achieved lux, lamp count, coverage uniformity, glare risk, and practical dimmer range.
The calculator treats the desktop as the target plane and separates required task light from ambient room light, so a bright room does not double-count lamp lumens.
Full Lighting Breakdown
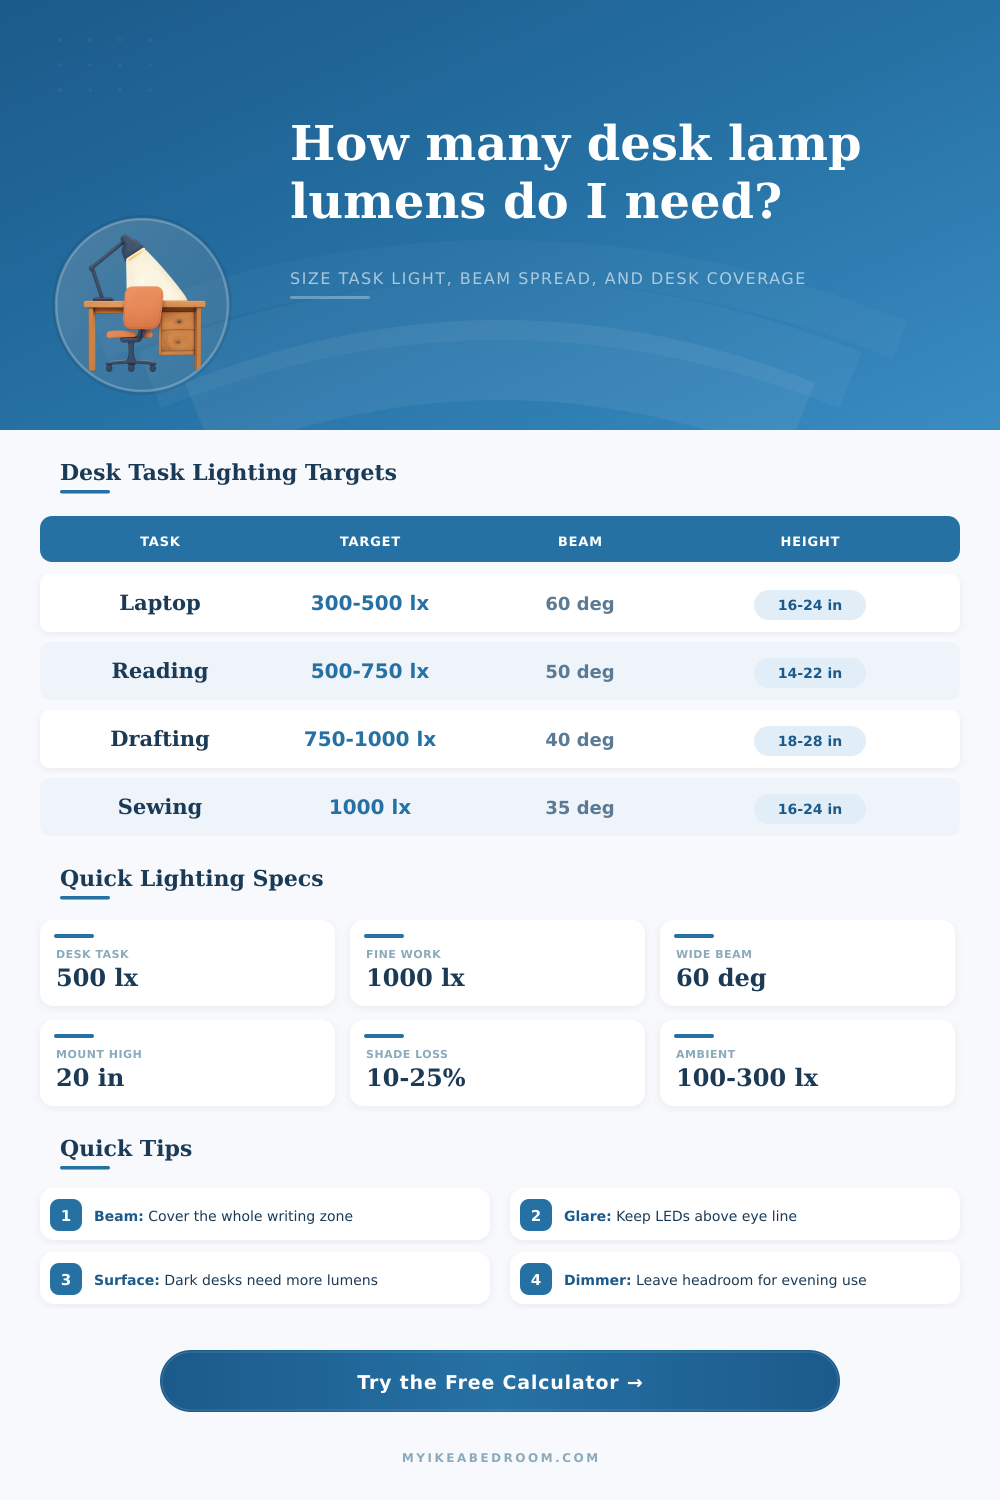
| Desk task | Typical target lux | Good beam angle | Notes for calculator use |
|---|---|---|---|
| Monitor work with keyboard | 300 to 500 lx | 60° to 90° | Keep task light to the side of the screen to reduce reflections. |
| Reading and handwriting | 500 to 750 lx | 45° to 65° | A single arm lamp is often enough when ambient light is above 150 lx. |
| Study or homework desk | 500 to 750 lx | 50° to 70° | Use a shielded head and leave dimmer headroom for evening work. |
| Drafting, plans, or drawing | 750 to 1000 lx | 35° to 55° | Raise the lamp to widen the cone without flattening contrast. |
| Sewing, needlework, and fine craft | 750 to 1500 lx | 30° to 50° | Two lamps can reduce hand shadows across the stitch path. |
| Makeup vanity task | 500 to 1000 lx | 70° to 100° | Use broad, balanced light rather than a single harsh spot. |
| Desktop finish | Approx reflectance | Lumen adjustment | Glare behavior |
|---|---|---|---|
| White or very light matte | 75% to 85% | Reduce 5% to 10% | Bright but usually comfortable if the head is shielded. |
| Light wood or pale laminate | 55% to 70% | Baseline | Good balance for reading and study desks. |
| Medium gray or mid wood | 35% to 55% | Add 5% to 15% | Needs a bit more lamp output for the same paper brightness. |
| Black, dark wood, or deep color | 15% to 30% | Add 15% to 30% | High contrast can make paper bright and desk edges dim. |
| Glossy white, glass, or polished top | 60% to 90% | Baseline | Reflected LED image can be the main glare source. |
| Beam angle | Footprint at 18 in height | Best use | Design caution |
|---|---|---|---|
| 25° to 35° | 8 to 11 in diameter | Inspection, stitch line, tiny detail area. | Needs careful aiming and often more than one lamp. |
| 40° to 50° | 13 to 17 in diameter | Drawing pad, book, notebook, or craft zone. | Mount too low and the edge of the cone becomes obvious. |
| 55° to 70° | 19 to 25 in diameter | Most desk lamps for reading and laptop notes. | Can spill toward eyes if the shade is shallow. |
| 75° to 100° | 28 to 43 in diameter | Wide workbench, vanity, shared desk, or LED bar. | Needs enough lumens because much of the beam misses the task. |
| Mounting choice | Typical height | Offset guidance | Result to watch |
|---|---|---|---|
| Desk arm lamp beside dominant hand | 14 to 22 in | 6 to 12 in from task center | Good reach, but may cast hand shadows if on the wrong side. |
| Shelf or hutch underside light | 16 to 24 in | Near center of work zone | Even spread if the beam is at least 60°. |
| Monitor light bar | 18 to 28 in | Centered above keyboard zone | Aim forward and down to avoid screen reflection. |
| Wall sconce over small desk | 22 to 36 in | 0 to 8 in from center | Higher mount needs more lumens or a narrower beam. |
If you’ve ever worked at a computer desk where everything was perfectly visible during the day only to become unreadable when lights were out, this should sound familiar. Everything’s lit up except for keyboard; your eyes hurt trying to decipher sheet of paper in front of you; and turning on lights doesn’t even seem like an option.
Because it isn’t… It’s a question of knowing what lumen value actualy means: It measures overall output, not usable light. You might have a super-bright bulb that’s useless because it’s pointed away from you and fighting with a black desk that simply sucks up all the light before your eyes ever get a chance to see it.
How to Choose Good Desk Lighting
After you input your task and desk size/dimensions, the calculator do the math for you (so there’s no need to guess at conversions and coefficients). But more importantly, it help you see what matters and what doesn’t. For example, most of us think that buying brightest bulb possible will fix our bad lighting. That’s a common error. A high lumen bulb paired with broad beam angle result in wasted energy and annoying glare.
It really comes down to knowing what you’re measuring and how your own environment change that measure. Desk lighting also depends a lot on reflectance. Light from a bulb bounces off your desk and into your eyeballs. But some fraction of it go into the desk, and then never comes out again. The tool takes this into account: When you tell it about a dark wood desk versus a pale laminate one, it adjust how many lumens it thinks you need.
White desks is reflective too (and they’re even glossier), reflecting large amounts of light, but creating another problem. Your computer screen starts showing a reflection of the LED array in its center. This distracts your eye and makes text more difficult to read then it would be in a darker room. It’s a subtle thing, but I’m telling you, it counts: As much as what you see matters to comfort, so does what you don’t look at.
The light quality, or how focused the light is (the “beam angle”), make a difference. Hot spots (a narrow beam) are great if you want contrast over a small surface, like when sewing, building intricate models, etc. But they’re awful for reading an entire book page as it will be blindingly bright in the middle with edges in the dark. For things like laptop use or just general studying, wider beams distribute the load (requiring higher total lumens to keep same brightness, since you’re covering more surface area at a distance), helping you match cone of light to size of your work zone.
The chart below breaks all of this down by activity, so you can see what the size of your work zone should of be relative to size of the cone of light. That all changes with mounting height. The higher you put up a lamp, the more the beam will spread out, but less intensely it’ll shine on any given spot. The lower you mount it, the greater the intensity in any given spot, but narrower the area covered.
Positioning also matters. For most people, side lighting tend to create hand-shadow problem. This is why some folks like forward- or overhead-facing bars. These are designed to push light down onto the surface instead of across it. This illuminates notebooks and keyboards without blasting them right in face or having the light reflected back by a monitor.
Dimming adds a layer of flexibility that fixed lighting cannot match. When you’re sketched out technical plans, you want brightness. But then when you’re looking at email at midnight, you don’t need max brightness, yet you don’t want to go below level needed to clearly see your screen. The more lumens you can have in reserve, the lower you can dim before dropping back into your visual acuity sweet spot. This makes your eyes less fatigued over long periods of use because you aren’t having to adjust to light all the time; instead, light adjusts to what you need.
In short: good desk lighting is about balance. It is not about bathing everything in light. It is about providing just the right level of concentrated energy right where it’s needed (at eye-level/hands-level). When you can think about what you need rather than how much light a bulb puts out, the entire system make sense. The shadows clear up, the words come into focus, and that black desk becomes a place to work again. This allows you to continue seeing clearly, as intended.