Stair lighting layout planner
Stair Lighting Quantity Calculator
Estimate stair light fixture count, step spacing, landing allowance, total lumens, watts, driver zones, wire run, and symmetry for step lights, tread lights, riser dots, or low-voltage LED strips.
Load a typical stair layout, then adjust step count, width, spacing, brightness, fixture style, driver capacity, and circuit zones.
| Fixture Pattern | Typical Use | Starting Quantity | Symmetry Note |
|---|---|---|---|
| One light per step | Closed stairs and riser lights | Stair count plus landings | Works best when centered on each tread |
| Every other step | Night path or low-glare guide | Ceiling of stair count divided by 2 | Choose odd or even steps before rough-in |
| Two per wide step | Broad main stairs over 42 in wide | Stair count times 2 | Keep left and right fixtures paired |
| Spacing-based wall lights | Side wall or skirt board layouts | Run length divided by spacing, rounded up | Calculator reports the real center spacing |
| Landing emphasis | Split flights and turns | Add one light for each 3-4 ft of landing | Align landing fixtures with flight centers |
| Lighting Goal | Target Lumens | Best Fixture Type | Planning Note |
|---|---|---|---|
| Soft night path | 25-45 lm per step | Riser dot or low marker | Use dimming or motion timing for bedrooms |
| Accent guide | 50-70 lm per step | Skirt board puck or small wall light | Good for hallway stairs with nearby ambient light |
| Balanced home stair | 75-100 lm per step | Recessed wall step light | Common starting point for indoor stair safety |
| Bright safety stair | 110-140 lm per step | Wall light or linear tread light | Useful for dark carpet, dark wood, or older eyes |
| Outdoor or deep finish | 150-180 lm per step | Sealed outdoor step light | Confirm glare and local code before finalizing |
| Zone Plan | Use When | Driver Logic | Wire Run Effect |
|---|---|---|---|
| Single zone | Short basement or utility stairs | Total watts must fit one driver after reserve | Shortest controls, longest continuous branch |
| Two zones | Main flight with upper and lower control | Load is split across two drivers or channels | Usually balances voltage drop better |
| Landing hub | Turns, mid-landings, or two flights | Landing acts as a practical branch point | More branches but shorter individual runs |
| Motion groups | Night path with sensors | Keep sensor output and driver load matched | Good for top-bottom sequence lighting |
| Stair Layout | Typical Count | Suggested Lights | Starting Zones |
|---|---|---|---|
| Straight interior flight | 12-14 steps | 12-15 wall or riser fixtures | 1-2 zones |
| Split stair with landing | 14-17 steps | 16-20 fixtures including landing | 2-3 zones |
| Wide feature stair | 13-16 steps | 26-34 paired fixtures | 2-4 zones |
| Open-tread stair | 12-15 steps | One linear strip per tread | 2 zones |
| Outdoor deck steps | 3-8 steps | One or two sealed lights per step | 1 zone |
Stair lighting is one of those things we all give short shrift to…until 3 AM when we go to get a drink of water and stub our toe. Suddenly it’s a matter of both safety and visibility, an emergency. And here’s the thing with stairs; if you guess as to how many light are necessary, you’re likely to end up either with too few (dark shadows between treads) or a runway catwalk of excessive fixtures. You want enough light so your feet see exactly where they is going, but not so much brightness that you lose the ability to see depth of each step. Spacing and rhythm matter more then sheer output.
First, count how many steps you have and what kind they are. Count each step and all intermediate landings. Why? A stair riser is a different beast than a landing. For example, lighting a flat landing is one thing, a long straight flight of stairs (say thirteen or fourteen steps) will make you want to simply divide up the whole thing with some arbitrary number of fixtures. But stairs aren’t linear hallway. They’re a series of individual platforms, each of which deserves its own visual cue.
How to Plan Your Stair Lighting
Plug those measurements into a planning tool that maps it out for you, and you’re running a mathematical equation to determine most efficient distribution of light sources into your unique geometry while eliminating dark gaps and hot spots. The calculator above will do the math for you, so you don’t have to draw everything out on graph paper by hand.
Placement strategy makes all the difference. Two fixtures per step (symmetrically positioned on both sides) can be particularly nice for wide treads. They double amount of light, and help maintain visual balance. One fixture per step provides a simple, moddern solution, which is easy to wire, though may appear sparse on wider treads. The goal isn’t to draw attention to one wall while leaving the other in the dark; symmetry helps make it all feel intentional, not patched together.
The role of the stair in your house plays a big part in brightness goals. Stairs that serves as a main entry require maximum visibility, which means pushing towards higher lumen counts per step. On the other hand, stairs that lead into a bedroom where you walk up and down at night requires more softness so they don’t fully wake you up while still allowing you to see your way. So consider this as task lighting vs ambient guidance.
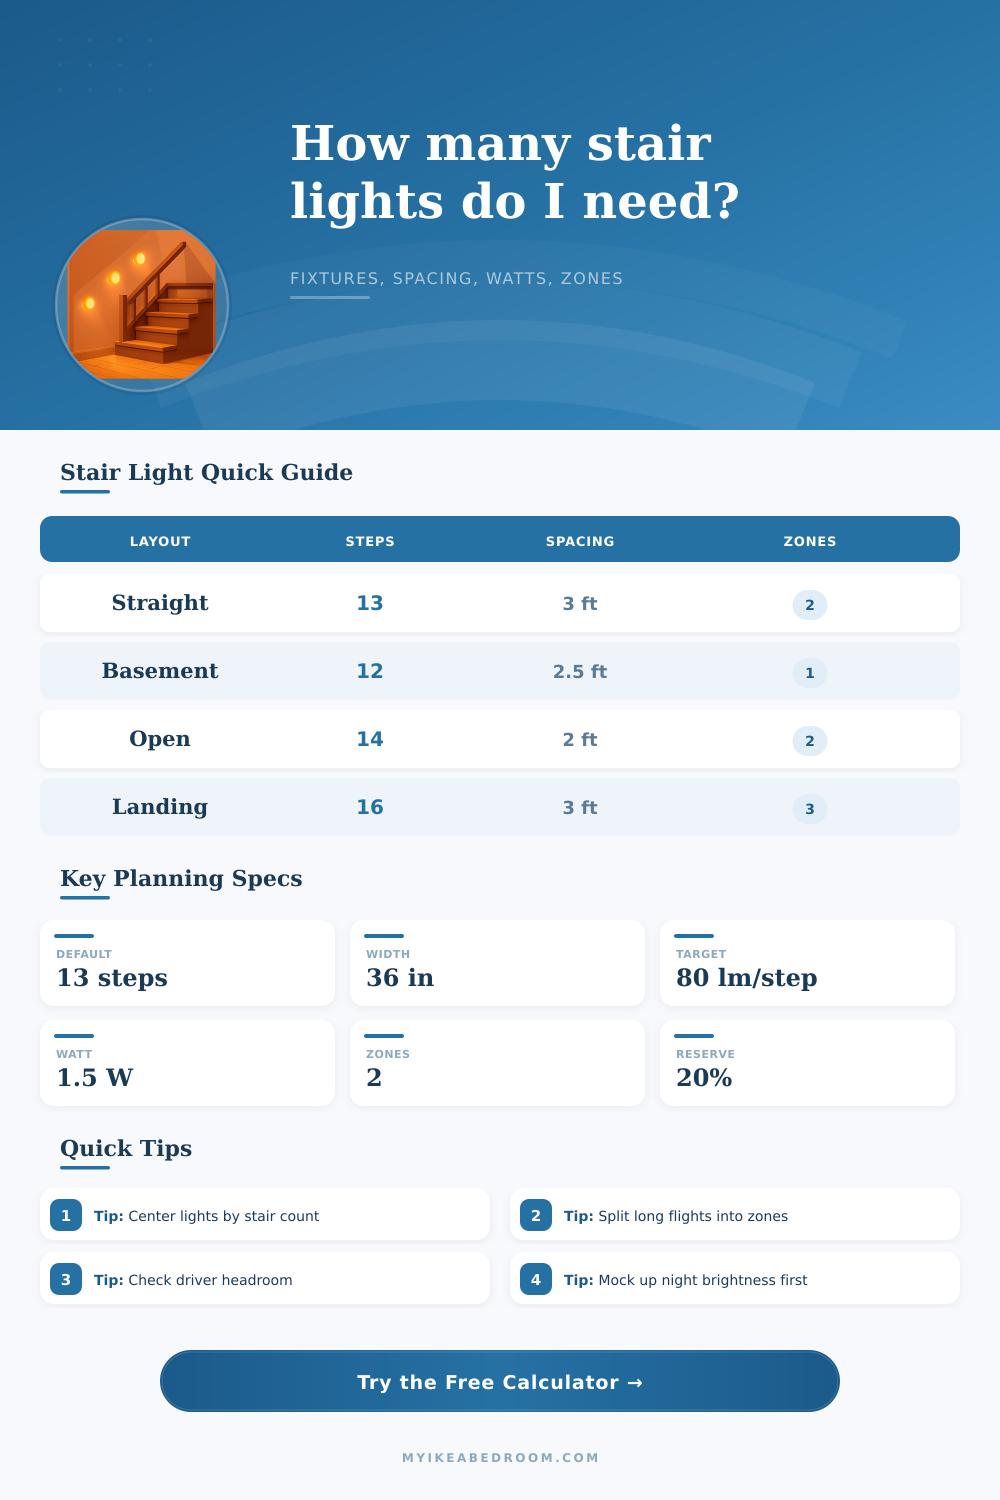
Eighty lumens per step is a good sort of middle ground for everyday around the house use. Lower than this starts to create that subtle marker feeling, higher requires more shielding from glare if one must look up or down the stairs.
Until your electrician arrives with a concerned look on his face, people tend to overlook wiring logistics. Voltage drop happens when you have a long run of low-voltage LED wire; it’ll dim the lights at the other end. To combat that, split your stair into zones: Don’t have one giant daisy chain from the basement to the second floor. Feed it from both ends (or use a central hub at a landing). That shortens the wire run for each individual light, keeping everything bright all over. It calculates the total load so you know if you need multiple circuits, or could of done it with just one driver.
Beyond looks, choosing the right fixture type also involves practical considerations. A recessed wall light stays out of sight and prevents accidental bumping. Under-tread strips provide an elegant floating effect on open stairs, though they must be mounted properly to prevent sagging over time. If used outside on steps, fixtures must be sealed so they won’t rust in the elements. A chart on the page clearly explains these considerations, pairing fixture types with common uses to ensure you don’t put flimsy indoor lights anywhere near foot traffic (or rain).
Then there’s that other variable: Driver capacity. Your driver should have a little room between what it provides and how many watts you’re using. Driving it all the time will shorten its life and make it flicker if heavily loaded. Having some reserve, I leave 20ish%, makes for good peace of mind. It doesn’t cost much, but it really matters when you don’t want to troubleshoot an electric problem in the middle of the night while enjoying your house.
So, ultimately, stair lighting is about trust. You must trust your perception of where the next step is. The right amount of light placed at the right intervals gives you continuous visual feedback as you descend and instills that trust in you. It makes what could have been a functional necessity a thoughtful element of the home’s character. If you’re building new or retrofitting an existing house, it is worth it to take the time up front to get the details just right. No more wishing for shadows where there should of been none.