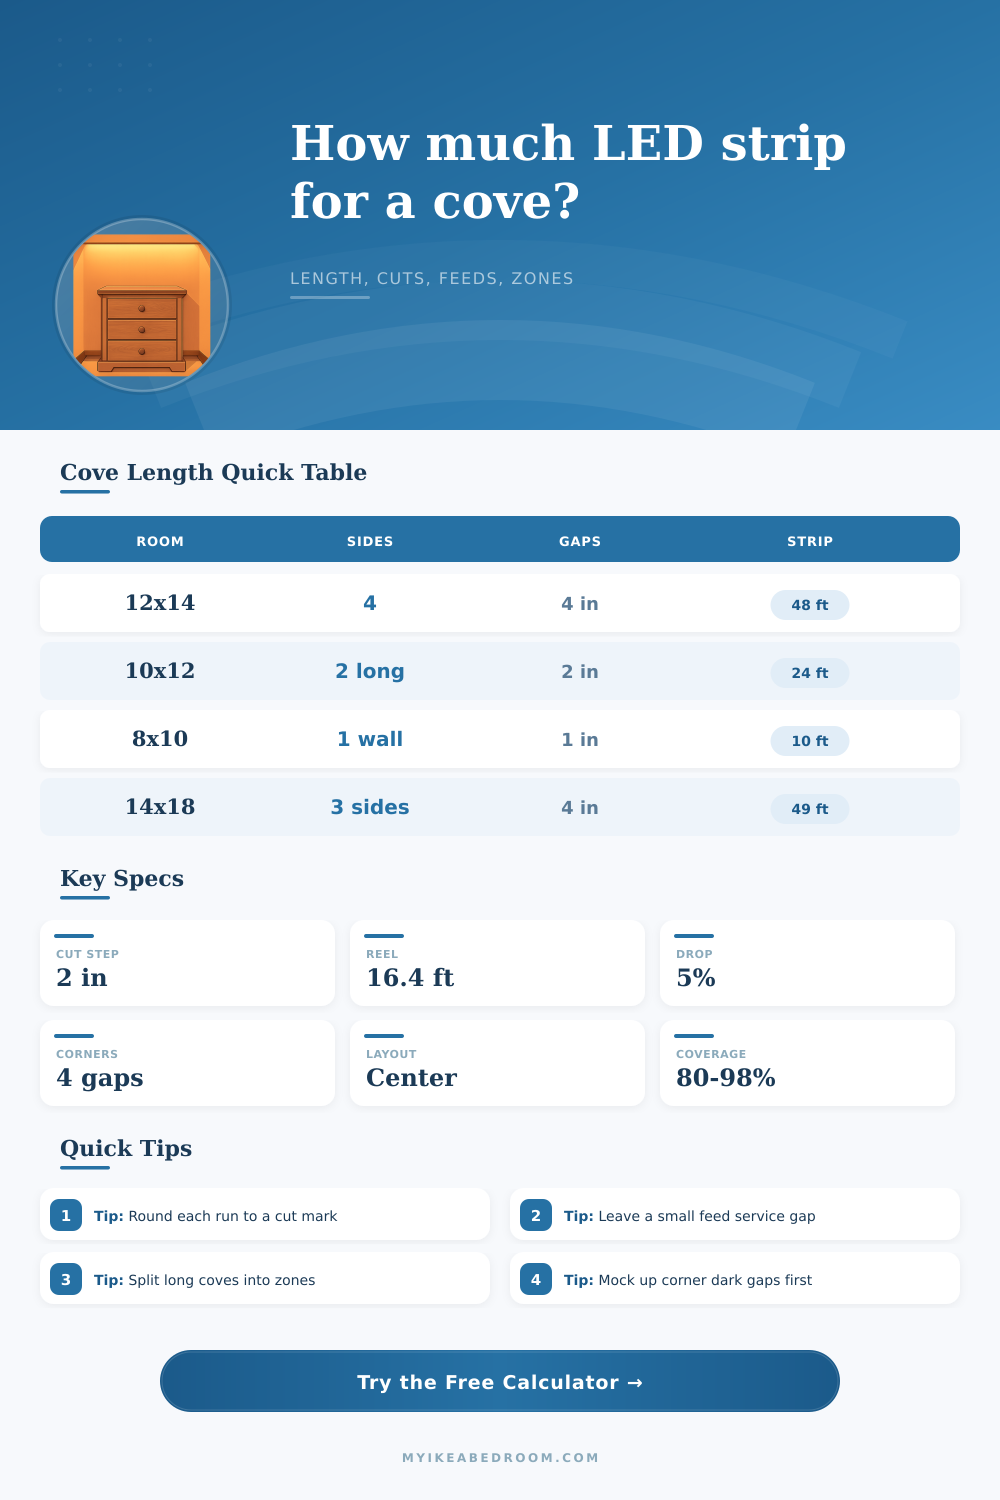
LED cove planning
Cove Lighting Length Calculator
Estimate lit strip length, cut pieces, reel or segment count, feed points, driver zones, perimeter coverage, and corner gap allowance for bedroom tray ceilings, closet coves, media walls, and built-in light channels.
Detailed length breakdown
| Cove side choice | Length formula | Default corner count | Typical use |
|---|---|---|---|
| All four sides | 2L + 2W | 4 | Tray ceiling or room perimeter glow. |
| Two long sides | 2L | 0 | Parallel coves above wardrobes or beams. |
| Two adjacent sides | L + W | 1 | Alcove, corner desk, or partial ceiling reveal. |
| Three sides | 2L + W | 2 | Open-ended ceiling, headboard return, or niche. |
| Voltage drop allowance | Modeled max single feed | Best layout | Planning note |
|---|---|---|---|
| 3% | 16.4 ft / 5.0 m | Short zones | Use where matching brightness is important. |
| 5% | 27.3 ft / 8.3 m | Center feed | Balanced estimate for many accent strips. |
| 8% | 43.7 ft / 13.3 m | Opposite feeds | Works for soft glow when exact matching matters less. |
| 10%+ | 54.7 ft / 16.7 m+ | Split zones | Check actual strip wattage and wire gauge before final wiring. |
| Cut interval | Common strip type | Length rounding effect | Use case |
|---|---|---|---|
| 1 in / 2.5 cm | High-density 24V | Very small trim allowance | Niches and short furniture channels. |
| 2 in / 5 cm | Many 12V strips | Moderate rounding | Bedroom tray coves and media walls. |
| 4 in / 10 cm | RGB or pixel runs | Larger end adjustment | Decorative color coves. |
| Custom | Product-specific | Use datasheet spacing | Any strip with marked copper pads. |
| Scenario | Room size | Cove sides | Likely planning focus |
|---|---|---|---|
| Bedroom tray ceiling | 12 × 14 ft | All four | Corner gaps and center feed placement. |
| Closet cove | 6 × 8 ft | Two long | Short pieces and diffuser dot control. |
| Media wall | 9 × 13 ft | One long | Single feed access and cut mark placement. |
| Headboard cove | 10 × 12 ft | One short | Small service gap behind furniture. |
Imagine walking into a room where there’s soft edge lighting. It’s hard to order enough LED strip though! Everyone measures their room around the outside and orders that much. Then they realize they’re 6 inches short at a corner. Or they’ve got a dim end of a long wall because they brought in power just from one side. It feels like a small problem until you are standing on a ladder realizing you need another reel.
No need to do any math yourself. The calculator does it for you. It takes into account the shape and size of your room to eliminate guesswork, it compares your lit length against your raw perimeter. Most people gets tripped up by that discrepancy. Your room isn’t a perfect rectangle. There are real corners in there which prevents the strip from wrapping around really tight. To keep it looking clean, it adds a tiny bit of space (an inch or two) on every corner. This tool accounts for that so you can see what the usable lit length is.
How to Use the LED Light Calculator
There’s also voltage drop. As electricity runs down a long run of fine copper traces on tape, it weakens. That means when you power a long line from one source, the end of that line will be dimmer than the beginning. It is not flickering, but fading. With the calculator, you can select how much drop you’ll accept. The tighter your tolerance, the more feed points you need. The more feeds, the more wires to hide. But you get the assurance that every part of the cove have the same brightness. Consistent light vs. Clean wiring.
Interval of the cut: You can snip most standard strips every couple of inches, though high-density options might let you cut every inch. Some may even work if you cut them an inch apart. That’s what the calculator rounds to for each piece. So if your wall was 13 feet and 2 inches long, you can’t use exactly 154 inches of tape since you have to stop at a marked copper pad. It will round off at a pre-marked piece of copper pad. So there is some little bit of waste added in. Better to end up with extra tape than to run out by 3 cm.
Gap appearance depends on strip density. Tape with fewer strips per meter is low density. With a diffuser in a deep cove, that’s fine. Those dots won’t glare. They’ll scatter off the plastic. But in a shallow channel, those dots might hurt. High density looks smoother. It draws more power and gets lower voltage sooner. That’s explained well in the comparison section. Match the hardware to your recessed ceiling.
Now let’s look at feed points. In practice, this means power ideally arrives from the middle of long runs. This doubles your effective reach before voltage becomes an issue. Zones are split by the calculator according to the configuration. It will tell you how many driver channels you need. For example, with a tray in the bedroom, you may get four zone. You’ll want individual drivers or a multi- channel dimmer. Otherwise, you’ve designed a cove that needs smart-home stuff you didn’t intend to add.
And think about the service gap. That’s where your wire nuts and connectors go. How do you replace a burned out section if you’ve sealed up each inch with drywall? Keep a little access somewhere, maybe behind a removable panel or next to a closet door. It is a hidden time-saver. The tool takes that area into account when calculating total length. You won’t fear cutting the connector sections.
But lighting design is all about working within constraints. You must use resistive wire, right angles, and straight tape. You avoid any nasty post-cut compromises by getting it right the first time. Even distribution of light is what matters in a cove. It is not some string of lights stuck to the ceiling. Small gaps makes a big difference. Measure twice, cut once.
Begin with the fundamentals. Consider the voltage limits. You should of used a calculator before picking up scissors.