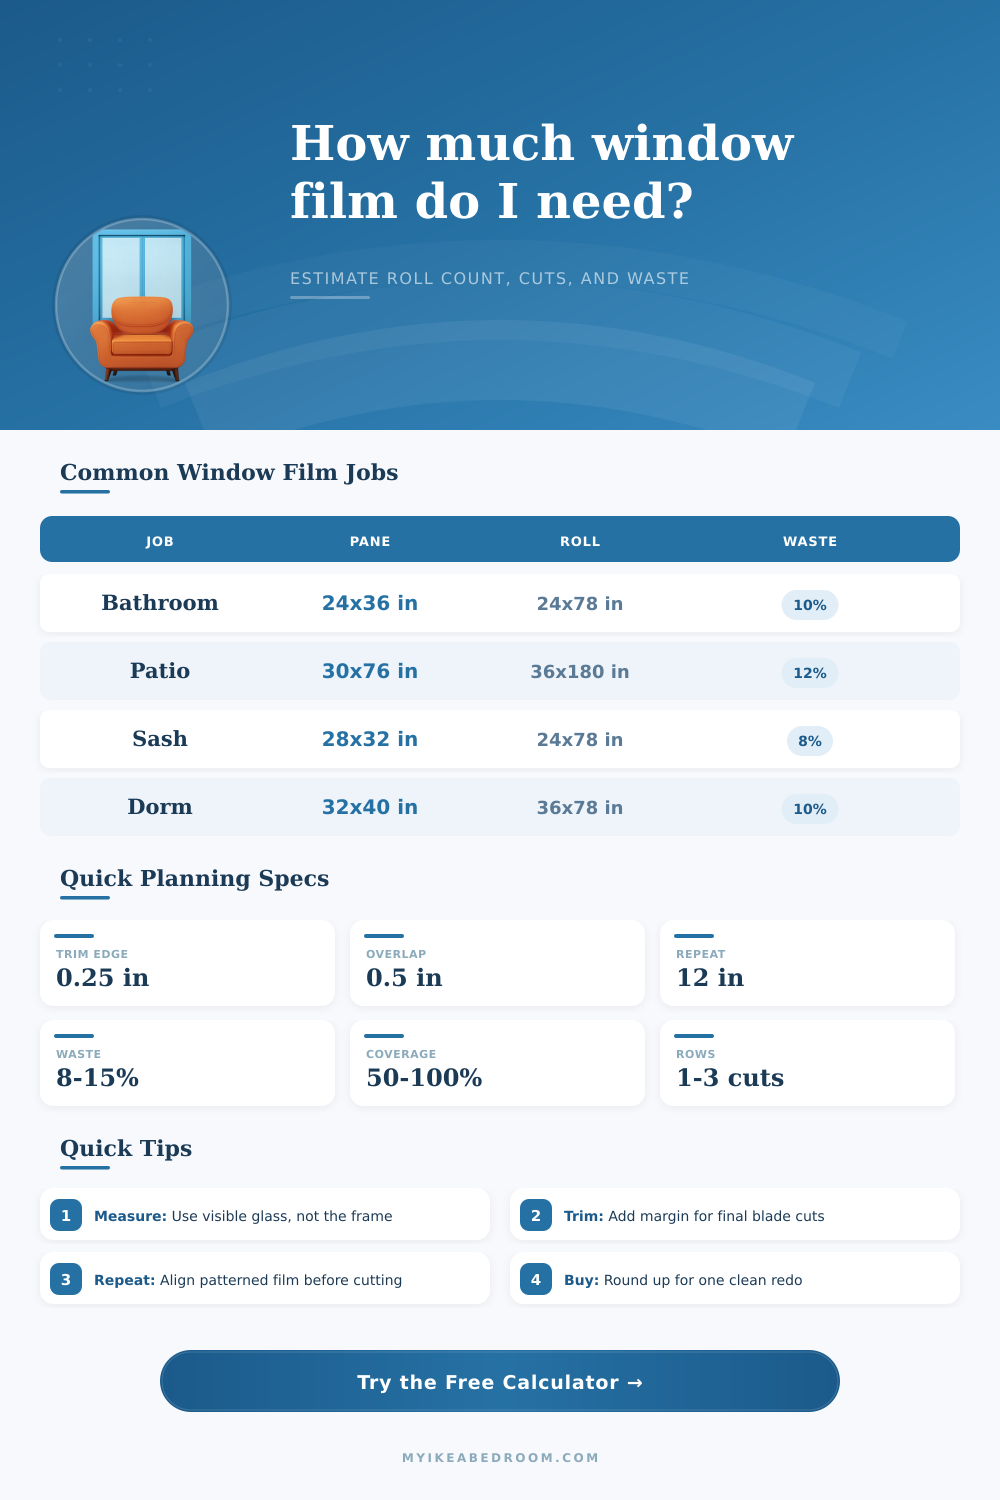
Pane, roll, repeat, and waste planner
Window Film Coverage Calculator
Calculate glass coverage, cut sheet size, cuts per roll row, total roll length used, roll count, offcut area, seam and repeat allowance, and waste-adjusted window film coverage for privacy, frosted, solar, decorative, and blackout films.
The calculator treats each pane as a cut sheet, then tests how many sheets fit across the roll width and how much roll length each row consumes.
| Window Setup | Typical Pane Size | Coverage Percent | Suggested Roll Width | Waste Buffer |
|---|---|---|---|---|
| Bathroom privacy panes | 20-28 in wide by 28-40 in tall | 100% | 24 in | 8-12% |
| Patio door panels | 28-36 in wide by 72-80 in tall | 100% | 36 or 48 in | 10-15% |
| Bedroom sash pair | 24-32 in wide by 28-36 in tall | 100% | 30 or 36 in | 8-12% |
| Decorative privacy band | Full width by 35-60% height | 35-60% | 17.7 or 24 in | 10-15% |
| Roll Width | Best Pane Width | One-Row Example | Watch For | Common Use |
|---|---|---|---|---|
| 17.7 in | Up to 17 in with trim | One narrow sidelight strip | Limited full-pane use | Sidelights, bands |
| 24 in | Up to 23.5 in with trim | One 23 in sheet per row | Small bathroom pane limits | Privacy panes |
| 36 in | Up to 35.5 in with trim | One patio panel per row | Large offcuts on narrow panes | Sash, door glass |
| 48 in | Up to 47.5 in with trim | Two small panes side by side | Harder to handle alone | Wide glass, bay windows |
| Allowance Type | Formula Used | Typical Input | Why It Matters | When To Increase |
|---|---|---|---|---|
| Trim margin | 2 x margin added to width and height | 0.25 in per edge | Lets you blade-trim after wet positioning | Old frames or uneven gaskets |
| Overlap | Added to seamed side of each affected sheet | 0.5 in | Prevents a visible light gap at joins | Roll narrower than glass |
| Pattern repeat | Cut length rounded to repeat interval | 6-18 in | Keeps printed motifs aligned | Large geometric patterns |
| Waste percent | Demand area x waste rate | 8-15% | Covers mistakes, wrinkles, and recuts | Blackout or cling film |
| Layout Mode | How The Calculator Fits Cuts | Best For | Limit | Result To Watch |
|---|---|---|---|---|
| Auto best fit | Compares portrait and rotated sheets | Most plain films | May rotate directional patterns | Selected orientation |
| Portrait cuts | Width across roll, height along roll | Tall door panes | Needs enough roll width | Cuts per row |
| Rotated cuts | Height across roll, width along roll | Short transoms | Can fight printed grain | Total length used |
| Stacked bands | Uses partial height first | Privacy bands | Only for partial coverage | Coverage percent |
It’s easy enough to measure out some glass. At least that is until you try to cut it. Thirty inches by thirty-six: That sounds straightforward. But when you come to unwrap the material, there’s always something wrong with your saw; or some pattern discrepancy you never noticed. And then you’re down three feet before you even get started. The problem isn’t typically mathematical but logistical, those little variable you don’t realize are real until after you’ve already run out and need more.
That’s why planning tools help, they makes you think about those variables before you even start cutting. After you enter your roll specs and panes sizes into the calculator, it do all the math for you, no more guess work about how many extra rolls to buy. Knowing where that answer comes from is just as important, if not more important then knowing what the answer is.
Why Planning Is Important for Cutting Glass Film
Typically folks starts with figuring out the surface area of glass they can see through frame gasket. This becomes your base area. One hundred percent means you want the whole window covered. So say you want a privacy band half way up then you reduce this percentage. Then the calculator builds on this basic glass area to account for how you will actualy install it.
First, there is the trim margin. Typically this is a quarter-inch all around. That doesn’t sound like much, but when you’re installing several panes, those little quarter inches add up. Wet positioning lets you slip film in and slide it into place. Then you can use a blade to trim flush with frame. If your glass isn’t square or your hands aren’t steady, trying to cut to precise measurements beforehand is a recipe for disaster.
The next thing is seam allowance or overlap. If your window’s too wide for one roll, you’ll have to splice two together. Half an inch of overlap ensures there won’t be any light leaks between tiny gaps. Those might form over time as the edges shrink/settle.
That said, adding patterns brings more variables, specifically those of geometry and aesthetics. Frosted plain doesn’t give a hoot which way it’s oriented. A floral design or other geometric print has a set repeat distance. You enter that into the calculator as well (repeat height) and it will adjusts your cut length to the next full motif. If not, your pattern could get chopped weirdly short at the base of one panel. And then it won’t match up on the next panel. It’s a small thing, but it matters if you want the installation to look professional rather than haphazard.
But if it looks haphazard to you…
The last multiplier is waste. This is where DIY can go wrong. Depending on the film and your confidence level, the table of references show a buffer range of eight percent to twenty percent. Stretchy cling films like static cling stretch when you reposition them, so there will be more waste. Precision are required with decorative prints. Aim for ten percent if you are confident. Aim for fifteen or twenty percent if you are new and tackling some tricky angled windows. Better to err on the side of having some excess film rather than ordering more and waiting weeks for it to arrive.
Everything else in the calculation depends on your choice of roll width. A wider roll will typically have fewer seams (cleaner look, less waste). But it will also be heavier and more difficult to manage without help. A narrower roll can be handled easily alone, though may involve more cuts when covering something like a large patio door. To compare those options, the tool test the maximum number of cut sheets that could fit across the roll width in each orientation. Behind the scenes it runs both portrait and landscape scenarios. It chooses whichever layout minimizes the number of rolls required. This optimizes an unseen but valuable part of the process, so you don’t end up buying more length than you need simply because the cuts didn’t line up neat.
Installing window film is very much a planning thing. Minutes applying the film will never be hours spent problem solving. Planning beforehand allows you to account for waste, pattern, seams and even trim ahead of time so what could be a mess becomes a project you can manage. You should of planned better. You know how much you are buying. You’re confident cutting out your pieces. And when it’s done, your film appears purposeful.