Centerline bends, returns, and curtain carriers
Curtain Track Bend Allowance Calculator
Calculate true bend arc length, adjusted straight length, total track cut length, glider count, actual carrier spacing, and return clearance for ceiling tracks, wall tracks, bay windows, closet curtains, and room dividers.
Measure straight run sections to the virtual corner or to the point where the bend begins. The calculator subtracts tangent setback and adds the real bend arc: arc length = radians x radius.
The result assumes bends are made on the track centerline. If your layout was measured along the inside or outside edge, convert to centerline first by adding or subtracting half the track width.
| Bend angle | Radians | Arc at 6 in radius | Arc at 10 in radius | Common use |
|---|---|---|---|---|
| 30° | 0.524 | 3.14 in | 5.24 in | Shallow bay angle or gentle wall jog. |
| 45° | 0.785 | 4.71 in | 7.85 in | Angled bay window or dormer side. |
| 90° | 1.571 | 9.42 in | 15.71 in | Closet corner, corner window, or room divider. |
| 135° | 2.356 | 14.14 in | 23.56 in | Wide alcove wrap or angled return. |
| 180° | 3.142 | 18.85 in | 31.42 in | U-shaped divider end or wraparound bed nook. |
| Carrier style | Typical spacing | Gliders per 10 ft | Best match |
|---|---|---|---|
| Flat panel with clips | 4 to 6 in | 21 to 31 | Casual closet curtains and room dividers. |
| Pinch pleat hooks | 3 to 4 in | 31 to 41 | Bedroom drapery with regular folds. |
| Ripple or wave tape | 2.4 to 3.2 in | 39 to 51 | Ceiling tracks where fold depth must stay even. |
| Sheer privacy layer | 3.5 to 5 in | 25 to 35 | Light panels with low carrier weight. |
| Heavy blackout layer | 2.5 to 3.5 in | 35 to 49 | Full panels that need extra support. |
| Return situation | Typical return | Clearance target | Check before cutting |
|---|---|---|---|
| Window side return | 3 to 5 in | At least 1/2 in beyond rail half-width | Confirm end cap and curtain stack do not hit trim. |
| Room divider return | 6 to 12 in | At least 1 in beyond rail half-width | Keep the return straight enough for carriers to park. |
| Closet opening | 2 to 4 in | At least 1/4 in beyond rail half-width | Check shelves, door casing, and hanger projection. |
| Bed nook wrap | 8 to 18 in | At least 1 in beyond rail half-width | Keep bends clear of headboard, lights, and wall shelves. |
| Layout | Straight sections | Bends | Usual glider mode | Planning note |
|---|---|---|---|---|
| Bay window | Three face widths | Two 30° to 60° | Two-panel spacing | Use centerline radius at each angled corner. |
| L-shaped closet | Two wall runs | One 90° | Spacing mode | Subtract tangent setback from both sides of the corner. |
| U-shaped divider | Back plus two sides | Two 90° | Spacing mode | Side returns often add more track than the curves. |
| Bed nook track | One long face and two returns | Two 90° | Manual count | Manual carriers help match curtain tape already sewn. |
| Corner window | Two window widths | One 90° | Two-panel spacing | Check overlap and curtain stack at the inside corner. |
Don’t just buy enough track to go corner-to-corner across your bay window. On paper, it looks like you have perfectly proportioned curtains. Then you hang them up. On paper, it looks like you have perfectly proportioned curtains, then you hang them up. Because you didn’t account for how it curves, the curtains bunched up at the bend and the gliders banged into each other in the corners.
Here’s the trap that DIY’ers falls into with their curtains. You measured a straight line, but the combined width of your rail and its curve is different than a straight line. When most folks measure they do so to the virtual corner formed by two walls meeting. However that doesn’t exist with a curtain track: it has a width and it can’t make a right angle turn without bending (and breaking).
Why Bay Window Curtains Need Special Measurements
By entering dimensions of your room, the calculator does all the work. You don’t need to worry about math conversions or guess how many more feet of track is needed for those curves. It is far simpler to understand what the tool is compensating for than trying to recall the trig formulas themselves. The tool calculate the amount set back on each straight run required for the curve to start by subtracting the tangent setback. Then, it adds the real arc length. This corrects for situations when you end up with track that’s four inches longer or two inches shorter.
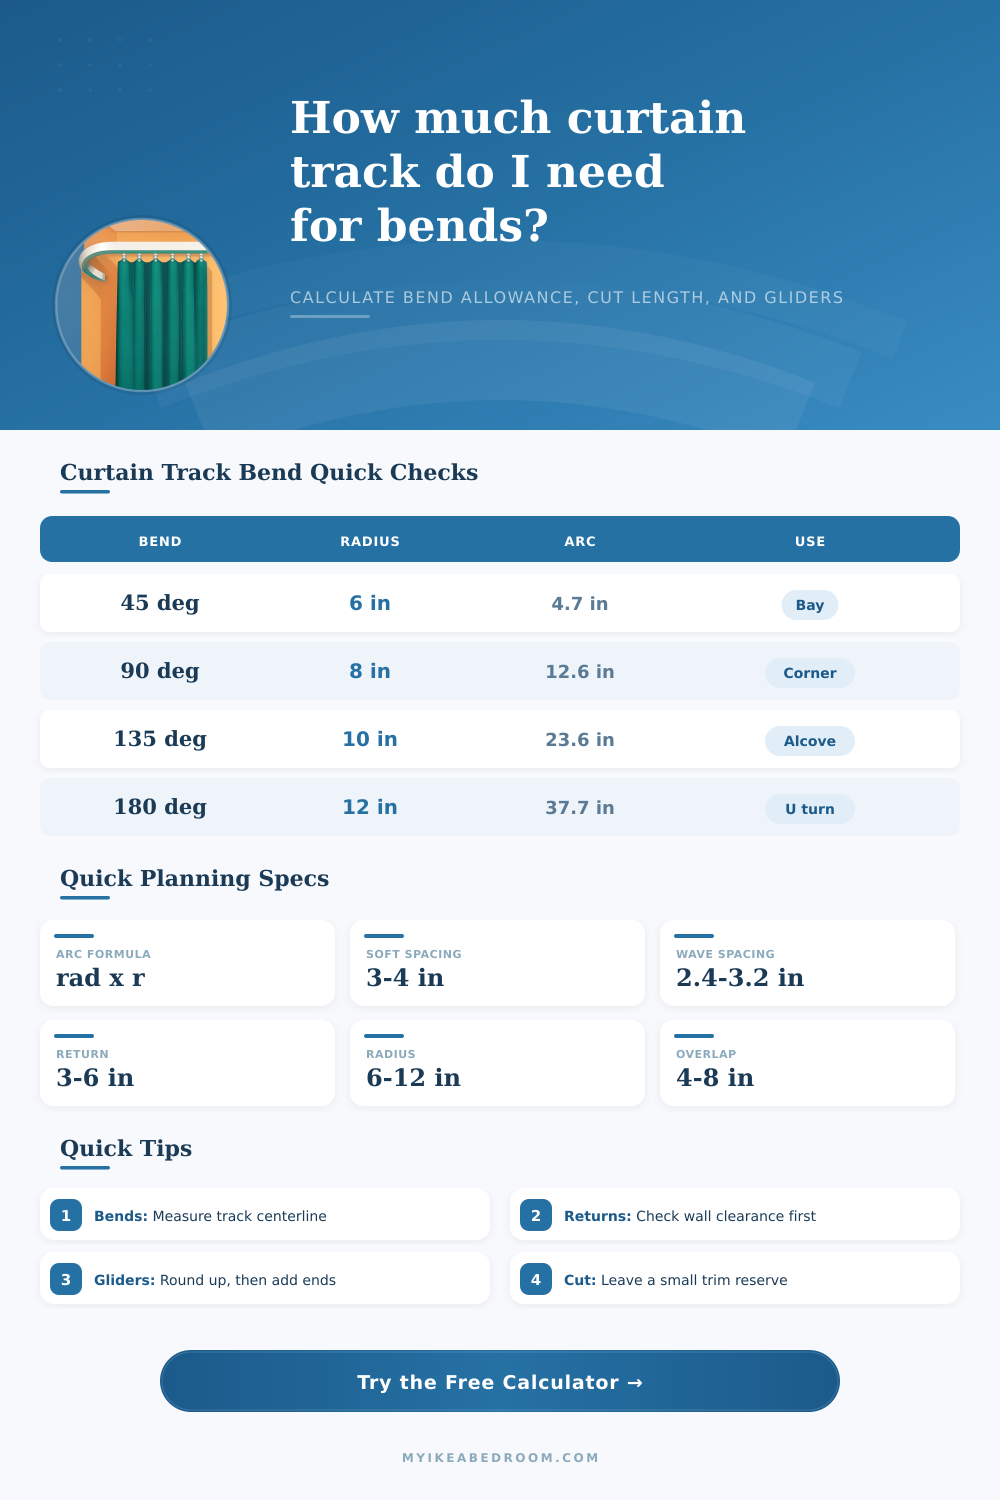
But here’s where intuition can get us into trouble: Which radius is best? How do we decide between those bends? On paper, an even tighter bend makes for a smooth-looking track; in real life, it will produce annoying resistance as your heaviest blackout drapes try to slide by. So what’s the scoop? The chart below spells it out: As the angle increases so does the arc length (and vice versa).
For example, a tight four-inch radius may be possible with some types of flexible PVC track. But you’ll want more wiggle room if you’re working with aluminum channel or other hefty hospital-style tracks that demand bending tools. For most ceiling installations, the sweet spot is roughly eight inches: Just enough curve to make it clear that this isn’t a straight run. But not too much that it catches and snags carriers as they glide along.
The length of the track are important, but also the spacing of the carrier. How many gliders will fit in the travel distance? You don’t want gaps so the spacing needs to be such that your waves (or pleat) are evenly spaced, that’s what makes them look nice. Overlaps and returns is accounted for with this kind of calculation: there’s no need to worry about cramming too many carriers into a corner where they won’t pass one another.
For example, pinch pleat hooks typically require four inches, while ripple fold tape requires a closer spacing of maybe two and a half inches. Space them too closely and the fabric jam; space them too widely and it sags between the gliders and loses its structure. The tool provides an actual number for spacing based off the information you enter, allowing you to double-check whether it looks like the right thing visually before cutting anything.
Returns are another budget buster. That little bit of track where you turn around and head back to the wall may not look like much, but those can accumulate fast. For a tidy installation, each return should of be no more than about three inches from the wall (but first measure your wall clearance!). If you have an electrical outlet near your windows, or other protrusions, maybe that three inches won’t work. The calculator takes that return space into account automaticly; if your rail won’t fit between the wall and ceiling fixture, it alerts you before you grab the drill, and realize halfway through digging out that pilot hole, “Oh shoot.”
You may also find it helpful to read how to install a window blinds rail. Even with flawless measurements it’s worth dry-fitting first. Brackets move, site conditions differs, and connectors occupy more room than expected. Consider your calculated cut length to be a guideline rather than a hard-and-fast rule. Allow some trimming margin for last-minute tweaking.
If you nailed down the math, hanging the hardware go on without a hitch. Your curtain folds fall into place. They hang straight. That irritating corner bulge is gone altogether. You measured the corner, but then you built the curve.