Window blind order width and trimming planner
Cordless Blind Cut Size Calculator
Calculate inside or outside mount cordless blind order width, cut width, height allowance, side light gap, bracket clearance, shortest-width safety, and trimming per side from top, middle, and bottom window measurements.
| Mount situation | Width formula | Height formula | Use when |
|---|---|---|---|
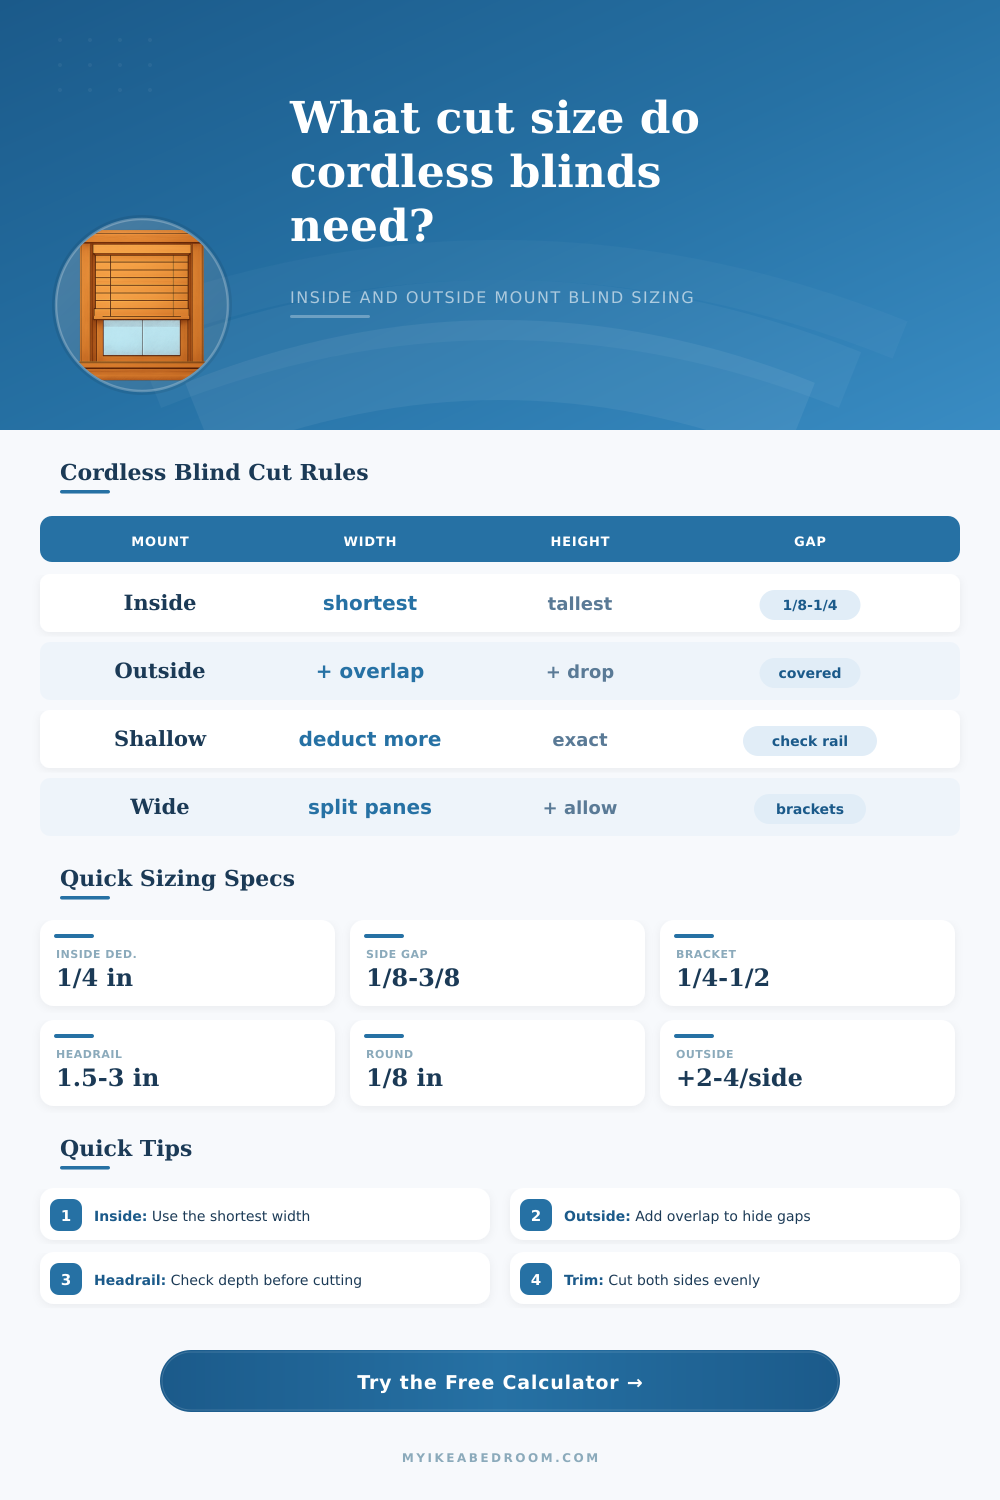
| Inside mount cordless blind | Shortest width - deduction | Tallest height + allowance | Frame has enough depth for brackets and headrail |
| Outside mount shade | Widest width + overlap both sides | Tallest height + top and bottom drop | Need more light blocking or frame is shallow |
| Wide single shade | Use widest reading, then check brackets | Tallest height + stack allowance | Opening is broad and fabric may sag |
| Two blinds in one opening | Split clear width, subtract center gap | Use the taller side for both blinds | Double windows or mullion-separated openings |
| Blind type | Common deduction | Side gap target | Bracket allowance |
|---|---|---|---|
| Cellular cordless | 1/4 in to 3/8 in | 1/8 in to 1/4 in | 1/4 in per side |
| Roller cordless | 1/4 in to 1/2 in | 1/4 in to 1/2 in | 3/8 in to 5/8 in per side |
| Blackout roller | 1/4 in to 1/2 in | 3/8 in or less outside | 1/2 in per side |
| Faux wood cordless | 1/2 in typical | 1/4 in to 3/8 in | 3/8 in per side |
| Roman fabric shade | 1/4 in to 1/2 in | 1/8 in to 3/8 in | 1/4 in per side |
| Opening condition | Shortest-width spread | Suggested action | Calculator signal |
|---|---|---|---|
| Straight frame | 0 to 1/8 in | Standard deduction usually works | Good safety margin |
| Slightly out of square | 1/8 to 1/4 in | Use shortest width and avoid tight gaps | Watch side light gap |
| Noticeably uneven | 1/4 to 1/2 in | Increase deduction or consider outside mount | Caution note appears |
| Severely uneven | Over 1/2 in | Outside mount or trim repair is safer | High-risk fit warning |
| Height planning | Inside mount allowance | Outside mount allowance | Why it matters |
|---|---|---|---|
| Cellular shade | 0 to 1/2 in | 2 to 6 in total drop | Fabric stack can compress slightly |
| Roller shade | Exact to 1/2 in extra | 4 to 8 in total drop | Tube and bottom bar need coverage |
| Blackout shade | 1/2 in extra if sill allows | 6 in or more total drop | More overlap limits glow around edges |
| Faux wood blind | Exact or 1/2 in extra | 3 to 6 in total drop | Slat stack is thicker at the headrail |
Window treatments appear simple, just measure, buy, and put up. Except, windows aren’t always stock sizes. The frame warp, the house settle, the corners aren’t square. That’s a problem if you want to install blinds but have trouble getting them to fit or hanging straight. It’s even harder when it comes to cordless mechanisms because there is parts inside that require exact clearance space. What can you do when your measurements don’t add up? How can you order something that will fit wall?
Inside mount; The core rule for inside mounts are deceptively simple but frequently ignored. Always order based off the narrowest dimension NOT the largest or the average. So in the case above, you would not order for the top of the window which is three and a half inches. Instead, the bottom is three and a quarter inches. Order by the bottom. Otherwise, your headrail will bind on the bottom frame, that jams the mechanism. This can cause damage to the wall and isn’t safe.
How to Measure for Perfectly Fitting Blinds
What about tolerance? Because cellular shades are softer edged, they will forgive more than a hard-edged faux wood blind. You can choose your exact blind type on this calculator and it will change your tolerances accordingly. Changing the blind type also adjusts suggested bracket clearances and side gaps. It simplifies math of what to deduct where so that you don’t need to guess at whether or not a quarter inch was sufficient.
The other tradeoff with outside mounts is that they are ideal for a shallow frame (one that can’t support a headrail inside its casing). But they do demand some thoughtful planning regarding overlap. A standard inside mount tend to allow light around the sides, which is fine if you’re seeking blackout performance. This is only true if it’s an exact fit and the frame are perfectly vertical. In that case, a bit of added overlap (a couple of inches on either side) seals out those gaps, transforming possible sources of light leakage into a strong defense against glare.
Take the time to accurately measure your height, even if it seems obvious. For an inside mount, measure tallest point of the opening to ensure the shade doesn’t ride up too high when raised. That way, when raised, the shade will not ride up too far and show the bottom track or create an ugly gap at the sill level. For outside mounts, providing additional length (i.e., “drop”) will frame out the window better visually, but make sure that you have enough wall clearance above the window so that the mechanism can be hidden and doesn’t look bulky.
People often overlook amount of space taken up by the mount. Cordless lift mechanisms and brackets is thick. Decorative window frame molding is sometimes wider than anticipated. A typical deduction won’t always work. Comparing the required headrail clearance with the true depth of your window frame will avoid trouble, it avoids running into something as you attempt to lift the blind.
If you have more than one window, it is far better to be consistent rather than exact. Yes, it’s right to measure every window separately but don’t get caught up in making tiny discrepancies into a big deal. Small differences in width between similar windows are normal. You want a visually balanced look, yes. You also want a functional fit. A mathematically perfect room isn’t necessary here. So if your windows vary by a few inches, then the deduction on one of them will be greater. That means the blind will be slightly smaller, which won’t look bad at all from six feet away.
That’s what I mean by understanding those variables, it takes away the fear from ordering. It turns buying into planning. You must plan based off the physical limitations of the space in which you live, whether that be a new build or renovating an old house, regardless of style (moddern apartment, anyone?). You also need to know how materials work and what width deductions to make so you can be comfortabley with your purchase decision.
The math is the hammer. Knowing why to use the hammer is where the talent lies. That’s when you grab for the tape measure.