Cylinder pillow yardage, circular ends, zipper, and piping planner
Bolster Pillow Fabric Calculator
Estimate cut dimensions and fabric yardage for cylindrical bolster pillows using length, diameter, end style, seam allowance, fabric width, vertical repeat, number of bolsters, zipper overlap, piping option, material behavior, and units.
For directional fabric, keep the body rectangle length running with the fabric grain when the design or nap requires it. The calculator adds repeat rounding and reserve after the base geometry.
Calculation Breakdown
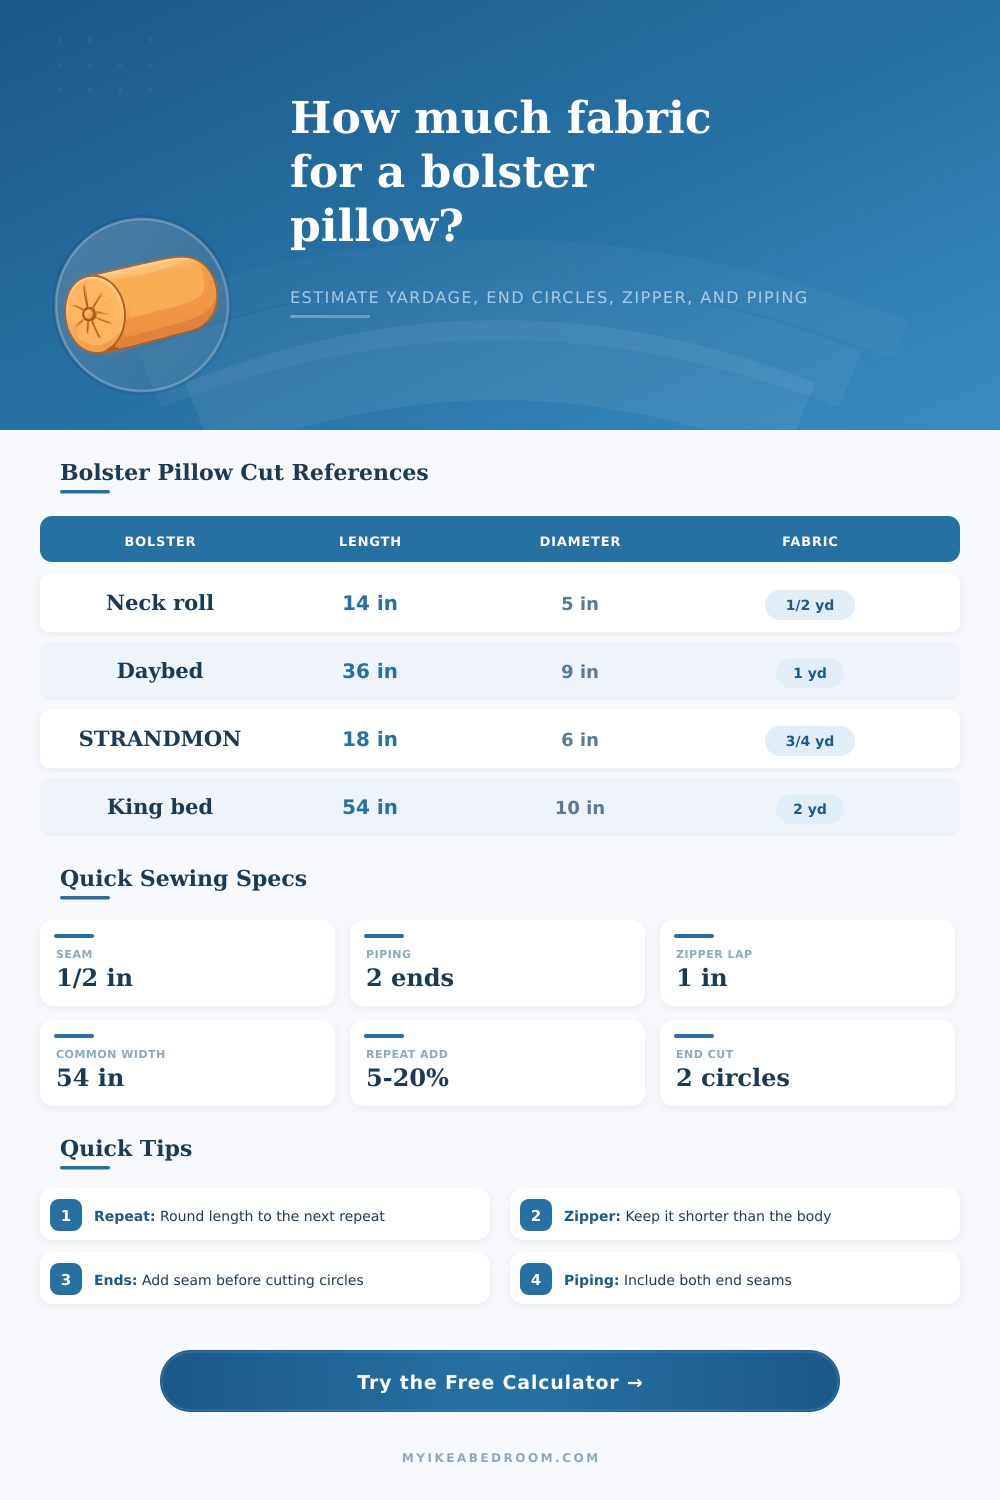
| Bolster type | Typical finished size | End style | Planning note |
|---|---|---|---|
| Neck roll pillow | 12 to 18 in long, 4 to 6 in diameter | Flat or piped ends | Often fits on 1/2 to 3/4 yd when fabric is plain. |
| STRANDMON-style neck pillow | 16 to 20 in long, 5 to 7 in diameter | Flat ends, hidden zipper | Works well with medium-weight decorator cotton or linen blend. |
| Daybed bolster | 30 to 40 in long, 8 to 10 in diameter | Piped or boxed ends | Repeat matching can change the order from one yard to more. |
| King bed bolster | 48 to 60 in long, 9 to 12 in diameter | Piped ends | Check whether body length or circumference controls layout. |
| Sofa bolster pair | 18 to 24 in long, 6 to 8 in diameter | Piped, flange, or boxed ends | Pairs need matching orientation so the ends look balanced. |
| Yoga bolster cover | 24 to 28 in long, 10 to 12 in diameter | Flat or boxed ends | Firm inserts need a zipper that opens wide enough for stuffing. |
| Formula item | Calculation | What it means | Common adjustment |
|---|---|---|---|
| Body rectangle cut length | Finished length + 2 x seam | The long dimension between end seams before sewing. | Add zipper overlap only along the seam opening, not to finished length. |
| Body wrap width | Diameter x pi + 2 x seam + zipper overlap | The rectangle width needed to wrap the cylinder. | Use a test wrap on thick inserts if fabric has little give. |
| End cut diameter | Finished diameter + 2 x seam | The circle size to cut for flat ends. | Boxed or flanged ends add a style allowance. |
| Circular end area | pi x cut radius squared x end count | Fabric area consumed by the end circles. | Multiply by bolster count and style factor. |
| Zipper length | Finished length - end clearance + overlap | Approximate zipper opening along the body seam. | Keep some fabric at each end for easier sewing. |
| Piping length | Circumference x end rows x bolster count | Cord length around circular seams. | Add 5% to 10% for joins and trimming. |
| Vertical repeat | Waste behavior | Best use | Calculator treatment |
|---|---|---|---|
| 0 in | No repeat rounding | Solid, texture, tiny woven pattern | Only reserve and material allowance are added. |
| 2 to 6 in | Small cut rounding | Small stripes, checks, small florals | Body length rounds up to the next repeat. |
| 7 to 14 in | Moderate repeat waste | Medium medallion or direction print | Body and visible end allowance both increase. |
| 15 to 24 in | High layout sensitivity | Large floral, toile, scenic fabric | Repeat waste and reserve should be reviewed against actual fabric. |
| Over 24 in | Cut from full layout | Oversized motif or matched pairs | Use the result as a minimum planning estimate. |
| Fabric width | Good for | Possible issue | Layout check |
|---|---|---|---|
| 36 in | Small neck rolls and narrow bolsters | Large circumference may not fit crosswise | Compare wrap width with usable fabric width. |
| 45 in | Many decorator cottons | Long bolsters may consume extra linear yardage | Check body rectangle direction before cutting. |
| 54 in | Most upholstery fabric | Nap and repeat can reduce nesting | Keep ends beside the body only if grain allows. |
| 60 in | Canvas, outdoor, and some performance goods | Wider fabric may still have unusable selvage | Enter usable width after trimming. |
| 72 in | Wide workroom or specialty fabric | May need a different grain plan | Confirm the design still runs the desired way. |
With a bolster pillow, you know what size insert is going into it. You know roughly how it’s going to look when finished. But then there’s this never-ending bolt of fabric that seem like an impossible fit onto a cylinder with round ends. This is where most projects fall through… Folks just don’t think about the geometric details.
Enter the measurements, and the calculator does all the figuring for you, no more guessing on how the rectangle fits around circle. So what’s the deal with a bolster? A bolster is more than a simple long tube; it’s a cylinder with two disks at each end (capped). Most folks measure out in yards using only length. They don’t think about the ends! Those round ends requires a large amount of material, particularly when one wants piping around the edge or if one wishes to make bolster directional, such as using a directional print. The tool takes this into account by measuring the surface area of the cylinder plus the area of the circle at either end, then fitting all of that within the width of the particular bolt of fabric.
How to Calculate Fabric for a Bolster Pillow
Pattern repeat is a silent budget killer because of the extra fabric waste it causes. For example, if you have a solid color or something with a really subtle print, you are able to place your cuts closely together. The ends of a bolster could even line up nicely right next to the body. But when you introduce a big floral or a striped jacquard into the mix, the pattern get crazy. Now you can’t just make cuts wherever the fabric allows. Each seam needs to match the pattern exactly to keep the design flowing without interruption around the cylinder.
To do that, we add a waste factor for pattern matching to our calculator. This means you end up wasting fabric to find the best spot for matching the pattern. That’s what catches most people off guard because they notice 5 inches leftover and assume it must be an error, but it’s not, it’s matching the design at a cost.
While cut geometry is important, so too is choice of materials (velvet is not cotton canvas). Since velvet has a grain (the nap should generally run downward for a softer feel), all pieces has to go in one direction. And you can’t turn pieces around when you’re done (since that will make them go the wrong way) to squeeze more into a space. So the calculator takes into account your material type and gives a different reserve percentage accordingly. Faux leather or napped velvet may call for almost 20% additional material. This is for example compared to cotton, which is stable enough to work with a normal 10% buffer to handle seams and the directional constraints it introduces.
The other practical matter that impacts the size of your cut: Zipper placement matters, and typically with a bolster pillow, you’d prefer the zipper opening on the body’s longest seam (the one creating the rectangle). That way the ends are clean, plus you can slide the insert in place and close the last few seams without worry. Most zippers requires some kind of placket or overlap of the rest of the fabric, so the tool will request a number for this. We have to deal with those metal teeth and the way the fabric wraps around them too.
There’s an option to add piping, which adds visual interest but also complicates things. If you select a piped end, the calculator tells you how long your strip of fabric should be to wrap around the cord and how much cord to buy. Seems like no big deal, that is until you’re three feet into your project and discover you’re two inches shy of binding it all together. Better to order just a bit more than necessary. It won’t make a dent in the final price; it’ll save you the hassle of heading back out to get another remnant…that doesn’t quite match.
Now looking back at the results, each of those numbers can be broken down into the end circle diameter and the body cut size; knowing what those are as separate pieces allows you to see how they might stack up on the bolt. You may have found your fabric is narrow and the tool tells you that the circumference is more than the width, forcing you to piece the rectangle. That’s totally okay, if you know why that happened. And typically a wide upholstering fabric fits most bolsters in their entirety without needing to piece, making for an easier sew job.
But, I mean, this isn’t very precise, either. How is it possible to estimate the hand of a fabric from a computer screen? But you can get reasonably close to predicting how many yards you’ll need to order, and that’s where the calculator provides a starting point. You tweak based off your personal comfort level with cutting and then further tweak based on any particular quirks of the fabric you’ve selected. And suddenly a vague sense of “oh crap” becomes a real shopping list.
In short, a bolster is basically a lesson in covering the area. You’re trying to make a flat plane turn into something round, so use the numbers as your guide, but let your hands do the heavy lifting. Keep the grain line straight. Watch the repeat of patterns. And always trust the math to tell you when to purchase that additional quarter yard, because it’s there for a reason: it gives you the margin of error. The pillow will thank you.