Floating shelf cleat, stud, and load planner
Floating Shelf Cleat Length Calculator
Calculate cleat length, screw count, stud hits, cantilever ratio, maximum advised shelf depth, unsupported end length, and a practical load score for floating shelves, picture ledges, closet shelves, display rails, and desk hutch shelves.
| Stud spacing | Cleat length | Likely stud hits | Layout note |
|---|---|---|---|
| 12 in on center | 30-48 in | 3-5 studs | Common in some partition walls and older framing. |
| 16 in on center | 34-60 in | 3-4 studs | Most common planning assumption for bedroom walls. |
| 19.2 in on center | 48-72 in | 3-4 studs | Use a detector and mark actual centers before drilling. |
| 24 in on center | 48-84 in | 2-4 studs | Longer cleats help when studs are sparse. |
| Load class | Typical use | Suggested screw spacing | Score target |
|---|---|---|---|
| Decorative display | Frames, candles, small decor | 10-12 in | 70+ |
| Everyday books and decor | Mixed books, storage baskets | 8-10 in | 75+ |
| Heavy books, plants, dishes | Dense loads and deeper shelves | 6-8 in | 82+ |
| Desk hutch or utility shelf | Office gear and active use | 6-8 in | 85+ |
| Shelf depth | Wood cleat | Rod bracket | Design note |
|---|---|---|---|
| 4-6 in | Excellent | Usually not needed | Picture ledges and spice rails have low leverage. |
| 7-10 in | Good for light loads | Good | Common display shelf depth when studs are hit. |
| 11-14 in | Use caution | Preferred | Better with thick shelves and more support reach. |
| 15-18 in | Not advised alone | Hybrid preferred | Deep shelves create high cantilever leverage. |
| Preset | Shelf size | Style | Planning focus |
|---|---|---|---|
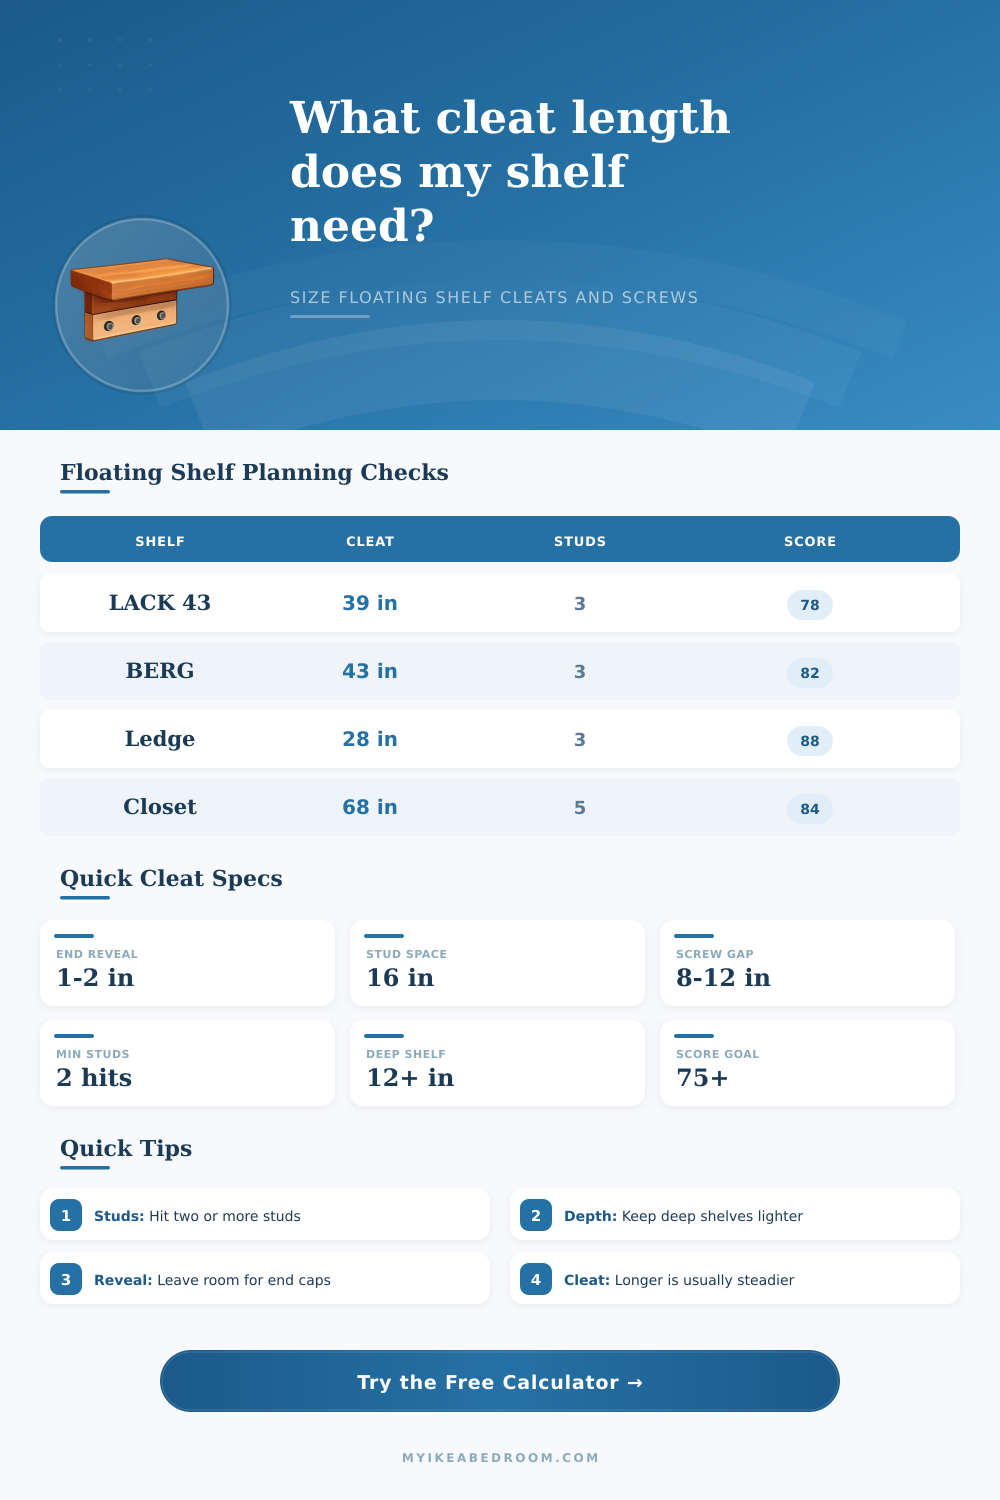
| LACK 43 in shelf | 43.25 x 10.25 in | Wood rear cleat | Decorative load with short end reveals. |
| BERGSHULT shelf | 47.25 x 11.75 in | French cleat | Books and decor across three studs. |
| Oak picture ledge | 32 x 4 in | Picture ledge lip | Tight screw spacing on a shallow ledge. |
| Desk hutch shelf | 55 x 13.75 in | Hybrid support | Deep shelf with higher score target. |
You mount a shelf and, from across the room, it appears perfectly level. It is exactly where you wanted it. You set your heaviest book down on the outer edge. You hear the drywall rip from the stud. The shelf droops and things tumble to their death.
That’s why we see so many failures; folks don’t think about mounting on walls as a geometry challenge but, rather, a leverage puzzle: Gravity concerns itself with load distribution and fulcrum points…not aesthetics. That is why sizing the cleat correctly really does matter.
How to Keep Your Shelf From Falling Off The Wall
With just a few measurements of shelf size, the calculator does the rest for you. If your shelves is 3 inches wide, will there be enough holding power to support the weight of all that wood, books and everything else, or will it pull away from wall? For most DIYers, screw length is what they focus on… until too late, when they realize they’ve ignored cleat length and stud hits! By forcing you to consider relationship between shelf depth and how much surface area is being anchored into something solid, the tool spares you some guesswork.
The deeper the bookshelf, the harder it pull down on each screw. Every inch of shelf depth increases its pull on those screws… so don’t take that for granted!
The first step is to measure length of your shelves and determine how much you’d like as an end reveal (the little space between the shelf face and the edge of the cleat). Two inches each side is good, enough for some finish work, yet limits your support area. So, in our example above, a 43”-long shelf would of require about a 39”-long cleat. The calculator spits out this answer in seconds.
But it is not just that. Where do you expect that 39” to fall? It should falls on at least two studs, right? Probably not. Unless you’re lucky with wall framing, chances are you’ll have just one stud in the middle with no other backing except for drywall anchors on either end. This is not good. No dice under pressure.
The reference table on this page shows that stud spacing matter. Sixteen-inch spacing is generous, but twelve or twenty-four inch framing makes the math tighter. Twenty-four-inch framing (tight) make the math tighter. To accommodate this, you must shrink the reveal or accept a slightly different visual balance by extending the cleat farther to grab additional studs. It’s a tradeoff between structural integrity and beauty. Integrity wins here most of the time.
The calculator takes into account the bracket style too, as they differ greatly in support reach. A standard wood rear cleat offers a maximum bearing depth of just three and a half inches. French cleats provides better lateral lock but limit depth similarly. Hybrid or steel rod systems push that reach much deeper, so deeper shelves don’t go limp right away.
The other area of failure is depth. If you’ve ever used the same screw on a ten-inch deep shelf that you would on a fourteen-inch, then you know what I’m talking about: people think that depth doesn’t matter; they’re mistaken. Because the further out the leverage is applied, the faster it multiplies. If you apply enough torque to the cantilevered part of the results, then you’ll be able to see how fast the leverage multiplies in the results. This helps you understand the risk. The deeper the support goes compared to its reach, the bigger the spike in torque on the fasteners.
When you increase depth without adding more hits to the studs or upgrading the bracket, you will notice the load score go down. This serves as a warning system in the logic. And then there’s the weight. Books are heavy; decorative objects aren’t. Wet plants in pots are heavy anchors that shift the center of mass forward (and add to their weight). Enter the estimated load into the calculator and see if your plan is dangerous or merely ambitious.
If your score comes in under seventy-five, you’ve got some reconsidering to do. Maybe shorten the shelf, add a few more screws, go for a steel rod system instead? Nothing wrong with changing plans before breaking out the drill. Remember: You want a shelf that’ll remain standing long past installation day. Measure twice, calculate once, and let the wall do the rest.