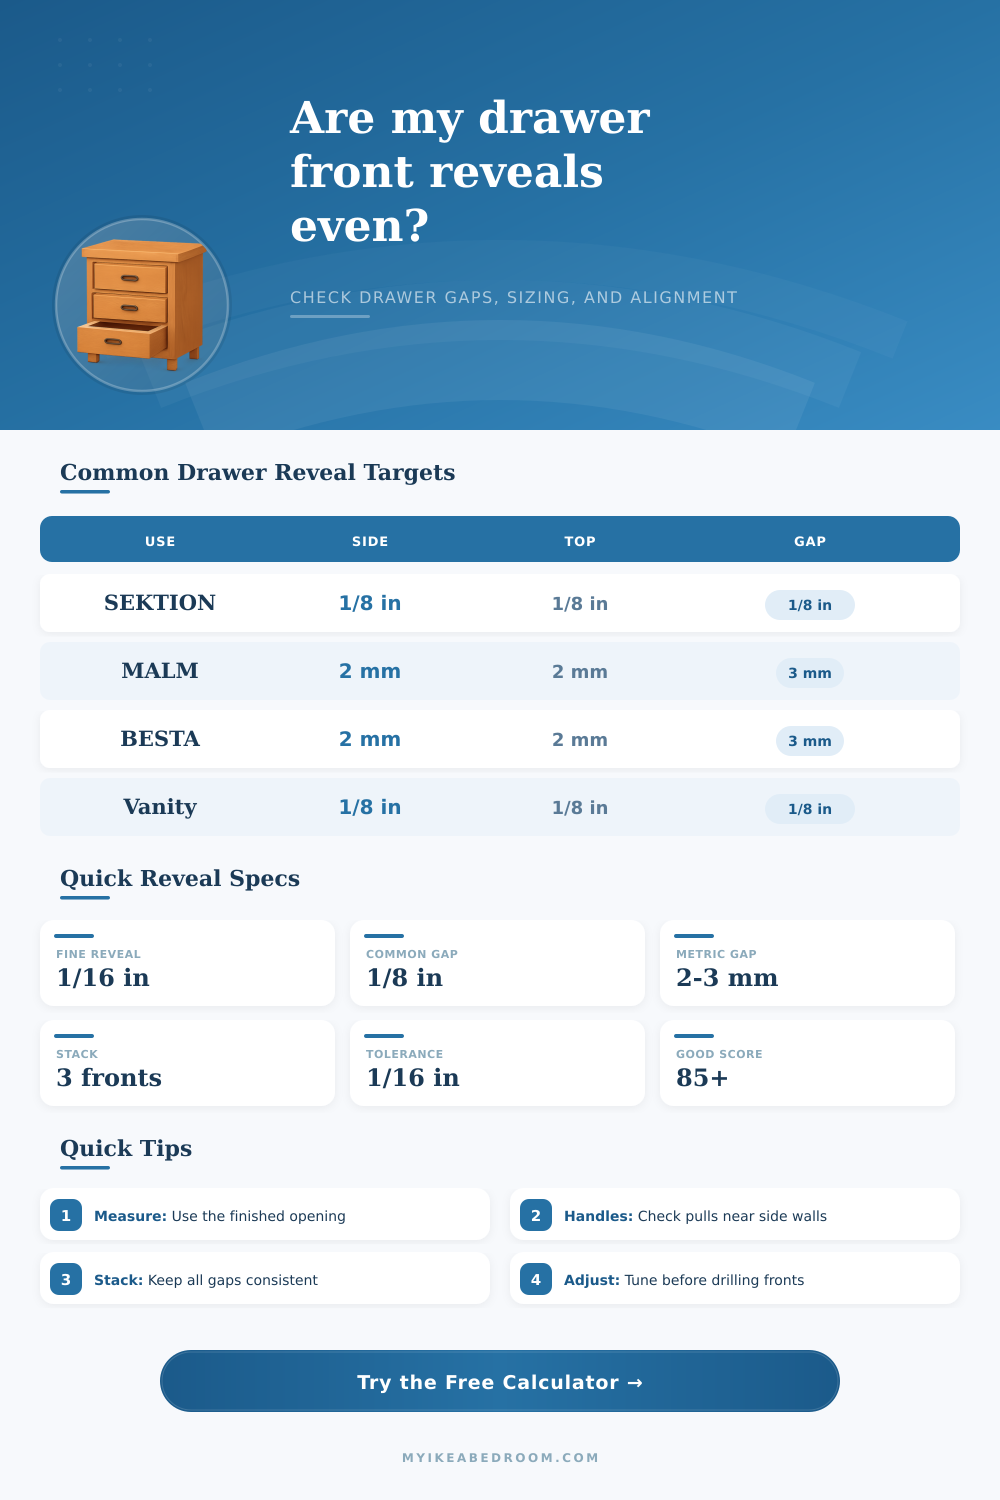
Drawer front gap and alignment planner
Drawer Front Reveal Calculator
Check side reveal, top and bottom reveal, inter-drawer gaps, stacked front height, front sizing, shim adjustment, handle clearance, and an alignment score before you drill drawer fronts.
For overlay drawer fronts, treat the opening as the design bay or visible rail-to-rail zone. For inset fronts, use the actual finished opening.
| Drawer type | Typical side reveal | Typical top/bottom | Inter-drawer gap |
|---|---|---|---|
| Inset cabinet drawer | 1/16 to 1/8 in | 1/16 to 1/8 in | 1/8 in |
| Frameless slab kitchen front | 2 to 3 mm | 2 to 3 mm | 2 to 3 mm |
| Bathroom vanity stack | 1/8 in | 1/8 to 3/16 in | 1/8 in |
| Wardrobe internal drawer | 3 to 6 mm | 2 to 4 mm | 3 mm |
| Dresser drawer bank | 2 to 4 mm | 2 to 4 mm | 3 to 5 mm |
| Adjustment result | Reveal error | Likely fix | Before drilling |
|---|---|---|---|
| Excellent | Under 1/32 in | Clamp, verify, and drill pilot holes. | Check the drawer is fully seated on both slides. |
| Good | 1/32 to 1/16 in | Use screw-slot movement or a thin shim. | Mark the front with painter tape reference lines. |
| Tune needed | 1/16 to 1/8 in | Loosen brackets, shim one corner, and re-clamp. | Check box square before blaming the front. |
| Resize likely | Over 1/8 in | Re-cut the front or adjust the drawer bank layout. | Confirm opening, front, and overlay assumptions. |
| Preset scenario | Opening or bay | Front stack | Reveal goal |
|---|---|---|---|
| SEKTION 3-drawer base | 30 in base bay | Three slab fronts | 1/8 in cabinet reveal |
| MALM dresser drawer | Metric dresser bay | One wide front | 2 to 3 mm side reveal |
| BESTA drawer pair | Media cabinet bay | Two low fronts | 3 mm centered gap |
| PAX internal drawer | Wardrobe interior | One pullout drawer | Hinge-side clearance first |
| Vanity stack | Bathroom base cabinet | Three drawer fronts | Consistent top and gap lines |
| Clearance condition | Warning threshold | What it means | Practical response |
|---|---|---|---|
| Pull beside wall | Handle clearance greater than side reveal | The pull may hit trim, tile, or wall finish. | Shift front inward or choose lower-profile hardware. |
| Adjacent front pair | Gap under 2 mm | Seasonal movement can cause rubbing. | Increase the inter-drawer gap or reduce front height. |
| Internal wardrobe drawer | Side reveal under 3 mm | Door hinges and drawer faces can conflict. | Open the wardrobe door fully and test travel. |
| Large slab front | Tolerance under 1/32 in | Tiny errors show across wide fronts. | Use temporary clamps and check sight lines twice. |
The problem with hanging drawer fronts is it puts you in a unique predicament. There you are, holding a tape measure and a drill press. Your hands trembles slightly as you remember how you ended up here.
You cut out the drawer fronts. Then you sanded down the fronts until they was smooth. And now you’re supposed to hang these bad boys up there in such a way that everything look straight and all the gaps match. Nobody needs to know that you eyeballed the space between each door to within fractions of a millimeter.
How to Hang Drawer Fronts Correctly
After you enter the size of your opening into the calculator above, it will do the math for you. It’ll spare you from trying to guess which front was too wide. It also stops you from wondering if your desired gap is possible given your cabinet box’s proportions.
It is not about getting it right; it is about making things consistent. You don’t want anyone’s eyes pausing on the seams, instead, you want them to flow across the surface.
Everyone thinks the opening width are the same as what’s on the tape measure. That’s just not how drywall rolls. Or plywood boxes twists slightly while they’re being built. Factory frame cabinets is built to tight tolerances but those tolerances add up when stacked in three-drawer units. So when you think of the opening width as a hard fact, the drawer will either fit tightly on one side or not at all with an excess on the other. By allowing user to type in the actual measured reveal target, the tool makes up for these realities.
Perhaps you want an eighth of an inch on both sides. That’s normal for inset cabinets. But if there is more space at the front than at the back, the calculator warns you before you start drilling pilot holes. This is where many folks goof up. They think the front determines the gap. Truth is, the gap determine the location of the final front.
Adding drawers to a stack makes things complicated: Vertical space is typically narrower than horizontal. You may be working with an opening that’s 30 inches high but with vertical space tight enough for three drawer. You have to add up the bottom reveal, the top reveal, and the two spaces between each drawer front. And suppose each one is precisely an eighth of an inch. Your total stack could of come up a quarter inch shy of the opening. Sounds like plenty. But now that’s an amount you’re dividing into four separate spaces. The calculator balances out those gaps so you can see how much of what you’ll need to shim or adjust the screw slots to get things lined up.
Can you fit handles with clearance? Is the middle drawer too long and will it require trimming a millimeter? Do all the gaps look equally balanced? Are they perfectly symmetrical? A great score mean yes to both of those last questions.
The handle’s something no one thinks about till it smacks into the wall. You may draw perfectly revealing sides on paper, but the look won’t work if the handle protrudes out past a nearby piece of trim or another door. That’s where this tool comes in and tells you how much clearance there’ll be for your hardware without bumping into other doors or trim around them. It is particulary helpful when the space are close together, like with kitchen islands or vanities. Once the caution light comes on, you know to move the front in just a bit or select a different hardware shape.
It is a small detail. But makes a bigger difference then anyone will tell you until their knuckles get scratched opening a drawer.
Before you mark anything in stone, clamp the drawer shut and then look at it closed from standing height. Slowly close the drawer and view it. That is how someone is going to judge it every day. If the gap looks like a wobble, even though the calculator tells you you’re within tolerance, listen to your eye and go play with the slide brackets until it close properly.
Wood expands and contracts with humidity. Paint adds bulk which alters the way it fit. The table on the page lays all that out according to style. Two or three millimeters are common gaps in the metric system. Custom work in the imperial system tends toward tolerances measured in fractions of an inch. Decide what convention works best in the style of your kitchen, and stay consistent. High-end cabinetry rely heavily on consistency as its secret weapon.
After checking for a square box, taping your holes, and making sure everything fits, drill away! And what’s the reveal? It’s not just space between objects; it’s also the visual breathing room that makes the piece of furnitures look intentional rather than rushed. You won’t even see it when it’s done right.