Cabinet base clearance and toe board planner
Cabinet Toe Kick Size Calculator
Size toe kick height, recess, front board length, exposed return cuts, stock pieces, seams, waste allowance, and cabinet clearance before cutting plinth or base trim.
Load a real cabinet scenario, then fine-tune the measurements for your room and cabinet system.
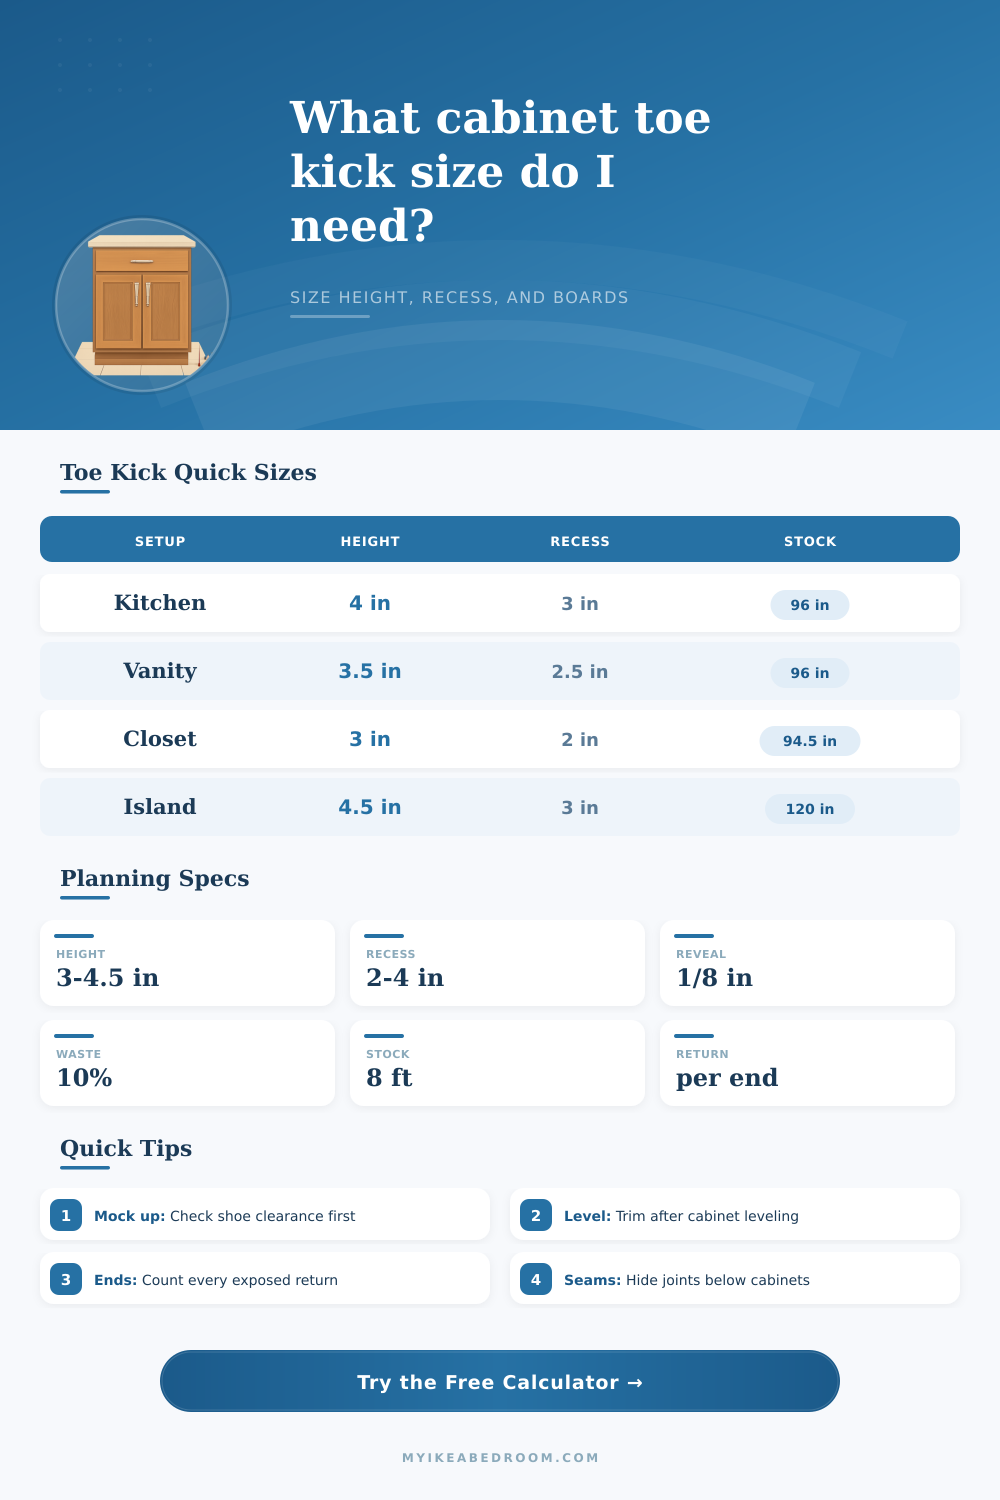
| Cabinet use | Common height | Common recess | Planning note |
|---|---|---|---|
| Kitchen base cabinets | 4 in / 10.2 cm | 3 in / 7.6 cm | Most comfortable starting point for standing work zones. |
| Bathroom vanity | 3-3.5 in / 7.6-8.9 cm | 2-3 in / 5.1-7.6 cm | Often lower because vanity boxes and tops vary in height. |
| Wardrobe built-in | 3-4 in / 7.6-10.2 cm | 2-3 in / 5.1-7.6 cm | Choose enough height to clear base trim and floor variation. |
| Island or peninsula | 4-4.5 in / 10.2-11.4 cm | 2.5-3.5 in / 6.4-8.9 cm | More exposed sides usually mean more return cuts and seams. |
| Stock type | Nominal length | Best use | Watch point |
|---|---|---|---|
| 96 in plinth strip | 8 ft / 244 cm | Small kitchens, vanities, laundry runs | Long walls need visible seams unless joined under cabinet divisions. |
| 120 in ripped board | 10 ft / 305 cm | Cleaner long fronts with fewer joints | Transport and straightness matter before cutting. |
| 240 cm metric plinth | 94.5 in / 240 cm | Modular cabinet systems and closet bases | Check actual package length before making a cut list. |
| 48 in tile backer strip | 4 ft / 122 cm | Tile-faced toe kicks and heavy wet areas | More seams; plan joints away from high-traffic center spans. |
| Run length | 96 in boards | 120 in boards | Likely seam plan |
|---|---|---|---|
| 60 in / 152 cm | 1 | 1 | One piece, use leftover for returns. |
| 120 in / 305 cm | 2 | 1 | One seam with 96 in stock or one long piece with 120 in stock. |
| 168 in / 427 cm | 2 | 2 | Place seam under a cabinet stile or appliance bay. |
| 240 in / 610 cm | 3 | 2 | Dry fit all long pieces before cutting short returns. |
| Clearance signal | Height range | Recess range | Action |
|---|---|---|---|
| Comfortable | 3.5-4.5 in | 2.5-4 in | Proceed after checking floor level and door swing. |
| Low kick | Under 3 in | Any | Check shoes, vacuum heads, base trim, and cabinet warranty needs. |
| Shallow recess | Any | Under 2 in | Expect more toe contact when standing at the counter. |
| Deep shadow | Any | Over 4 in | Confirm cabinet support and clip attachment reach. |
There’s a new kitchen counter in front of you and as you step up to it, you notice your heel touches something before your toes do. It’s not a design flaw; it’s a feature: the toe kick. The toe kick are the small area at the base of each base cabinet, typically three inches deep and roughly four inches high.
It is there because people need somewhere to stand while in kitchen, and our feet requires space to plant them comfortabley without bracing against the cabinets. Without it, cooking becomes more of an exercise in leaning backward so we can balance on a tightrope. Most people only think about this space when they’re cutting trim out and discover floor isn’t level, or the cabinet run extend past the length of the board. At that point, the math start to feel less obvious and more like a guessing game.
Understanding Toe Kicks in Kitchen Cabinets
After entering your layout into the calculator (above), which does all the hard work, you’ll be thinking about actual room instead of gazing at a spreadsheet. Begin by drawing out the shape of your cabinet run, such as a simple pantry against a straight wall. It could also be a complex one, like an island with returns on both sides. Because those things dictate where that shadow line falls, you enter the door thickness and depth of the cabinet box.
Go too shallow on your recess, less than two inches, perhaps, and you’ll be stubbing your toe every time you reach down to get a heavy pot from the bottom drawer. Sounds minor, right? But it kills your posture after eight hours of prep work. For most people, the standard four inches are fine. You may want to go to three inches to maintain proportions if you have built-ins, low-profile wardrobe doors, or vanity tops.
Next is the stock issue. This is what causes most homeowners to either purchase insufficient material or overspend. Plinth blocks is sold in 8-foot lengths by cabinet stores. This sounds like plenty, but you actualy need more than two boards for a twenty-foot galley kitchen (not including any return/ends). Because wood warps, measurements change as the cabinets are shimmed and eventually levelled, and saws inevitably bind. The calculator include an allowance for this type of waste.
There’s no way to cut your toe kicks beforehand unless the cabinets is already installed; and then shimmed flat. Walls bow; floors slope; cabinets must be measured off finished floor, not the blueprint. Trim that measures off the plan will either bind on one end or gap on the other. This is why input for the scribe allowance is important. It provide a quarter inch buffer to allow for penciling in the bottom edge and trimming to conform to the contours of your actual room.
The material matters as well and that influences your cut plans. Melamine strips are the cheapest and most commonly used, but they chips when handled roughly. Painted MDF is the most forgiving because you can nick it, sand it smooth, and touch it up with a paintbrush. The best looking option are long ripped boards, which have fewer seams. However, getting a ten-foot straight board of wood into the busy kitchen is another logistical challenge.
Tool’s reference tables explains which number of boards to order (assuming you’re ordering eight- or ten-foot stock) based off those lengths. But this isn’t simply a matter of covering distance. This is a matter of concealing joints nobody will see. Seams in the corner or underneath cabinet stiles are okay. Dead center on the long front face? Not so much. A little math goes a long way: Plan Ahead = Money Saved + Time Saved.
Count how many ends requires a return piece. Those little scraps realy do add up quickly. If it’s a corner, don’t forget about the inside angle…remember? Two boards overlapping means losing material to the joint. It doesn’t take much away, but when you’re cutting out ten feet of trim… It all adds up!
The idea here is clean lines + comfy footing. Your knees should of been soft while your toes tuck in nicely. After running through the numbers, printing out the cut list, and heading to the shop with a clear plan, there’s no more guessing. There are straight cuts, clean joints, and enough room for my heels. This is what makes the difference between a cabinet as a box vs a workspace. It is a perfect blend of function and form.