Floor movement clearance planner
Floor Expansion Gap Calculator
Estimate perimeter expansion gaps, fixed-object clearances, baseboard cover, transition breaks, and metric equivalents for floating and wood flooring layouts.
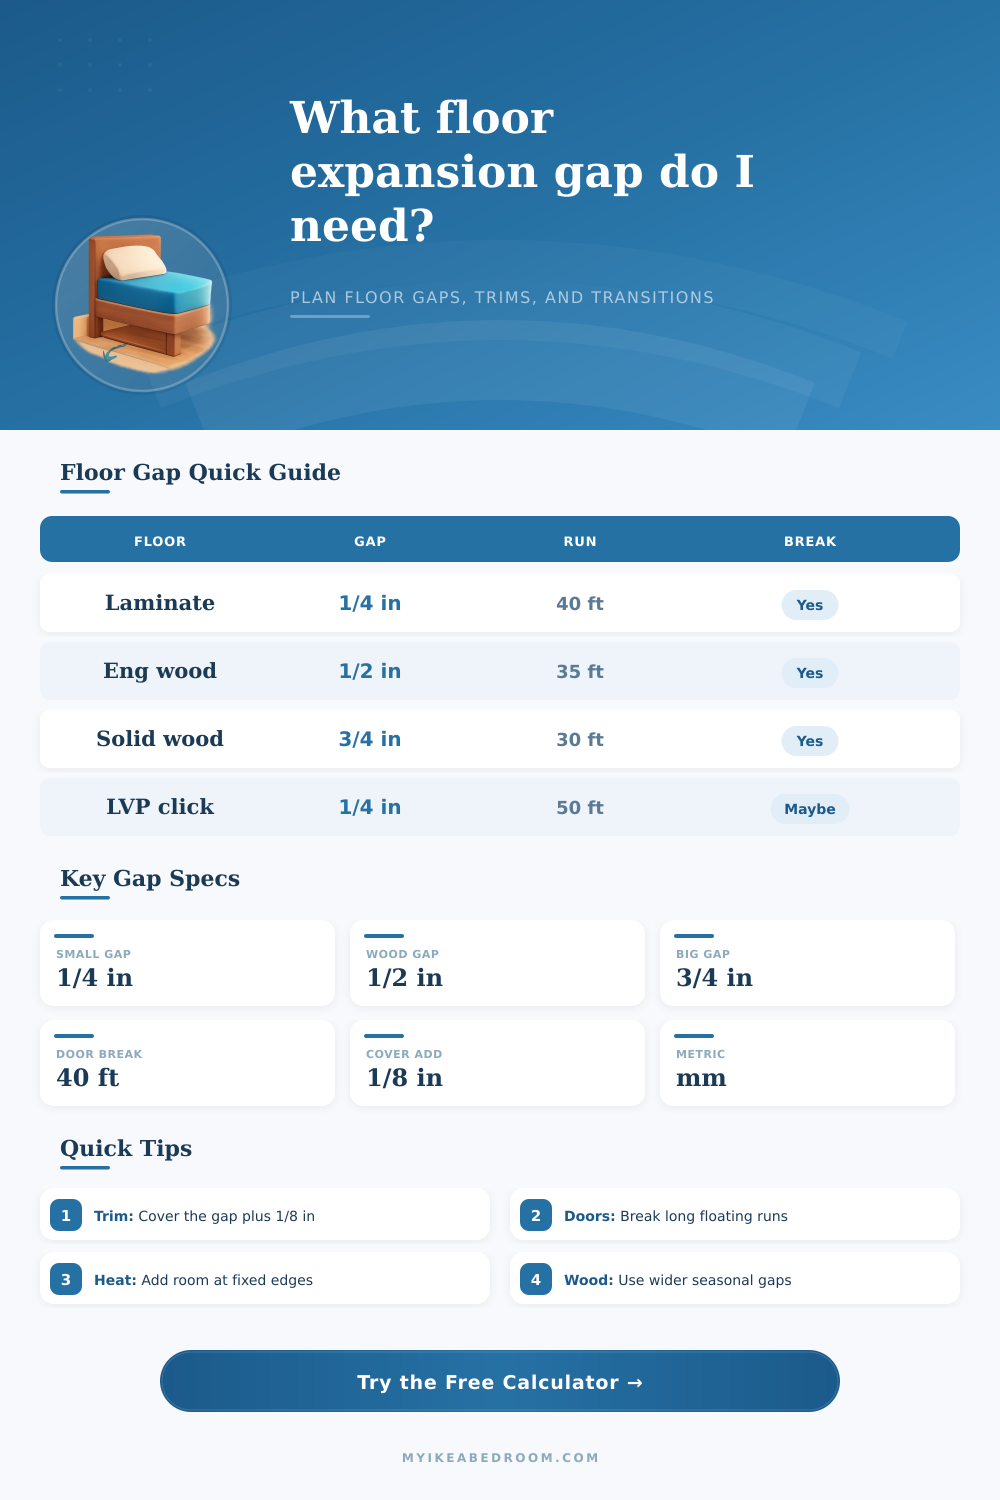
| Flooring profile | Common perimeter gap | Typical long-run break | Planning note |
|---|---|---|---|
| 8 mm to 12 mm laminate plank | 1/4 in to 3/8 in / 6 to 10 mm | About 40 ft / 12 m | Use transitions at long halls and connected rooms. |
| Click LVP or SPC rigid core | 1/4 in / 6 mm | About 50 ft / 15 m | Sun exposure and fixed islands can raise the need. |
| Floating engineered wood | 3/8 in to 1/2 in / 10 to 13 mm | About 35 ft / 11 m | Wood faces need more room across seasonal changes. |
| Solid hardwood strip | 1/2 in to 3/4 in / 13 to 19 mm | About 30 ft / 9 m | Species, plank width, and moisture swing matter. |
| Room condition | Gap adjustment | When to use it | Calculator behavior |
|---|---|---|---|
| Stable indoor humidity | 0 in / 0 mm | Conditioned bedrooms, offices, and closets | Uses the material base gap. |
| Moderate seasonal change | 1/16 in / 1.6 mm | Typical homes with winter heating and summer humidity | Adds a small movement reserve. |
| Wide dry-to-humid swing | 1/8 in / 3.2 mm | Wood floors, large rooms, or climate swings | Adds a stronger seasonal reserve. |
| High moisture risk area | 3/16 in / 4.8 mm | Mudrooms, kitchens, and damp transitions | Adds reserve and flags edge sealing. |
| Edge cover item | Common cover depth | Best use | Gap check |
|---|---|---|---|
| Baseboard reinstalled low | 3/8 in to 1/2 in | Laminate, LVP, and tidy wall edges | Often covers 1/4 in to 3/8 in gaps. |
| Quarter round or shoe molding | 1/2 in to 3/4 in | Retrofit floors without removing baseboards | Works for most floating floor gaps. |
| T-molding or threshold | Varies by profile | Doorways and long run breaks | Should bridge movement on both sides. |
| Flexible sealant edge | Gap plus backer support | Wet edges or sliding-door zones | Needs compressible fill, not rigid grout. |
| Common project | Area | Typical gap | Transition note |
|---|---|---|---|
| 10 x 10 home office laminate | 100 sq ft / 9.29 sq m | 1/4 in to 3/8 in | Usually no break if isolated. |
| 12 x 14 bedroom engineered wood | 168 sq ft / 15.61 sq m | 3/8 in to 1/2 in | Door threshold can hide the break. |
| 15 x 20 living room LVP | 300 sq ft / 27.87 sq m | 1/4 in to 3/8 in | Check sunny glass walls and islands. |
| Long hall with wood parquet | 160 sq ft / 14.86 sq m | 1/2 in or more | Use T-molding before the run limit. |
The story of why most floors fail starts not with faulty adhesives or flooding but with a little misstep along the wall. In the spring you get your new hardwood or laminate installed and marvel at how snugly it is up against baseboard. Then summer comes around and humidity increases. Suddenly there’s no more room for expansion, so the wood gets swollen and the planks pushes against one another until they’re buckling. It looks terribel; and costs a fortune to repair.
Now, how do we know what’s right? Well, there is a math formula that calculator will do for you based off the room size and type of material. But knowing why it matters help protect the install. Here’s the deal: All flooring products will expand and contract as they interact with changes in air moisture. Different types of materials has different amounts of expansion/contraction. Dried wood (solid hardwood) still reacts to its environment and can shifts quite a bit as humidity changes from season to season. Luxury vinyl plank and laminate are far less likely to move, which is why they generally need narrower gaps. Once you choose your type of profile, the tool take all this into account automatically.
Why Flooring Needs Space to Move
Secondly, think about longest run that will be continuous. In a small room like this bedroom, the floor can stretch out and fill up the available space with ease against all four walls. This is not as true for long hallway or an open concept great room. Where do you think a floating floor goes if it’s stretched out too far and has no transition? It doesn’t buckle along the edge where it meets another surface; it buckles right in the center of the room! Run length limitations vary based on material type (e.g., rigid SPC core vs. Traditional engineered wood). Refer to the chart on the page for details. For longer runs, planned placement of transitions (typically thresholds or T-moldings) at doorways help break up the flooring.
More important for do-it-yourselfers: humidity is a bigger factor. Do you live where winter is dry and summer is wet? Your floor will expand and contract more then the floor of someone living in a stable, climate-controlled environment. By checking off “radiant heat” or “higher moisture risk,” the calculator will adjust the recommended gap amount accordingly. For example, radiant heated floors generates their own local expansion force, which traditional charts may not take into account. There’s no one-size-fits-all answer here. Thermal stress require extra space to allow for expansion.
Now you know what size gap you have. Now on to the trim. Here’s where engineering meets looks: most folks don’t realize how much baseboard they should of be covering. For example, maybe you want a half-inch gap but your baseboard only covers three-eighths of an inch. When the floor gets totally expanded, there will still be an exposed gap. In this case, you’ll either require a thicker molding or a shoe trim to really hide the movement area entirely. It is better to be safe than sorry, leave a little more coverage than you expected so you do not expose the gap when it expand later.
Another typical culprit is fixed objects. Whether it’s a structural column in a room, a bathtub in a bathroom, or an island in a kitchen, all of these fix to the floor in certain places. That means a floating floor need to float everywhere else too. It can’t be wedged (or nailed or glued) tightly to immovable fixtures. Just as you would with the walls, you need to give the floor some clearance around hearths, pipes, cabinet returns, etc., etc. This is where the tool comes into play to help you determine what those clearances should be without accidentally anchoring your floor so it can never move freely.
That’s planning for growth; not paranoia; because physics rules and wood moves. Composite stuff flexes with heat or cold. Let ‘em do it quietly and the floor will last. Constrain ‘em and they’ll fight back. Take your measurements, walk away from the room and let that material go where it was built to go. That simple margin of safety can be the difference between a flawless finish and an expensive repair job next season.