Engineered flooring order planner
Engineered Wood Flooring Calculator
Estimate cartons, board count, waste reserve, underlayment, adhesive coverage, transition allowance, project weight, and metric equivalents from real engineered wood flooring profiles.
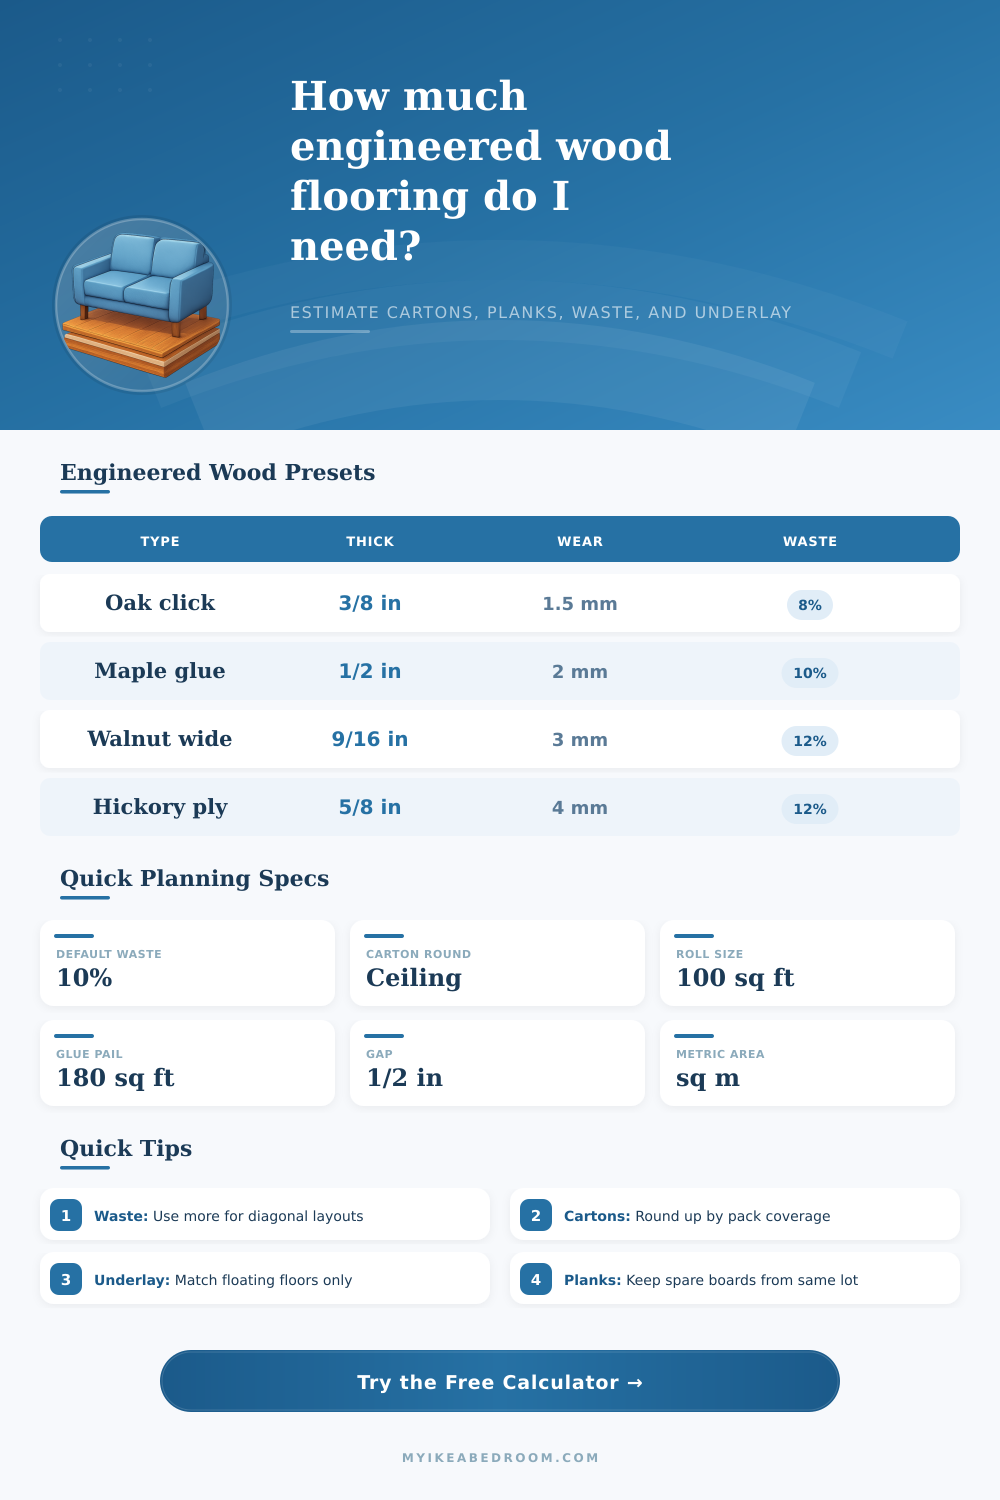
| Engineered profile | Typical thickness | Wear layer | Planning waste |
|---|---|---|---|
| Entry click oak or birch | 3/8 in / 9.5 mm | 1.2 to 1.5 mm | 8% to 10% for straight rooms |
| Standard oak, maple, or pine | 1/2 in / 12 mm | 2 to 3 mm | 10% to 12% with closets |
| Wide plank walnut | 9/16 in / 14 mm | 3 mm | 10% to 15% for color matching |
| Premium plywood core hickory | 5/8 in / 15 mm | 4 mm | 12% to 15% for multi-room work |
| Layout condition | Added reserve | Why it changes cartons | Best use |
|---|---|---|---|
| Straight run | 0% to 1% | Few angled cuts and simple starter rows | Square bedrooms and offices |
| Staggered with closets | 2% to 3% | More end cuts and doorway sorting | Bedrooms with wardrobes or closets |
| Diagonal install | 5% to 7% | Long angled cuts reduce reusable offcuts | Feature rooms and entries |
| Multi-room alignment | 4% to 6% | Boards must carry through openings cleanly | Suites, halls, and open plans |
| Supply item | Common coverage | Calculator rule | Notes |
|---|---|---|---|
| Engineered wood carton | 18 to 31 sq ft | Adjusted area divided by carton coverage | Always rounds up to whole cartons |
| Underlayment roll | 100 to 200 sq ft | Net area divided by roll coverage | Mainly for floating floors |
| Wood flooring adhesive | 140 to 220 sq ft | Net area divided by pail coverage | Used for glue-down and hybrid installs |
| Transition strip stock | 72 to 96 in pieces | Entered run divided by stock length | Estimate includes a small cutting reserve |
| Room example | Net area | Typical cartons | Planning note |
|---|---|---|---|
| 10 x 10 home office | 100 sq ft / 9.29 sq m | 5 to 6 cartons | Small rooms often need a little extra waste |
| 12 x 14 bedroom | 168 sq ft / 15.61 sq m | 8 to 10 cartons | Common floating engineered wood project |
| 15 x 20 living room | 300 sq ft / 27.87 sq m | 14 to 17 cartons | Check board color spread before starting |
| Hall and suite layout | 240 sq ft / 22.30 sq m | 11 to 14 cartons | Doorway alignment raises reserve |
Flooring isn’t a multiplication exercise. Don’t just grab your tape measure, measure the floor, multiply that by number of boxes, and call it good. This is what happens when you forget about reality while building things. That space in the middle are where projects go wrong. The disconnect between your drawing and real world.
The gap is filled by waste factors. Most people instinctively select ten percent, but it’s more complicated then that. Eight percent might be all you need for a straight run in a square bedroom, while installations on diagonals or any other complex angle could drives waste up to fifteen (or even higher). Instead of blindly basing your order on total square footage, the calculator takes into account complexity of your layout and adjusts the order quantity accordingly. Before buying, it require you to consider the room’s shape.
Why You Need to Calculate Flooring Carefully
Weight and profile thickness are also factors (but who puts them on their list till after the fact?) A 1/4 inch thick engineered wood is going to be lighter than same width of a thicker 1/2 inch board. Knowing expected weight will help you decide which rental truck to choose or whether you should of hire professional movers instead. That’s what the tool does: take into account those profiles and provide a realistic estimate of how much entire project weighs. Two-hundred or four-hundred pounds? Makes a big difference in terms of rental truck or hiring decision.
Another category of budget killers are ancillary supplies, which is dictated by the installation method. For example, floating floors call for underlayment rolls covering a certain square footage, while glue down jobs require pails of adhesive (each with its own coverage ratio). Hybrid approaches may combine the two, which makes it easy to overlook that your floor itself represent just one part of materials bill. This input is built into the calculator and lets you see all consumable at a glance, no surprise panic upon realizing half the room is already prepped, but you’re out of adhesive.
Transition pieces like reducers and T-moldings hides the expansion gaps that stop floors from buckling in summer heat, but people usually forget them until the end. Non-negotiable if you want pro results; they add $$, but you’ll thank me for it. Enter the linear footage of the break when using the tool to ensure you order enough matching trim in your chosen species/finish. An amateur-looking mismatch is embarrassing, plan early.
The takeaway: To avoid any issues with wood grain differences (subtle yet noticeable) among production batches, keep some leftover board from a single batch as insurance for future replacements. That way, if something cracks or cups after five years, you’ll be able to replace the plank(s) with one(s) from same batch, which should blend in just fine. The carton count rounding up in the calculator allows you to have this cushion (i.e., backup for your future self), but it won’t force you to order too much. I’d recommend keeping some additional cartons on hand for this reason.
For today’s home, engineered wood is a clever solution: It mimics appearance of hardwood while remaining stable during temperature and humidity changes. But be careful when ordering! Plan carefully to avoid mistakes, such as wasting material with complex layouts or facing higher costs from impractical package sizes. Know your math so that your measurements is more than just guesswork. Early calculations makes all the difference between a seamless installation versus an expensive (and embarrassing) do-it-yourself disaster. Do measure twice; but calculate wisely before you do.