Venetian Plaster Coverage Calculator
Estimate venetian plaster weight, pail count, primer, sealer, surface area, coats, burnish allowance, and touch-up reserve for polished, marmorino, travertino, and accent wall finishes.
🏠Real Venetian Plaster Presets
⚙Project Inputs
Your venetian plaster estimate
Full calculation breakdown
📊Finish Weight Reference
📋Venetian Plaster Coverage Table
| Finish type | Typical use | Base material rate | Common coat plan |
|---|---|---|---|
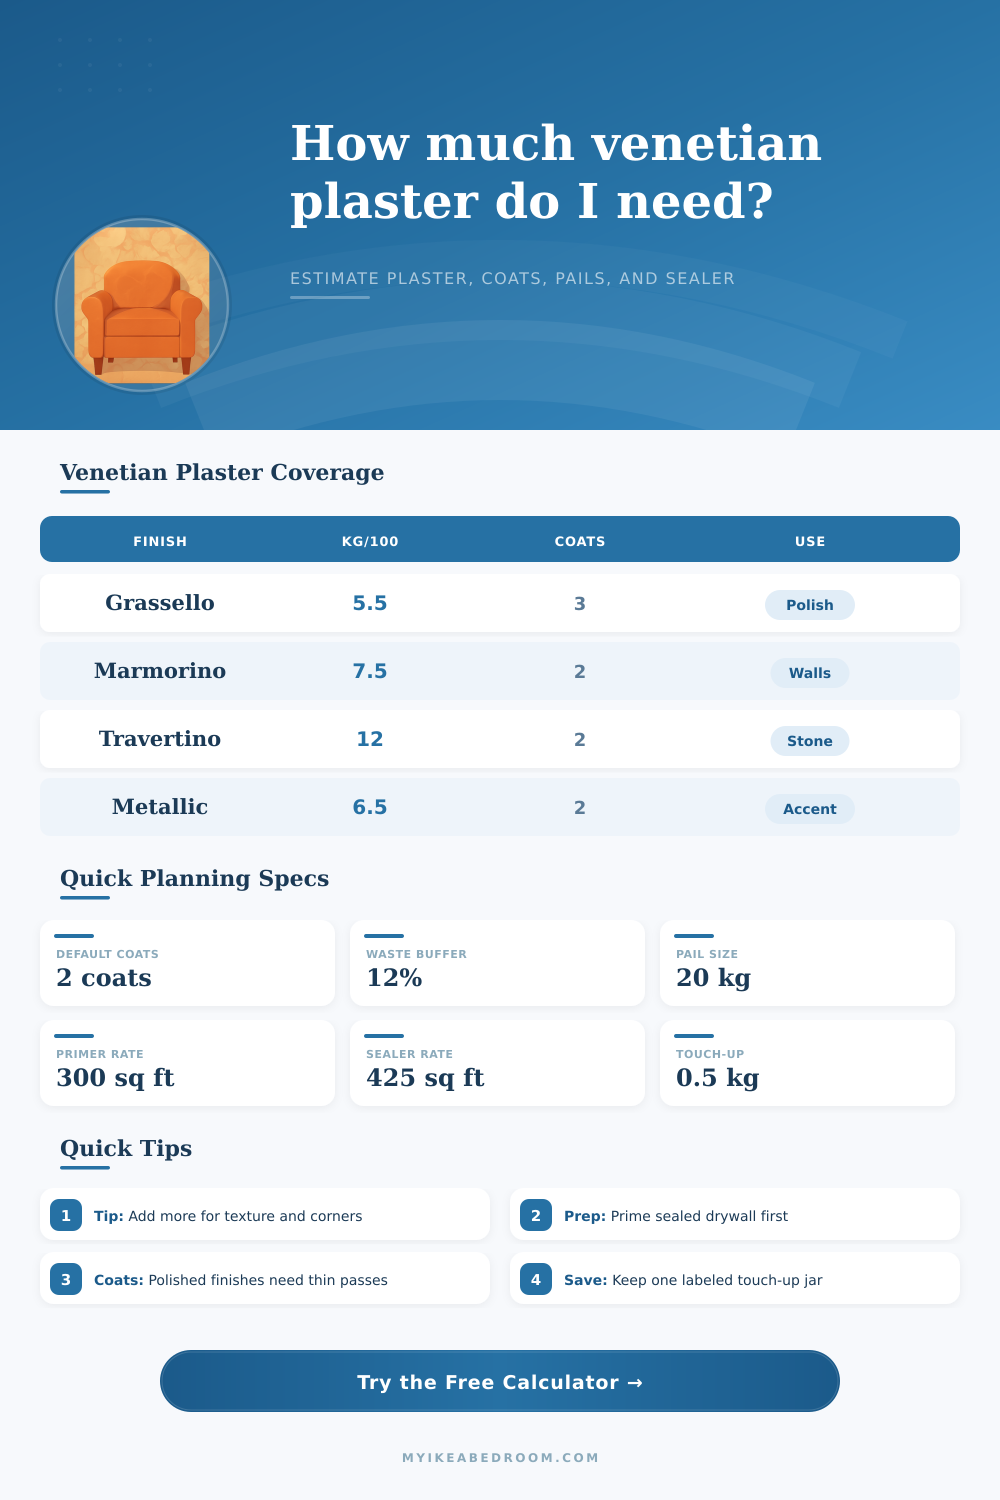
| Grassello polished lime | Glossy bedroom or feature wall | 5.5 kg per 100 sq ft per coat | 2 to 3 thin passes |
| Fine marmorino | Smooth classic venetian wall | 7.5 kg per 100 sq ft per coat | 2 finish passes |
| Medium marmorino | Subtle stone movement | 9 kg per 100 sq ft per coat | 2 to 3 passes |
| Travertino texture | Grooved stone fireplace or panel | 12 kg per 100 sq ft per coat | 2 heavy passes |
| Intonachino matte lime | Soft low-sheen wall finish | 8 kg per 100 sq ft per coat | 2 passes |
| Metallic venetian plaster | Decorative accent wall | 6.5 kg per 100 sq ft per coat | 2 thin coats |
| Tadelakt style finish | Bathroom or splash-prone wall | 9 kg per 100 sq ft per coat | 3 to 4 compacted passes |
| Concrete microcement look | Modern matte alcove or media wall | 10 kg per 100 sq ft per coat | 2 to 3 coats |
⚖Coat And Texture Adjustment Table
| Adjustment | Multiplier | When to use it | Coverage effect |
|---|---|---|---|
| Ultra thin glass polish | 0.90 | Very tight skim with little build | Uses less plaster per pass |
| Standard venetian trowel | 1.00 | Normal overlapping steel trowel work | Uses the base finish rate |
| Heavy movement and overlap | 1.12 | Cloudy movement and more edge work | Adds about 12% material |
| Textured stone drag | 1.28 | Marmorino or stone-effect ridges | Adds about 28% material |
| Deep travertine grooves | 1.40 | Dragged and opened limestone texture | Adds about 40% material |
🧱Pail, Primer, And Sealer Reference
| Planning item | Coverage or size | Metric equivalent | Use in calculator |
|---|---|---|---|
| 1 kg sample jar | Depends on finish and coats | 2.2 lb | Sample panels and tiny repairs |
| 5 kg small pail | About 55 to 90 sq ft at 2 coats | 11 lb | Feature panels and alcoves |
| 10 kg pail | About 110 to 180 sq ft at 2 coats | 22 lb | Accent walls and powder rooms |
| 20 kg pail | About 220 to 360 sq ft at 2 coats | 44 lb | Bedroom and living room walls |
| Quartz primer | 300 sq ft per gallon | 7.4 m² per liter | Improves grip on sealed walls |
| Wax or sealer | 425 sq ft per gallon | 10.4 m² per liter | Protects polished and wet-area work |
🏦Common Project Size Table
| Project | Typical area | Finish choice | Approx material at 2 coats |
|---|---|---|---|
| 12 ft by 8 ft bedroom feature wall | 96 sq ft | Grassello polished lime | 12 to 14 kg with buffer |
| 15 ft by 20 ft living room walls | 520 sq ft before openings | Fine marmorino | 80 to 95 kg with buffer |
| Small powder room, full walls | 185 sq ft after openings | Stucco lucido | 35 to 45 kg with buffer |
| Fireplace surround and chimney breast | 70 sq ft | Travertino texture | 20 to 26 kg with buffer |
| Media wall with niches | 140 sq ft | Metallic venetian plaster | 20 to 24 kg with buffer |
🔍Finish Comparison Grid
Grassello
Highest polish, thin coats, lower material weight, and more burnish sensitivity.
Marmorino
Balanced coverage for bedroom walls, soft stone movement, and reliable two-coat planning.
Travertino
Texture and dragged grooves increase plaster weight, especially around fireplace edges.
Tadelakt Style
Wet-area work uses extra compacted passes plus sealer, so the buffer should stay high.
💡Venetian Plaster Planning Tips
A tradesperson might of bought three bags of lime plaster to do a bedroom wall, but then realised they’d only used one bag after first coat and had never even opened the other two. Why? Because when doing Venetian finishes, volume estimation works different to normal paint calculations. Paint is pigment spread over surface. Lime plaster is built up in layers upon layers of tiny amount of material until it is finish itself: a new skin over your wall. This difference change how much you need to buy; it is no longer just about square footage, but about building things up layer by layer.
After establishing your desired look and size of space, the rest is handled by the calculator. No need to convert weights into areas. That part are left to the calculator. Begin with specifying real world area of the wall(s). That’s where most people ends their calculations. Length x Height = area done. But what about the built-in shelving? Mirrors? Windows? Doorways? None of these will be getting any lime whatsoever. You’ll want to deduct those from total.
How to Calculate Lime Plaster Needs
If you are plastering around the whole room, the tool need the percentage of walls that will get lime treatment. If you’re just tackling an accent wall or a fireplace surround, you can specify those exact measurements instead. Getting this right avoids having to buy extra-heavy bags you might never even break open.
The finishing option make a big difference in weight. Polished, light Grassello creates its own shine instead of needing to be thick to look bright. Because of this, you don’t have to use as much per square foot. Travertine, however, need lots of dragging with the trowel making grooves and stonework textures. This “pulling” of material away from itself take up volume, and so you’ll need considerably more product per swipe. The reference table on page explains the exact rates of weights, you’ll get a sense right there of how much more lime a textured fireplace will take versus a smooth bedroom wall.
Next, you compensate for the strength of the texture: Cloudy, overlapping strokes and super-heavy troweling will reduce your stockpile quicker then a tight, glass-smooth skim coat. There are other variables where intuition tend to fail: coat count. Two solid coats of product can give you a nice finish on a wall. However, you will typically need three or more thin coats to build enough thickness before polishing them to a deep mirror-like shine. If you go this route every extra coat increases the total work required. This multiplier is applied by the tool automaticly according to what you select.
You’ll also factor in waste. This includes not just wasted product (spilled), but trowel drag at corners, initial learning curve mistakes on first section, and the inevitable need to work over a patch that dried too quick or picked up the wax unevenly. For most projects, twelve percent is considered a good buffer, though wet rooms or complicated niches will require more.
The same goes for the plaster estimates: there are also primer and sealer calculations running parallel. Without the right kind of grip (a good quartz primer), you can’t burnish the lime over sealed paint or bare drywall. And if you’ve got a polished wall, it’s going to continue to be vulnerable to water marks and other stains unless you seal it with a layer of wax or sealer. Remember that invisible layers count too. The tool accounts for those by looking at how many square feet each gallon covers so you don’t run out of paint halfway through your last coat.
Last but not least: Think about the size of your pails. Once plaster is mixed it has a working time, and certain finishes do not hold up well if they are stored, especially if they sit open for weeks at a time. If you order only what’s needed, you may be opening new bags every time you fix a little patch somewhere down the road. A smart suggestion is to have a labelled touch-up jar filled from the last batch you mixed. This isn’t something any calculator can automate.
Calculate the right amount for the job and include a reasonable extra amount. This way, you won’t have to mix multiple batches and deal with color or texture mismatches in the future. It’s all about understanding material requirements based off layer counts, textures and thicknesses; so you begin planning rather than guessing. You’ll head to the store confident you know precisely what size pail you need for the job…and leave the rest behind.