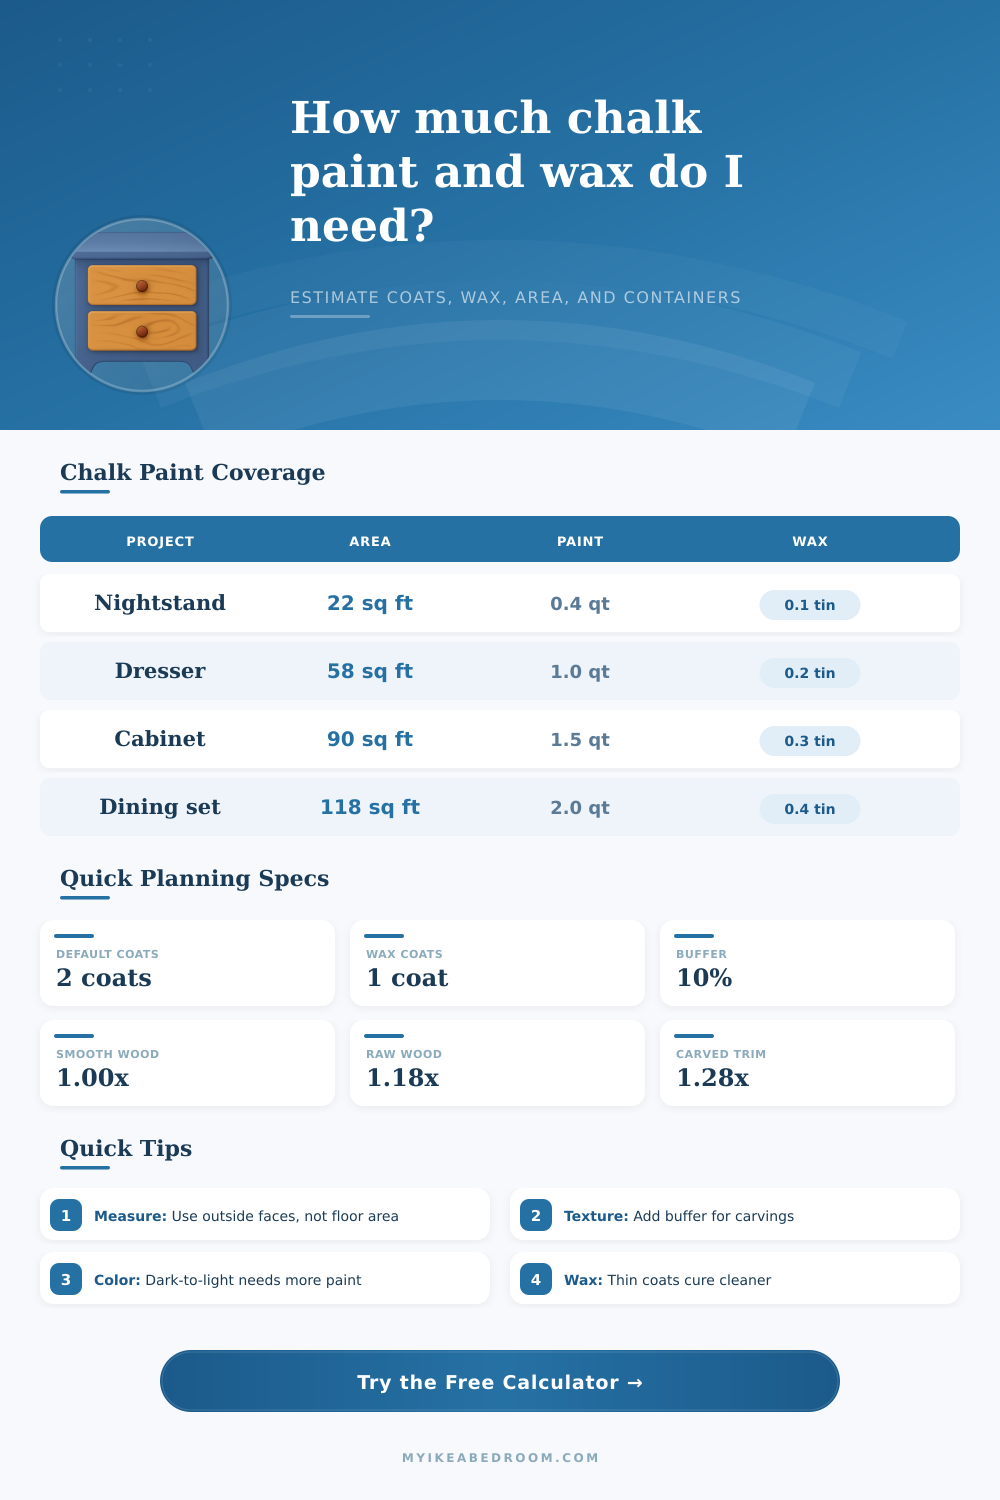
Chalk Paint Wax Coverage Calculator
Estimate paint, wax, coats, surface loss, and container counts for furniture, cabinets, doors, and room pieces.
| Chalk paint and wax preset | Paint coverage per container | Wax/topcoat coverage per container | Best calculator use |
|---|---|---|---|
| Annie Sloan Chalk Paint 1 L + Wax 500 ml | 140 sq ft per coat | About 490 sq ft per thin wax coat | Furniture and cabinets with classic wax finish |
| Rust-Oleum Chalked 30 oz + Topcoat | 110-150 sq ft per coat | About 150 sq ft per topcoat container | Smooth wood, metal, ceramic, and decor pieces |
| Dixie Belle Chalk Mineral 32 oz + Wax | 150 sq ft per coat | About 250 sq ft per thin wax coat | Dressers, vanities, and blended furniture |
| Jolie Paint Quart + Finishing Wax 500 ml | 150 sq ft per coat | 300-450 sq ft per thin wax coat | Large furniture with hand-waxed finish |
| Country Chic 32 oz + Natural Wax | 120 sq ft per coat | About 180 sq ft per thin wax coat | All-in-one furniture finishes and kids pieces |
| Behr Chalk Decorative Quart + Wax | About 150 sq ft per coat | About 150 sq ft per wax container | Tintable chalk-style furniture projects |
| Krylon Chalky Finish Quart + Wax | About 100 sq ft per coat | About 100 sq ft per wax container | Small furniture, frames, and decor accents |
| FolkArt Home Decor Chalk 8 oz + Wax | About 20 sq ft per coat | About 40 sq ft per wax container | Small decor, trays, boxes, and sample boards |
| Waverly Inspirations Chalk 8 oz + Wax | About 25 sq ft per coat | About 40 sq ft per wax container | Craft furniture and small accent pieces |
| Retique It Furniture Paint 32 oz + Topcoat | About 120 sq ft per coat | About 150 sq ft per topcoat container | Cabinet fronts and heavier-use furniture |
| Measurement method | Area model | Detail input effect | Use when |
|---|---|---|---|
| Flat panel or door face | Width x height x pieces | Adds 3% per detail item | Doors, drawer faces, headboards, shelves |
| Box furniture outside faces | Front, sides, top, and depth faces | Adds 2.5% per drawer or shelf | Dressers, nightstands, cabinets, toy boxes |
| Cabinet fronts and frames | Width x height with frame allowance | Adds 4% per door/drawer opening | Kitchen fronts, vanity fronts, wardrobes |
| Chair or spindle-heavy piece | Seat, back, legs, and rail allowance | Adds 6% per spindle or rail group | Dining chairs, stools, benches with turnings |
| Custom measured area | Direct sq ft or sq m entry | Applies as detail multiplier only | When you traced or measured every face |
| Surface or color condition | Coverage multiplier | Why it changes use | Planning note |
|---|---|---|---|
| Sealed or painted wood | 1.00x | Normal absorption | Good baseline for most furniture refreshes |
| Sanded smooth bare wood | 1.08x | Light absorption | Fine sanding still uses more first-coat paint |
| Raw pine or thirsty wood | 1.18x | Open grain pulls finish | Consider a slightly larger buffer |
| Clean laminate or veneer | 1.12x | Adhesion coat tends to be thin | Thin coats level better on slick surfaces |
| Carved trim or cane detail | 1.28x | Brush loss and small edges | Detail brushes hold more finish |
| Dark-to-light color shift | 1.22x | Extra hiding power needed | Three lighter coats may beat two heavy coats |
| Primed metal or glass insert | 1.15x | Thin bonding coats | Measure only the painted insert area |
| Common project | Typical adjusted area | Paint at 2 coats, 150 sq ft/qt | Wax at 1 coat, 350 sq ft/tin |
|---|---|---|---|
| Small nightstand | 20-28 sq ft | 0.3-0.4 qt | 0.1 tin |
| Six-drawer dresser | 52-70 sq ft | 0.7-1.0 qt | 0.2 tin |
| Dining table base | 38-55 sq ft | 0.5-0.8 qt | 0.2 tin |
| Four dining chairs | 95-130 sq ft | 1.3-1.8 qt | 0.3-0.4 tin |
| Cabinet fronts | 85-130 sq ft | 1.2-1.8 qt | 0.3-0.4 tin |
Have you ever stood in the middle of the paint aisle clutching two containers of chalk paint, one small, one large, and panicked because you’re not sure which (or how much) you’ll need to cover grandma’s oak dresser? Yes, I know there are images on social media where someone’s made an entire room happen with just a quart. But then reality sets in. We all know that knowing your wall space versus your surface area determine whether you have enough paint. By “just enough,” I mean you will have exactly enough to make it from start to finish on the second coat. So yeah, doing the math ahead of time are important.
When it comes to starting out, everyone guesses at footprint of the piece of furniture. “If it fits on the floor, it will fit in the paint.” That’s how most of these project fail. They don’t realize that a six-drawer dresser has more than just drawers on the front. It also have sides, top edges, and sometimes detailed moldings. All of these parts needs to be painted.
How to Calculate Paint and Wax Needed
Enter the calculator above that does all of that math for you. Simply put the outside dimensions into the calculator and tweak for interior details (lips of shelves, drawer fronts…etc). Because if you’re painting a dining chair full of spindles, you’re not painting a rectangle. You’re covering volume.
And then there’s the type of wood you’re painting. Porous wood like pine are thirstier and will soak up the first coat like a sponge. This means it takes more material to reach an opaque finish than a previously painted or sealed piece will. And the tool factors all that into its calculation, using extra amounts on unfinished or raw pieces. Then when we go from something dark like an espresso stain to a soft cream, that multiplier pops back up again since we want to hide some color and therefore has to deposit more pigment. It’s less of a matter of brand of paint and more a matter of wood porosity and the physics of how light is absorbed.
You might pay $100 for the most expensive tin of wax ever made but if you didn’t take into account the substrate and underbuied, you’ll be doing color patches rather than completing a piece. For wax, we apply coverage logic that’s different to paint. We figure that wax goes on in a very thin coat. This means a little bit of wax go a really long way. A small tin can covers an unexpectedly large surface. To avoid overspending on topcoat but skimping out on pigment, the calculator shows amount of wax and amount of paint separately.
One of the most frequent mistake people make with wax is slapping on globs of it to “protect” their finish. In truth this results in long cure times and hazing. Wax works best if used in thin coats; they last longer and cure cleaner. With the wax estimate, the tool assumes a typical thin layer, otherwise your material list would of be more hope than reality.
If you examine the numbers, take note of what percentage of the entire amount is the buffer. I know it’s tempting to whittle off that number so you can afford an extra dollar on the sales rack. Don’t! Brushes drip. Paint spills. You’ll move the piece of furniture into place, and one corner need a little bit of touch up. The additional ten percent, or even fifteen percent, is insurance. It is insurance for the fact that this is going to be a hands-on project. It covers those little mistakes no one notices except you, like when you are one ounce shy of a full can on that last coat.
If you’re loyal to one particular line, there’s also a breakdown of brands included with the reference data supplied with the tool. But it applies no matter who makes them. First count the number of outside faces, then the details (drawers, trim). Let the numbers do the talking when it comes time to grab quarts or liters off the shelf.
The lesson: Precision is the enemy of stress when it comes to DIY projects. Back to the aisle panic: What if you walked into the store with a piece of paper that listed everything that would fit in your cart? No more guessing! You will have just enough. You pay only for what’s needed and get that new dress for the dresser, uninterrupted.
Save your money for another project, while keeping your sanity intact. Planning is more than just preparation. It is the start of the change.