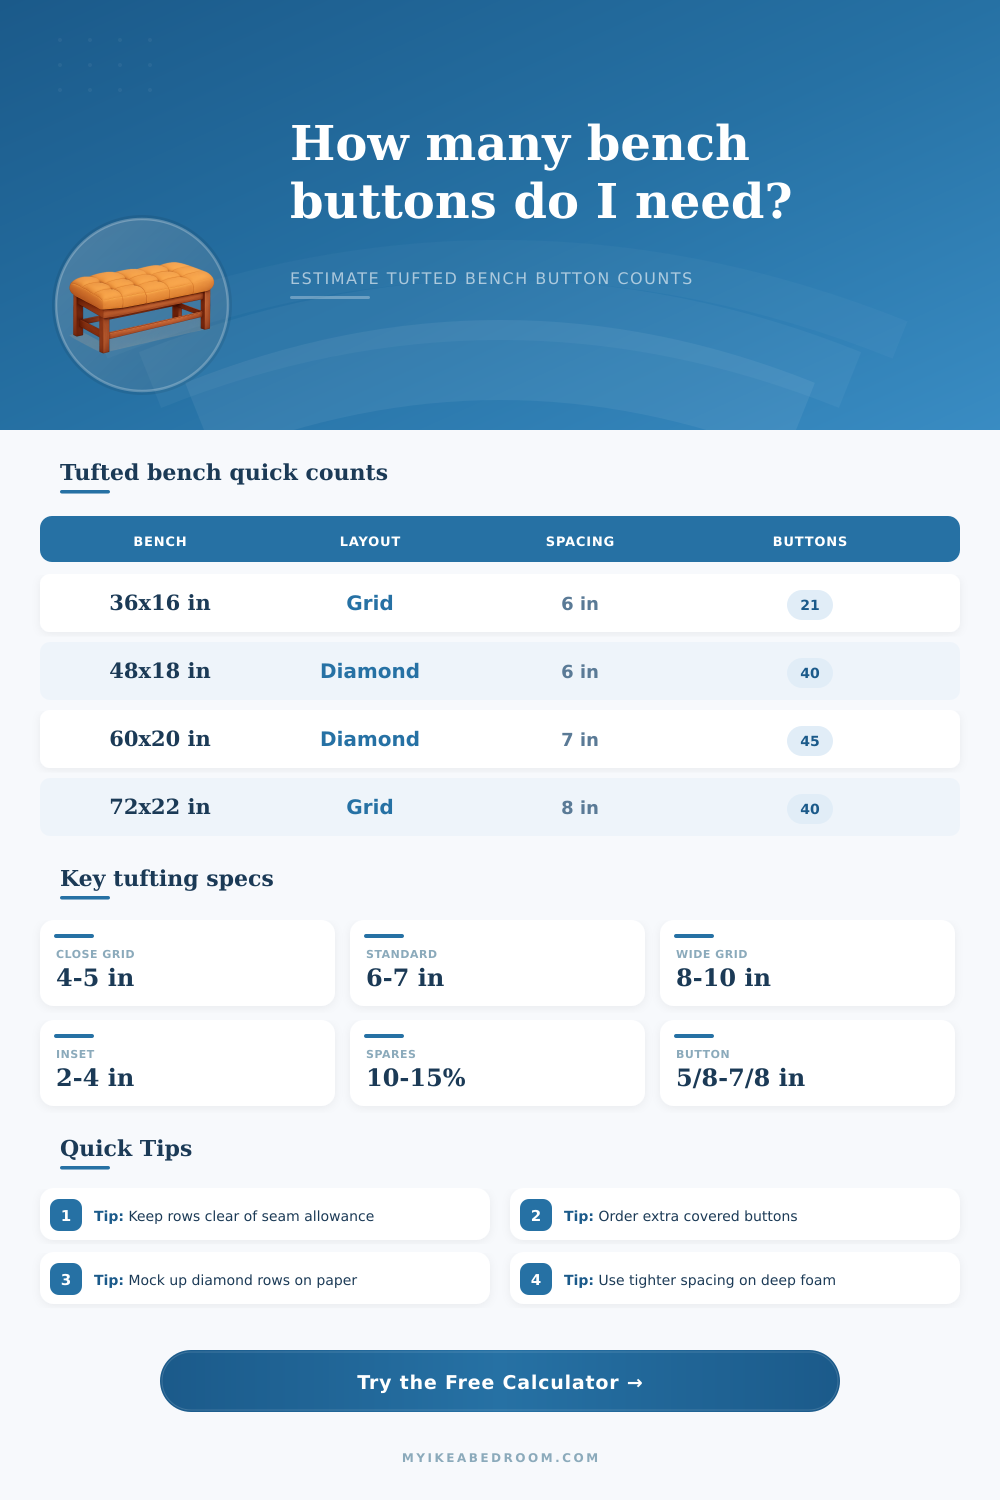
But what if you’re all set to make a tufted bench and don’t know how many buttons to order? Panic sets in. Too few and you can’t finish up, oh no, you’re missing an eye on your upholstery monster! Too many and you’ll waste leftover fabric. You’ve also wasted money on extra buttons that won’t be used, and you’ll end up feeling like a bad upholsterer.
How to get it right? It’s less a matter of advanced geometry then a respect for the physical limits of your particular bench. Once you know how much spacing you want between buttons and the size of your seat, the calculator do the rest. You do not need to guess with coefficients or conversion factors; you just try to picture rows on a hunk of foam.
How to Count Buttons for Your Tufted Bench
But there’s one key input: the inset. This is how far away the edge of your bench sits from your first button. If they are too close, you will lose buttons in the rounded corners. They might also fall into the seam allowance when you pull the tool across. What is best practice? Make sure there’s plenty of fabric tension (so no holes show) and leave some generous space.
From there, the tool calculates grid points by taking the total depth or length and subtracting the seam allowance and the inset. This way, it knows exactly how many buttons will land in actual fabric versus landing on the structural edge where they should go. The former equals messy. The latter equals pro.
The thing that alters the count in all of these is the pattern. A straight grid is the most intuitive, as each row matches the one above. It is also the easiest for the math, where button count equals the number of rows times the number of columns.
Staggered or diamond: These look better visually. There is an offset from row to row so the total count is different on each line. This requires you to alternate your rows to keep up with the shift. It is a little harder to plan, but it provides a visual wow factor. You can see the effect laid out using the reference table on the page, which demonstrates that as you increase the space between, the overall density decreases.
Typically tufting runs around 6-7″ apart at center to center, balancing the views to show off the pulls without feeling over-powered. If you do less than four inches, though, you’ll either be running into trouble trying to get the button covers to work or else you’re so crowded on the fabric that it looks strange.
Another gotcha is the introduction of side buttons. The addition of tufting gives depth and brings all elements together on the front face of the bench, but it requires additional buttons depending on how many rows you’ve added and how high your sides are. Will the pattern be wrapped? Or will it just be kept to the top surface? Sides add another whole group of faces and thus another large order altogether.
Consider going with fewer rows and keeping this in mind: Will the bench be free standing? Or will it be up against a wall? If no one’s going to see the back, don’t bother and save yourself some fabric.
Most estimates fall short on the allowance side. Because covered buttons are delicate, they will break while installing. They might slide down the button stem during installation or tear under the pull of a rough tool. You shouldn’t of the option of ordering a “just in case” few. It’s simply good insurance.
Ordering an extra 10-15% is a necessity for matching fabric orientation and directionality later if you need to replace a broken button. This becomes especially true with velvet, and other directional fabrics, as there isn’t always a random spare that fits lying around in the bin. That means you’ll need one that has the same nap as the original piece. This number is included in your total order, so you will have enough to finish without having to panic at the store.
Button placement is also important. It’s relative to how much foam you have and how big of a space it needs to occupy. Thick foam require larger buttons and wider spacing. Oversize buttons on thin cushioning look heavy and awkward. A button that is too big for its space looks out of place. Too little fabric to support it makes your little button look like it dissapears into a hole.
The tool will scale up or down based off button size to maintain those relationships. Ultimately, you’re creating a system that works together, hardware complementing soft goods instead of competing with them. So really, tufting is all about planning ahead and then being patient while you execute the plan. Measure twice, cut once. Don’t go by your gut feeling, the numbers are always right. A couple more minutes at the beginning saves you from having to rush out for supplies down the road. Use the tools to do the work for you and start off with the measuring. Make clean pulls and let the tool do the rest.
The finished product? The finished product is a bench that looks like it was planned that way, not improvised. Go easy on the cutting, leave plenty of margin and keep some spares handy so you can avoid the most common mistakes of upholstering yourself. It may be a little thing, but when you’ve got an entire row of buttons to make sure lines up perfectly, it makes a difference.