Display Cabinet Shelf Spacing Calculator
Plan shelf openings for collectibles, books, art glass, dishes, and mixed displays by checking usable cabinet height, glass thickness, pin-hole pitch, clearance, door rail loss, and object heights.
Start with a similar display case, then replace the dimensions with inside measurements from your cabinet.
Balanced display spacing
Enter your cabinet measurements to compare even shelf spacing with a layout that reserves room for taller pieces.
Placement note: Shelf pins should be checked after rounding.
Load note: Shelf load guidance updates after calculation.
| Display type | Typical height | Good opening | Spacing note |
|---|---|---|---|
| Small figures and miniatures | 4 to 6 in | 7 to 9 in | Low shelves work well when depth is shallow. |
| Hardcover books and albums | 9 to 12 in | 11 to 14 in | Leave extra room if books lean forward. |
| Dinner plates on stands | 10 to 13 in | 13 to 16 in | Check door rail and plate-stand angle. |
| Vases and trophies | 14 to 20 in | 17 to 24 in | Reserve one or two taller openings. |
| Gallery objects | Varies | Item plus 25% | Use fewer shelves for a calmer display. |
| Inside height | 3 shelves | 4 shelves | 5 shelves |
|---|---|---|---|
| 48 in cabinet | 11.8 in openings | 9.4 in openings | 7.8 in openings |
| 60 in cabinet | 14.8 in openings | 11.8 in openings | 9.8 in openings |
| 72 in cabinet | 17.8 in openings | 14.2 in openings | 11.8 in openings |
| 180 cm cabinet | 44 cm openings | 35 cm openings | 29 cm openings |
| Pin pitch | Best use | Rounding effect | Planning advice |
|---|---|---|---|
| 25 mm | Fine adjustment | Small changes | Good for compact collectibles. |
| 32 mm | Common cabinet holes | About 1.26 in steps | Round tall openings upward first. |
| 50 mm | Wide shelf pitch | About 2 in steps | Expect less exact even spacing. |
| No holes | Fixed shelf layout | Free placement | Mark positions after testing objects. |
Measure the usable height, not the outside height. Cabinet tops, bottom rails, lighting strips, hinges, shelf thickness, and door frames all reduce the real vertical space that objects can occupy.
Place tall openings first. Once vases, trophies, art glass, or oversized books have enough space, divide the remaining height into smaller openings and round those shelves to the nearest available pin holes.
Remember that display cabinet you built for your growing collection? You had such a vision! Except…when you go to put in the first glass shelf, you realize there’s a pin hole in your drill, and the vase you were going to display doesn’t actualy fit. It barely fits, so you have to twist your arm into weird angles to get it up onto the shelf. That’s one of those things about planning furnitures: The spacing between shelves seem intuitive, but then you measure it against something and it turns into this sort of precise puzzle of geometry.
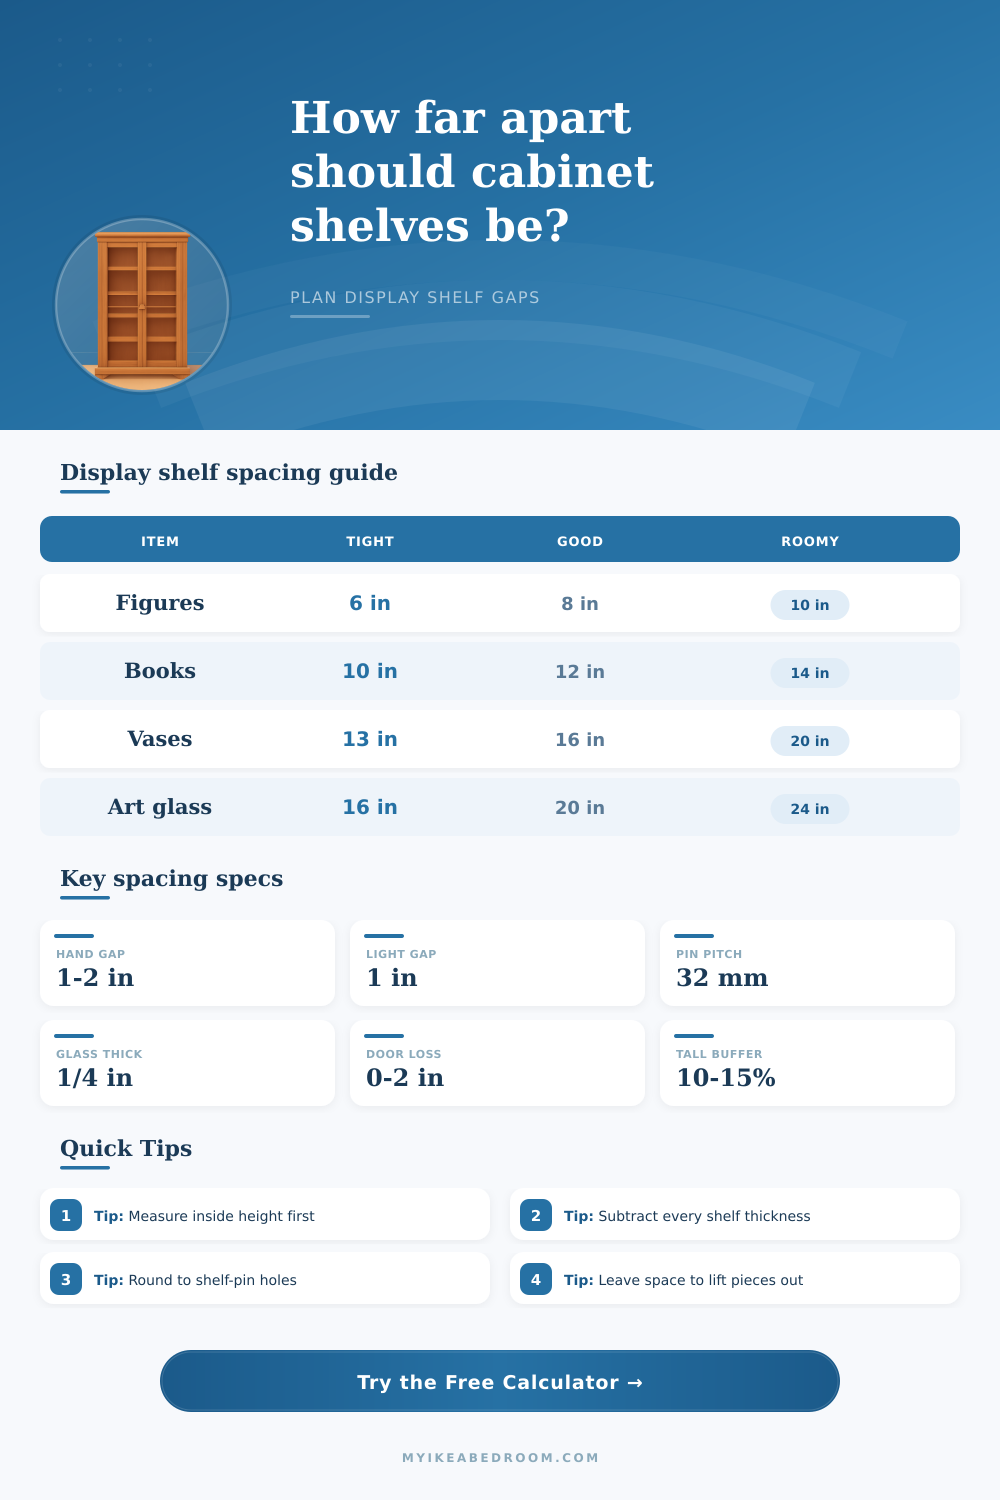
Most folks end up doing this: they measure the interior depth of their cabinet, divide it by how many shelves they desire, and call it good. Sounds reasonable. But they forget what happens when you put all those shelves in there. Each one take up space, even if you can’t see it with your ruler. Every shelf you tack on takes up another 1/4″ of glass (or whatever) that doesn’t register on your tape measure. Four shelves? You’re losing an entire inch of height from your storage area, just due to the shelf material alone. People make that error. It’s calculating for air. It is not for what fills that air.
How to Space Your Shelves Correctly
The calculator above plug in the numbers and figures out the rest for you. No need to worry about conversions and coefficients. But that doesn’t address pin holes. A common pitch for adjustable shelves are thirty-two millimeters (the distance between holes). Convert that into inches and you get about 1.26 inches of separation between holes. That is how far apart any given shelf could go. So if your protractor says to put a shelf right here but your shelving system has only these holes here, you’re outta luck. You’ve got to round off, or up, to one of them. And that rounding error adds up fast. If you’re trying to space out six same-size shelves evenly, a small rounding error mean things won’t be perfectly even. This will result in a gap at one end that is either too snug for a book to slip in or too loose to keep things standing upright.
Height isn’t everything. Clearance is important too. There should of be enough room to actually use what’s on the shelves. Even though a small gap (like one inch) between a tall vase and the shelf above may seem like plenty in theory, try lifting that vase straight up if it is resting on top of another object. Doesn’t sound so great now, does it? To get the item out without scratching the glass or chipping off any edges, you’ll want to angle it out and give yourself some kind of hand clearance. You will need at least an inch or two. And with heavy ceramics or other fragile antiques, err on the side of caution and give yourself even more room than you expect you’ll need. It is better to have a bit of extra space than to drop something precious. Don’t try to save a few extra inches for an empty shelf that never ends up getting filled anyway.
You should also consider visual balance. Some things just look nicer when there’s some variety in the space around them; other things looks best if everything is tightly uniform. With art glass, for example, which tends to be tall, you want one or two extra-generous openings so that each piece can breathe. You don’t want cramped, low shelves all around it… Too much visual noise. To help figure out whether you’re looking for an airy gallery look or a denser storage feel, the reference table on the page suggests good vs roomy spacings for different types of item.
Also consider the door rails. Glass doors with horizontal bars might limit where something could be stored on shelves. A rail across the middle of your cabinet means you cannot put anything above that point in the space behind it if you want to keep the shelf intact. It’s a not-so-obvious limitation that ruins many great designs. The inside height measurement do not account for this obstacle.
Finally, being thoughtful about planning means avoiding the need to drill additional holes in already-finished wood or buy new custom glass. Measure the height of your tallest item first. Then, subtract the thickness of each shelf and the space needed for the pin holes before you screw anything in place. Knowing that there’s a bit of breathing room around your most-loved items not only makes the cabinet look less cluttered but more curated. It looks more like a proper showcase than just a storage unit. Those extra inches you’ve allowed for beforehand can mean the difference between satisfied and frustrated.