Cornice Board Length Calculator
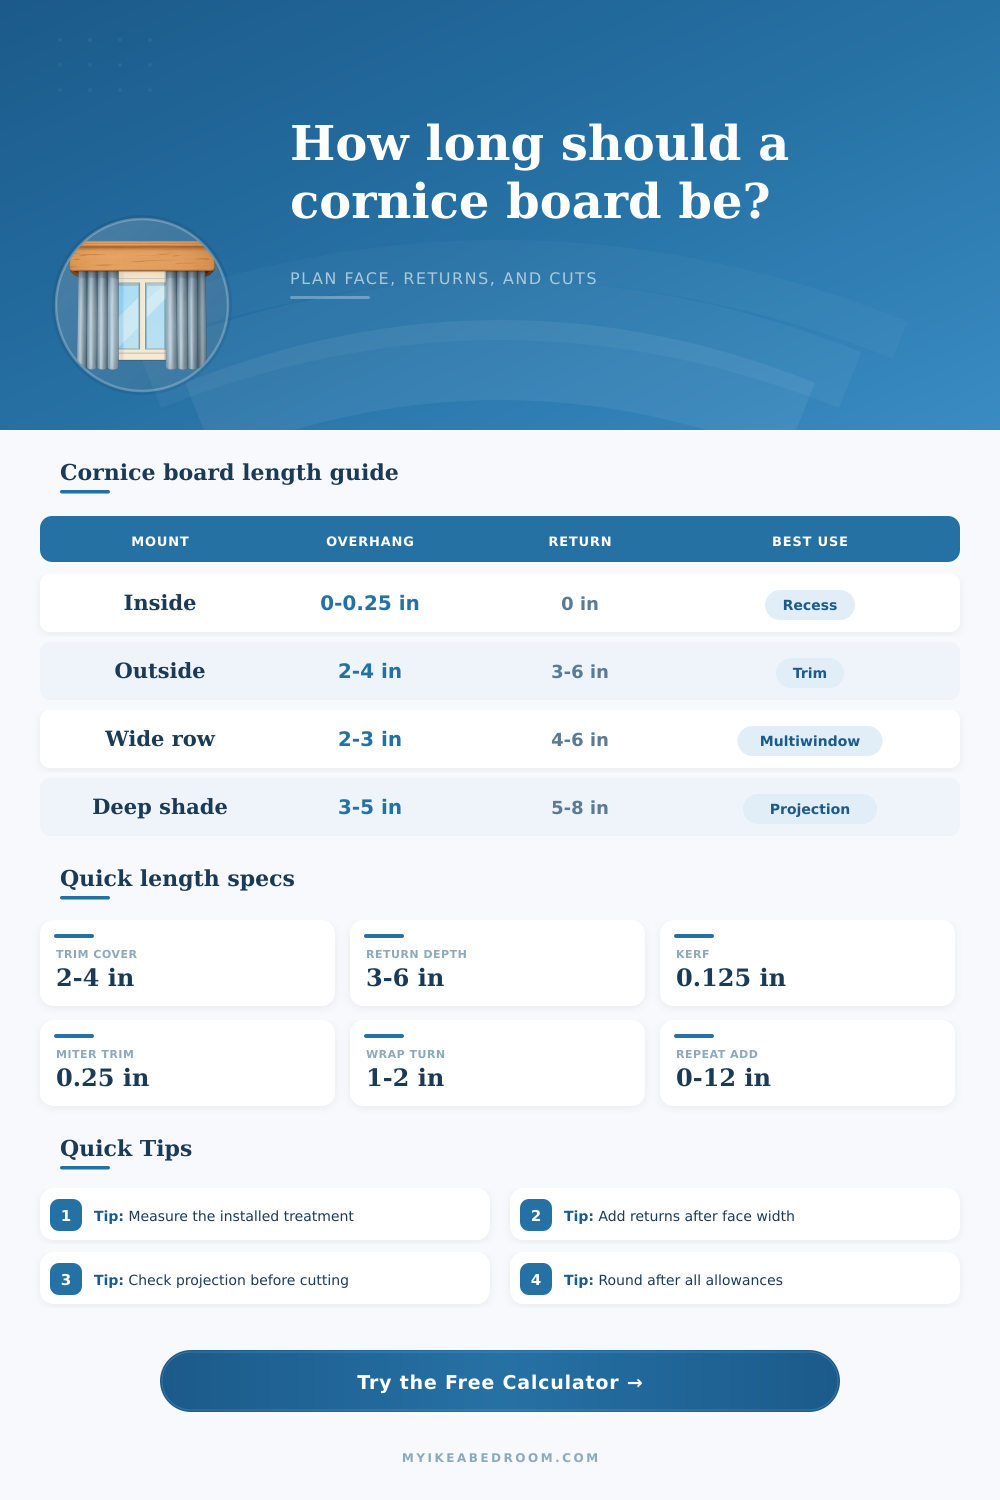
Calculate finished cornice face width, side returns, total board path, cut length, fabric wrap length, padding allowance, stock pieces, joins, and projection clearance for window cornice projects.
Choose a common window treatment layout, then adjust the exact opening, returns, fabric wrap, stock length, and cut allowances.
| Mount style | Face width basis | Return depth basis | Length note |
|---|---|---|---|
| Inside recess | Opening width minus clearance | No side returns | Cut the face to fit between jambs without rubbing. |
| Outside over trim | Opening plus casing plus reveal | Projection plus clearance | Face and returns hide brackets, rods, and side gaps. |
| Multi-window row | Combined treatment width | Return only at the outer ends | Section gaps affect the visible face and final board path. |
| Bay group | Panel total plus gaps | Short returns or end caps | Use this calculator as a flat cut list before angle fitting. |
| Deep shade | Shade width plus generous reveal | Shade projection plus 1 in | Confirm the return clears moving fabric or shade rolls. |
| Rounded board cut | Common stock | Likely pieces | Join placement idea |
|---|---|---|---|
| Up to 48 in | 48 or 60 in | 1 piece | No join needed unless using a separate face frame. |
| 49 to 72 in | 72 in | 1 piece | Leave offcut for return blocks or test cuts. |
| 73 to 96 in | 96 in | 1 piece | Add center support if the board is heavy. |
| 97 to 144 in | 72 or 96 in | 2 pieces | Hide the joint behind a bracket or fabric fold. |
| 145 to 192 in | 96 in | 2 to 3 pieces | Balance joints away from the visual center line. |
| Construction | Typical span behavior | Join behavior | Allowance focus |
|---|---|---|---|
| Plywood box cornice | Stable at moderate spans | Can splice at internal cleats | Kerf, miter cleanup, and support blocks. |
| Painted MDF cornice | Smooth but heavier | Fillable joint if supported | Weight, sag control, and end trim. |
| Upholstered cornice | Padding hides small joints | Hide seams under fabric folds | Wrap turnback, padding, and repeat. |
| Light rail or foam board | Easy to cut, less rigid | Use connectors or backing strips | Handling length and squareness. |
| Laminate or veneer face | Needs clean visible face | Pattern or grain match matters | Repeat allowance and clean end trimming. |
| Hardwood face frame | Strong but movement sensitive | Join at rails or stiles | Seasonal clearance and miter cleanup. |
| Scenario | Opening or treatment | Usual finished path | What changes the cut length |
|---|---|---|---|
| Small bedroom window | 34 to 48 in | Face plus two short returns | Casing width and side reveal drive the extra length. |
| Outside-mount blind | 36 to 60 in | Face plus projection returns | Bracket projection sets minimum return depth. |
| Double window row | 72 to 110 in | Long face with outer returns | Section gaps and stock joins can add material. |
| Sliding door treatment | 72 to 96 in | Long face with deeper returns | Layered curtains often need more projection clearance. |
| Upholstered fabric board | Any width | Board path plus wrap | Turnbacks, padding thickness, and pattern repeat add length. |
Measure what the cornice must cover. A rod, shade cassette, or stacked drapery may be wider than the window glass or frame.
Return depth is a clearance check. The return should clear projection, fabric thickness, brackets, and any moving treatment.
Plan joins before cutting stock. Keep seams near returns, brackets, or folds so they are easier to hide and support.
Round only at the end. Add face width, returns, kerf, trim loss, join overlap, padding, wrap, and repeat before rounding up.
And then there are the times when you’re all excited because this board is going to be perfect (it looked so good on the rack!) until you cut it up for seams and returns, and suddenly you has nothing but a useless scrap. It happens to everyone at some point or another. You see how wide your window is and don’t take anything off because you obviously have nothing to take off. You run home all happy with yourself, only to find out at the saw that a cornice board isn’t merely something that gets slapped flat against a gap in the wall. It’s a three dimensional piece of wood that requires space to turn the corner, space to breathe and well, space for mistakes.
Unlike many other types of trim, math is important. Every inch you underestimate is an inch you can never recover. The width of the face is what most DIYers consider. You can measure from jamb to jamb or add a couple inches extra for an outside mount. But they never think about the fact that the board also has depth. There must be some return on each side for a cornice. This covers mounting hardware and wraps around the window casing.
How to Measure Correctly for Cornice Boards
And if you don’t give yourself enough return… Say your return is just two inches deep and you want your curtains out three inches from the wall, then when the curtains close, the fabric will rub against the side of the box. This cause a bunch of problems: it creates wrinkles, drags the rod, and ruins those clean lines you’re going for.
This calculator does the math for you (so you don’t need to do it in your head holding a tape measure and a pencil). Just plug in your curtain projection and how much reveal you’d like, and it’ll tell you how long that side needs to be before you ever make your first cut.
And then, of course, there’s the whole issue of material waste, which is how most projects derail. Kerf is the term for what happens every single time your saw cuts through the wood, removing a little bit of material. Sounds like nothing. But if you’re cutting out several pieces for a bay or wide window, all those small fractions accumulate to create an ugly gap. And don’t forget about the trim loss on either side of the mitered corners. In reality, few cuts are perfectly 45 degrees; thicker materials like MDF and plywood make this even more true, requiring an extra quarter inch buffer on each end. Pessimistic? No. Realistic. When making a long cornice with two shorter pieces of stock to be joined, where do you get the necessary overlap for screwing/gluing? The tool takes those shop realities into account when calculating the overall cut length. It builds the allowances into the total, so the number it spits out can be bought for real use, not just in theory.
The stakes are higher still if you’re wrapping the box with fabric. Fabric is not like wood. It stretches and it moves. It requires more material to secure a good staple to the sides or back without going too tight and exposing the seams. Patterned fabric is another level: you have to match the repeat on either side of the joint. Fail to do so and you’ll find your stripes off by a few inches, or your plaid skewed. To avoid that, the calculator has fields for pattern repeat and for wrap turnback. These help you bring enough material to the fabric store to cover the box, the return, and the extra needed to stretch it taut. That turns a messy process into a specific list of what to buy.
Additionally, some woods demand more or less wiggle room than others; hardwoods move with humidity and require slightly different allowances in fitting different than say, rigid plywood. MDF is heavy. Unless it is supported every now and again over longer spans, it sag. This sometimes requires interior joins, which eats up even more of the overall length. A piece cut for a solid oak frame behaves differently than one cut for a lightweight foam cornice. This is where the reference guides on the page come in. They break down how each wood behave so you don’t get frustrated later by trying to force a fit that just doesn’t exist.
And ultimately: that’s what a cornice is; reconciling expectation with the real world. You supply the judgement; the tools tell you the numbers. Measure twice, cut once. Allow room in your board for everything… For your hands to work, for fabric to be draped over it, for hardware to be attached. Plan ahead for those losses, plan ahead for the turns. It will look made that way, not made up on the fly. And that makes all the difference. It is the difference between a project that holds together and one that comes undone at the seams.
You should of planned better. It’s more naturaly easy to succeed when you use the right tool. The morderne carpenter knows that pieces is hard to find. If you want to make it look good, you can absorbs all the errors if you have enough material. Every furnitures piece needs care. One could of avoided this. Finding a luxurius finish depend on your cuts. Most people recieve less than they expect. It’s harder then most think.