Curtain Finial Clearance Calculator
Check whether decorative curtain rod finials fit between the window, walls, corners, furniture, and return depth before you choose rod length or bracket locations.
Pick a window situation, then fine tune the window width, side space, finial size, stackback, bracket projection, curtain return, and safety gap.
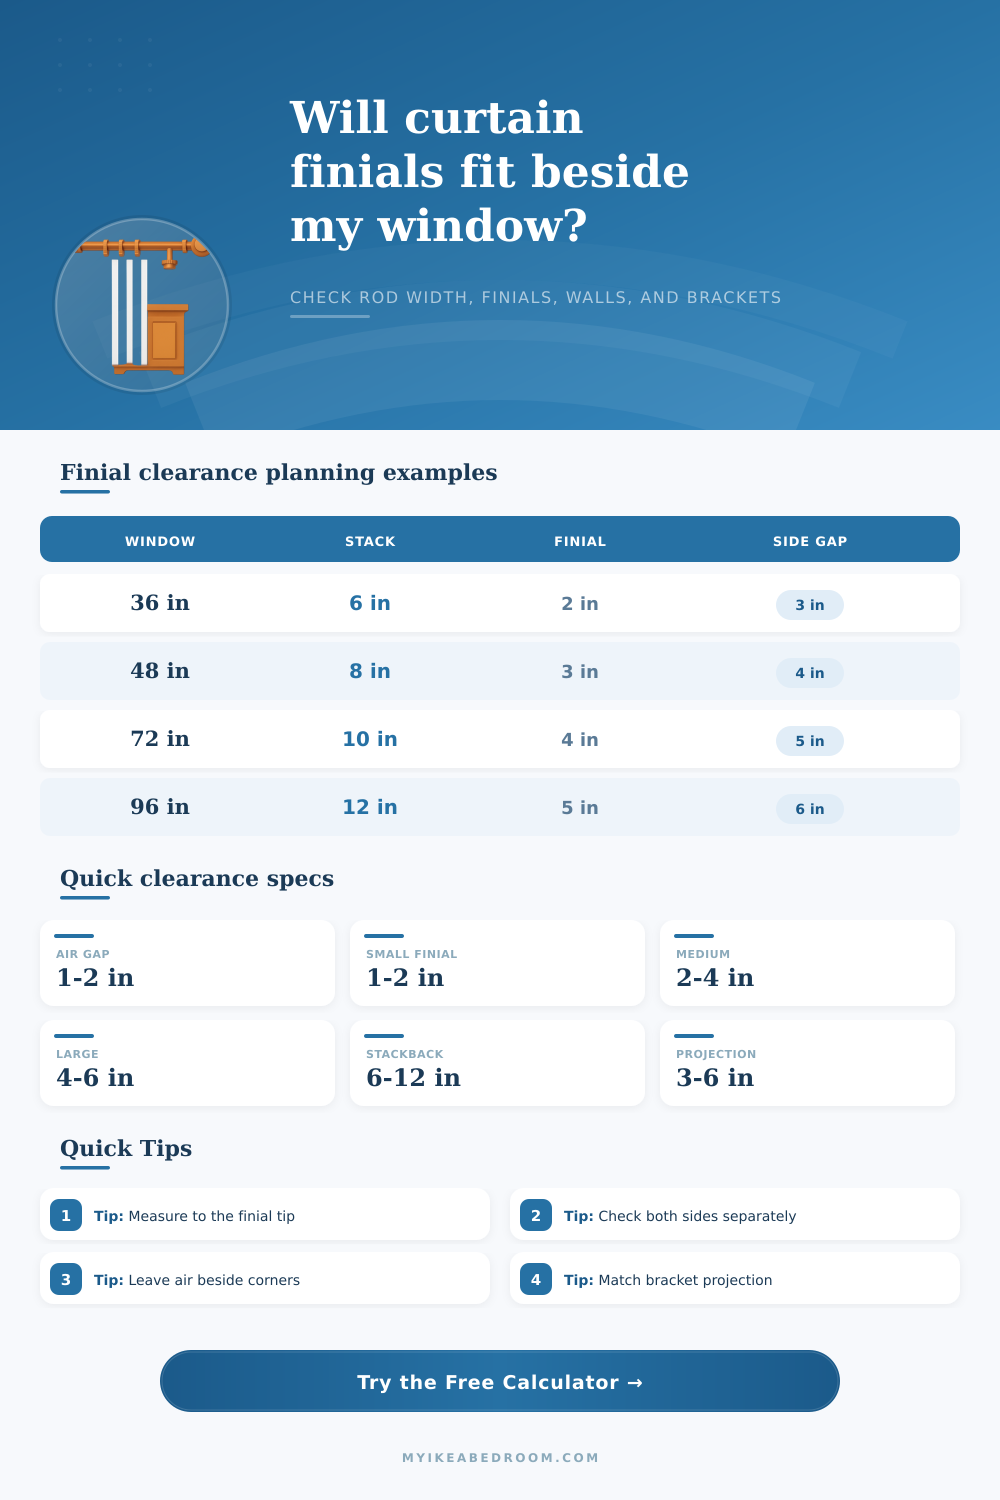
| Finial style | Typical length | Best side gap | Clearance note |
|---|---|---|---|
| Flat end cap | 0.75 to 1.5 in | 2 to 3 in | Best when a rod stops near a wall, corner, or cabinet. |
| Small ball | 1.5 to 2.5 in | 3 to 4 in | Works for compact windows with modest stackback. |
| Medium ball | 2.5 to 4 in | 4 to 6 in | Common size; check both sides before centering the rod. |
| Long cylinder | 3 to 5 in | 5 to 7 in | Needs straight side room because the visual end is longer. |
| Crystal finial | 3 to 5.5 in | 5 to 8 in | Leave extra air so facets do not look squeezed. |
| Statement finial | 5 to 7 in | 7 to 10 in | Often requires shorter stackback or smaller rod extension. |
| Window width | Light panels | Standard panels | Blackout or pleated panels |
|---|---|---|---|
| 24 to 36 in | 4 to 6 in each side | 5 to 7 in each side | 6 to 8 in each side |
| 37 to 54 in | 5 to 7 in each side | 7 to 9 in each side | 8 to 11 in each side |
| 55 to 72 in | 6 to 8 in each side | 8 to 10 in each side | 10 to 13 in each side |
| 73 to 96 in | 8 to 10 in each side | 10 to 12 in each side | 12 to 16 in each side |
| 97 in or wider | 10 to 12 in each side | 12 to 15 in each side | 15 to 20 in each side |
| Projection case | Common depth | Clearance impact | What to check |
|---|---|---|---|
| Single rod bracket | 3 to 4 in | Low to medium | Finial usually clears a flat wall if side width is enough. |
| Double rod bracket | 4.5 to 6.5 in | Medium | Check return walls and furniture because rod ends sit farther forward. |
| Wall niche return | 2 to 8 in | High | Deep returns can make a long finial visually collide with the side. |
| Wardrobe side panel | 12 to 24 in | High | Use the cabinet face as the obstruction and leave air at the tip. |
| Bay or angled wall | Variable | High | Measure at the rod projection depth, not only along the flat wall. |
Means: each finial tip still has the selected air gap.
Keep the rod centered and mark bracket centers from the rod ends after confirming stud or anchor locations.
Means: left and right side spaces are uneven.
Shorten stackback on the tight side or use a smaller finial only if the design can stay balanced.
Means: rod extension is workable, but the decorative tip consumes the spare space.
Switch to a cap, a smaller ball, or a rod where the end cap sits closer to the bracket.
Means: a return wall or furniture side is close at the bracket projection depth.
Reduce projection, move the bracket inward, or choose a shorter end treatment.
Measure side space from the trim edge to the obstruction. The calculator subtracts stackback, finial length, and air gap so you can see what actually remains.
Check clearance at the bracket projection depth. A corner or cabinet may look clear on the wall line but become tight where the rod sits forward.
The curtain rod you chose was brushed brass and it suit your style. It has nice heavy hardware with fancy finials on either end and the panel is hung up using those brackets. You stand back and admire your work only to realize that the one side are almost touching the wall. Although you fiddled around with the hardware you still feel the rod isn’t centered. Because it’s not centered, the crystal tip is squished together and just doesn’t look right.
That’s a common problem and why I think most people find it hard to calculate 3D aspect of window clearance. Measuring a window across is easy, but figuring out how far from the wall to hang a rod are not easy! This site has a great curtain calculator that will do the math for you. But knowing why it’s doing it that way help avoid frustration down the road. Here’s what you need to know:
How to Measure Curtain Rod Space Correctly
The key is something called stackback. What does it mean? When you pull your curtain back, think about whether the fabric bunches up into a thin line (like sheer curtains) or a thick roll (like heavy blackout curtains). You don’t want that cylinder to touch the wall, right? Or the glass. It needs some room. So most folks just take their measurements from the window frame plus a couple more inches. They forget the fact that there is actual volume of the curtain itself. The calculator takes this into consideration, it asks you to estimate the stackback, and then it reconfigures accordingly. Otherwise, without taking that measurement, you’ll end up with a rod that’s too long and won’t have anywhere to screw in the finial corectly.
Finally, consider this: Finials are not simply decorative knobs; they mark the ends of the structure. In other words, they create the visual stopping point for your window treatment. This means that it’s really important to consider size of the finial. A little ball finial will only extend maybe two inches in length; however, a big crystal piece could extends five or six inches. If you’re working with a limited amount of wall space between things like corners, built-in bookshelves, or trim, this make all the difference.
From the reference table, you’ll be able to easily see what each style requires in terms of side gap. For example, a long cylinder projects outwards and needs air space so it does not look squeezed. A flat end cap, however, sits flush against something. Another factor in the eventual appearance is bracket projection, which is usually 3 or 4 inches. That’s how far from the wall your rod will hang… Measured from the middle of the rod to the wall.
But what about a wardrobe that juts into the room, or a window niche with deep returns? That extra distance create issues. Now the rod hangs further away. This causes the end finial to project further into the room. It might then hit an angled wall like a bay window, or run into a cabinet. It can also appear too close to the wall. You’ll enter the return dimensions on the calculator, a reminder that forgetting how much depth your curtains take up can happen, until you’re jamming the hardware into position.
So first of all: What do you want to measure? During the planing stage, we’re talking about what? It is not necessarily width; we are talking about the sweet spot where beauty meets functionality. If the tool tells you that your configuration’s too snug on one end, you know your visual balance isn’t quite right. But hey, you can adjust for that with lighter fabric to decrease stackback or by selecting a slightly smaller finial. And there’s no correct solution, because it comes down to trading off elegance against space saving.
A tighter configuration saves wall real estate, but won’t be as grand looking. On the other hand, a broader spread makes the whole thing look more formal, but takes up more room. If you’re thinking about investing in new curtains, grab a tape measure before making any purchases. Take measurements from edge-to-edge at each end (to the nearest obstacle), and record how thick your desired curtain are when gathered. Input all these numbers into the calculator, and voila, you’ll know if the crystal-tipped brass rod is going to appear intentional or like an accident!
You don’t want it touching drywall (that’s why I said “space” for the finial clearance). Make sure you get this correct, and even DIY-ers can install with pride using just a power drill and a steady hand.