Ceiling Mount Curtain Track Length Calculator
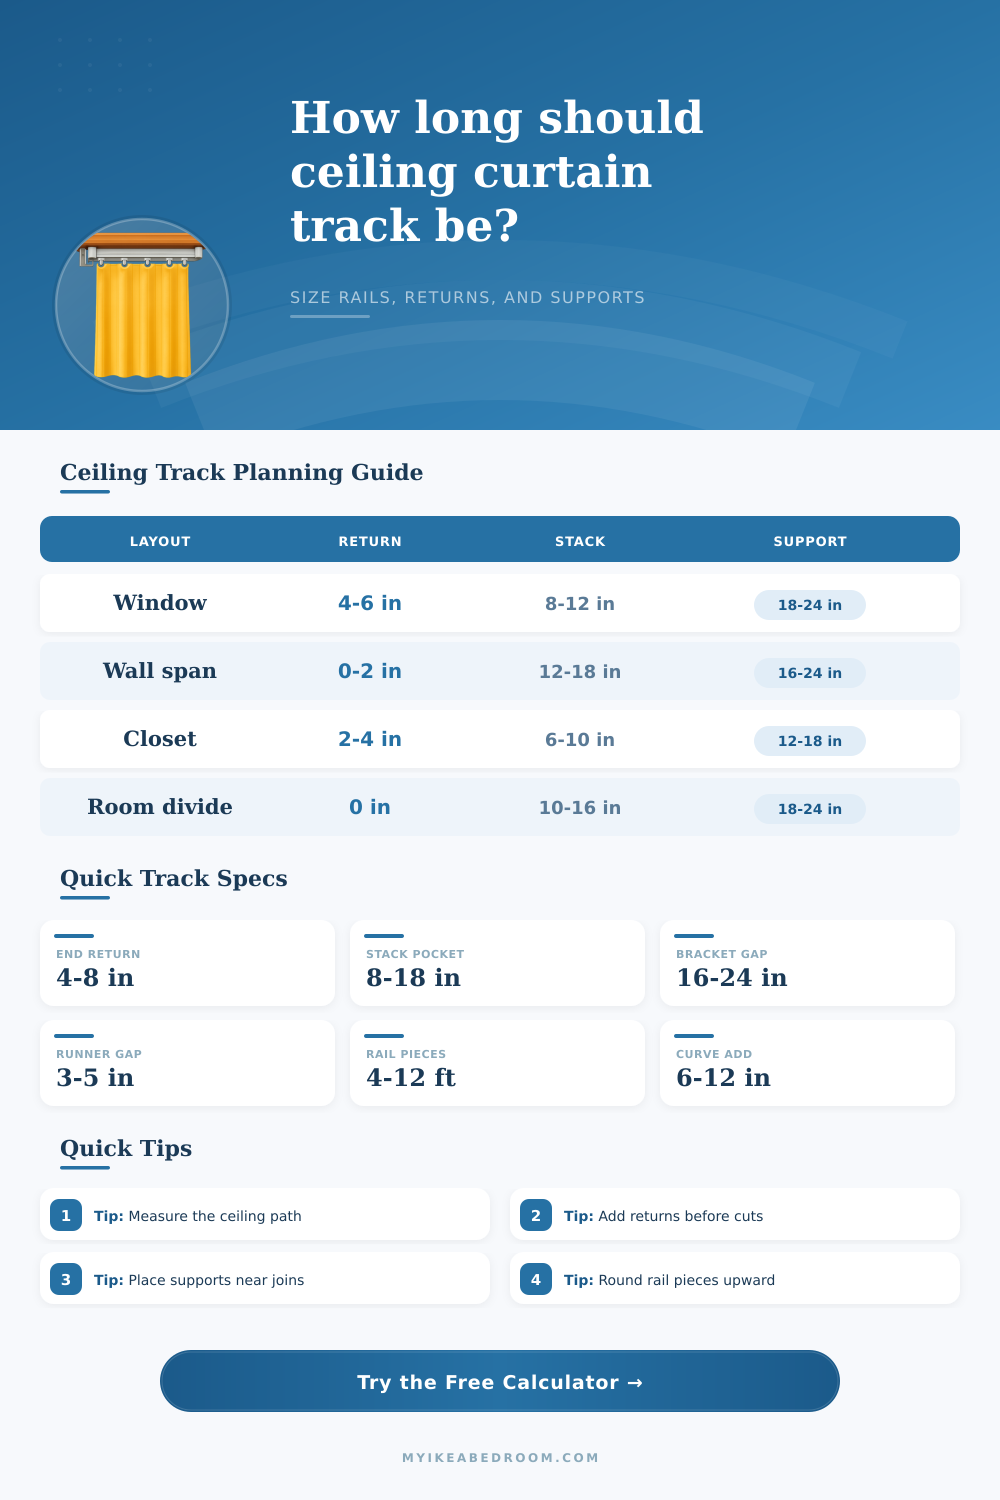
Plan the total rail path, stock track pieces, joins, supports, carriers, and cut length for straight, return, closet, bay, and room-divider layouts.
🪟Common ceiling track presets
📏Track path and hardware inputs
Ceiling Track Estimate
🧰Hardware summary from current inputs
The hardware summary updates after calculation and rounds counts upward so small shortages do not stop the installation.
📋Ceiling track planning reference
| Layout | Typical extra track | Support spacing | Planning note |
|---|---|---|---|
| Standard bedroom window | 8-18 in total stack plus 4-8 in returns | 18-24 in | Good for two panels that clear the glass. |
| Wall-to-wall curtain | 0-4 in return, stack inside total wall span | 16-24 in | Measure wall obstruction to obstruction. |
| Closet or wardrobe cover | 2-4 in each end, shallow stack pocket | 12-18 in | Use closer supports if doors or shelves are nearby. |
| Bay or angled window | Add measured arc or bend allowance | 12-18 in near bends | Put supports near each bend and connector. |
| Room divider | Stack pocket on parking side only | 18-24 in | One-way draw often needs a deeper stack area. |
🔧Carrier and support spacing guide
| Curtain or track load | Carrier spacing | Support spacing | Best use |
|---|---|---|---|
| Sheer or voile | 4-5 in | 22-24 in | Light panels with easy glide. |
| Standard bedroom drape | 3-4 in | 18-22 in | Balanced look for most curtains. |
| Blackout curtain | 3-4 in | 16-20 in | Closer ceiling supports reduce sag. |
| Ripple fold curtain | 2.4-3.2 in | 16-20 in | Consistent waves need regular carriers. |
| Privacy or curved track | 3-4 in | 12-18 in | Extra support near curves keeps the rail aligned. |
✂Stock rail cut planning table
| Stock length | Best for | Connectors per extra piece | Cut planning note |
|---|---|---|---|
| 48 in / 4 ft | Small closets, short returns | 1 connector | Easy to transport but creates more joins. |
| 72 in / 6 ft | Bedroom windows | 1 connector | A useful middle size for shallow stacks. |
| 96 in / 8 ft | Wide windows, room dividers | 1 connector | Fewer joins across long straight spans. |
| 118 in / 300 cm | Metric track systems | 1 connector | Often suits apartment wall spans with one cut. |
| 144 in / 12 ft | Full wall ceiling tracks | 1 connector | Long sections need careful transport and support. |
💡Ceiling track measuring tips
When most folks think about buying window treatments they simply take a measurement between frames then quit. However, the curtain rail is NOT on top of the glass. There are usualy returns. Other times, the rail must wrap around or turn a corner. If you purchase a track the same size as your window opening, the fabric stacks up in front of the glass. This let the light in and destroys the drape. Most DIY installs fail before they ever get to drilling holes because they didn’t allow enough room for stacking.
After you’ve entered the details of your path, the calculator (above) do the math. And it differentiates between physical distance and usable coverage. Remember: First think about the stack pocket. That’s the area on each side of the window where the fabric stacks up when closed. Eight to 10 inches is sufficient for a single panel. For two panels closing into one another (i.e., center-opening panels), that much space are needed on each side. More if you’re using heavyweight blackout fabric.
How to Measure Curtain Tracks Correctly
Then there are those two buffer areas, which include the opening plus a margin. When adding up the total track length, include the opening plus those two buffer zones. Otherwise, you’ll block view. And then there’s the return: Does your window sit flush with the wall, or is it recessed? In that case, the track mounts flat on plaster but turns a right angle into corner first. That eats away at length but doesn’t cover any more width. Measure the real-world route of the rail, not the gap between walls. This bend adds another allowance. Which the tool automatically calculates, and adds another length of track.
Same deal with figuring out how many standard-length sections to purchase. Tracks is generally available as four- or eight-footers. Each joint need both a connector and typically an additional bracket to support the ceiling. Knowing if you’re going to need three or two pieces has a big impact on what hardware goes onto your list.
Overhead rails live by gravitys rules. An aluminum rail might look rock-solid, but it will stretch and sag over time if there aren’t enough intermediate brackets to support weight of the carriers. That’s why this calculator asks how far apart you want them: It calculates from your desired interval and total length how many supports is necessary. For lightweight curtains, one every eighteen to twenty-four inches are standard practice. If you’re hanging heavyweight thermal blackout or other heavy velvets, get closer. These fabrics needs tighter spacing. This isn’t rocket science (well…), just a little structural know-how so nothing gets droopy or otherwise out of whack.
Length isn’t the only factor. Spacing of carriers also plays a role. Too many gliders will be wasted. However, if there are not enough, you’ll ruin the appearance of what could be a perfectly good rail. To get a nice drape, use a width that is double or sometimes triple the window size for standard fullness. Want more voluminous folds? Go for it. The tool figures out how many carriers should of been used given your preferred spacing and desired amount of fullness.
Tracks with ripple folds are especially finicky. To keep their smooth wave shape, carriers must be close together and spread out evenly. Space them out too far and they loses that ripple and become uneven bunches. It is a balance between aesthetic precision and material cost.
If you’re not prepared, cutting track will be a mess. Angled cuts aren’t squared off correctly, creating an amateur appearance. Burrs from the metal cut gets caught in carriers. If you don’t add some wiggle room when figuring out the length of track, it’s smart. Add five-percent waste buffer so that there’s extra scrap for test cuts and slight measurement error. Ideally, the end result is a little longer than intended, not shorter. Easy enough to trim down; headache to splice back together.
Where this thing works or falls apart is in the planning phase. Spend a little time using chalk lines to physically map out the route of ceiling before running any numbers. Mark off the stack zones and returns so you can get a feel for what it’s going to look like. Then poke around behind potential support points for joists so that you have something solid (wood) to nail into, not just a drywall anchor. The measurements is based off the math. The implementation depends on the conditions at your site. Get the route decided, put on the buffer and then let the track do the work.